Good Morning Springfield,
Springfield said:
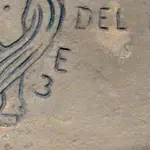
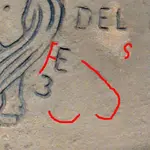
Mike, you are dead on target here. Anyone who ignores the less obvious marks on these stones does so at the risk of possibly discarding clues as important as any others on them. We all see the magician's hands but we seldom look behind his back. Always take the highest resolution photos you can - it's surprising what may appear. Anyone trying to decipher these things also needs to be working with the originals. The reproductions are great for the tourists to gawk at and wonder, but they will be missing the subtle nuances on the originals.
I don't think that's exactly true Springfield. A 10X Jewelers loop even on a reproduction, with different angles of light, will bring out things that might never be captured in a photograph of an original stone. The process used to make the reproductions, is capable of transferring details as small as the date on a dime. The surface of these stones is pretty rough to be looking for anything smaller than that. I believe there are around 30 sets of reproductions out there in private collections, (20 of them with painted surfaces, cast in the 1980's, and 10 of them that are stained, cast in 2002). Nobody that owns one of them has ever reported finding anything on the original stones, that could not be found on the reproductions. The only disadvantage I have ever observed in examining the reproductions is that. The ones that have been painted, have a "glossy" finish to them, that can interfere with the clarity of the smaller details.
I think if you were ever able to examine a reproduction beside an original stone. (With both under magnification). You would conclude, that they are far better than just something "for tourists to gawk at and wonder", and many times better than working with just photographs of the original stones.
To give you an idea of how delicate and accurate the process of making a reproduction of a stone map is…
First the stone has to be prepared with a releasing agent so the mold can be removed when completed. Then layers (almost the consistency of water) are applied one at a time, and allowed to dry for 24 hours before another coat can be applied.
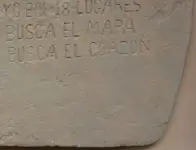
It takes about 30 coats to build up the latex enough to fill all the nooks, crannys and grooves to a level surface. The photo below shows how the stone looks after about 5 coats of latex have been applied. The white substance in the grooves is liquid latex that is not dry yet.
Then a layer of cheesecloth is applied to give the mold strength, and another 30 layers of latex is applied., each given the same 24 hour drying time.
By the time the mold is finished, you are looking at 2 months worth of time, just applying the latex.
Now the easy part is over and the hard part begins. Anyone that has worked with plaster is familiar with all the problems that can be experienced with fractures, that can occur from curing too fast, or too slow, or air bubbles in the plaster. For every stone that comes out perfectly, at least two have one kind of flaw or another in them, and have to be thrown away. The more you do it, the better you get, but “I” never got to the point where every plaster pour was good.
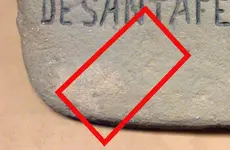
The end result comes out looking like this. With the exception of true color, they are absolutely identical to the originals, right down to the finest little scratches. (the reproductions in this photo are stained not painted).
This should give you a better understanding of how even the smallest textures and details, in the maps can be reproduced.
Jim


")