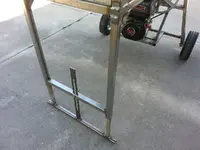
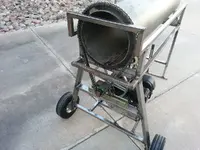
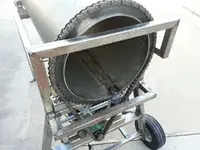
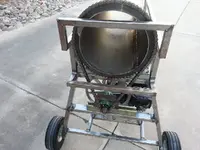
12 INCH TROMMEL BUILD

How are you planning on keeping the trommel drum from walking downhill with gravity? You might think about another 2" ring on the exterior of the drum, near the discharge end with one more skate wheel on the downhill side just to keep it from walking with gravity....

DoItLaynStyle,

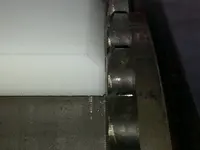
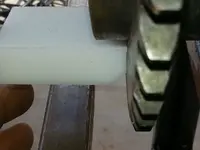
Here are the blocks I made up to keep the cylinder from walking. The blocks will be mounted on the bottom side of the trommel and ride against the sprocket on either side. Using this method allows me to eliminate an additional ring on the cylinder. I made up a few sets to have on hand if needed while out prospecting.


T59.jpg T60.jpg T61.jpg T62.jpg
 

DoItLaynStyle,

Here are the blocks I made up to keep the cylinder from walking. The blocks will be mounted on the bottom side of the trommel and ride against the sprocket on either side. Using this method allows me to eliminate an additional ring on the cylinder. I made up a few sets to have on hand if needed while out prospecting.
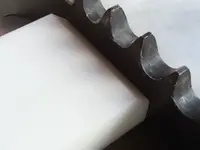
Very cool. Nice long surface to glide against. In a wet environment even a dirty one those blocks are going to last a long time. Are you making those adjustable or are you going to set them up and just check for wear and replace?
 

Very cool. Nice long surface to glide against. In a wet environment even a dirty one those blocks are going to last a long time. Are you making those adjustable or are you going to set them up and just check for wear and replace?

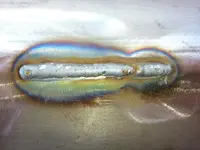
The plan is to make them adjustable. I need to see what kind of room I have. I started welding the seam on the cylinder. Welding the seam on the inside is going to be tricky to weld. Going to start in the middle and work out.
 

Got the cylinder welded inside and out. I welded the seam in 3" sections allowed the cylinder to cool but I still ended up with a cylinder that's no longer round. Not sure how I am going to get the cylinder round again. I welded the seam with the sprocket in placed but when I removed the sprocket the cylinder decided to go out of shape. As long as I can get the ends shaped back up I could care a less about the middle section. Just need the ends round where the cylinder rides on the wheels.

T65.jpg T64.jpg T63.jpg
 

Last edited:
Grind down the weld, find a metal shop that has a set of rollers and have it rolled until it comes back to round. Or just use a block and hammer and de-stress the seam it should return to mostly round. Another idea would be to have a couple more rings cut similar to your gear except thinner like 11ga and slide them over the outside and tack weld them on until you've ran enough rocks through to de-stress the material. Then you could remove the rings if you are worried about weight.
Edit final pic came through. I see you've already removed the weld

I will call the shop who rolled the metal for me to get them to roll it again. The outside welds are ground already. The inside welds will need to be ground.
 

Lay a bar or tubing along the weld of your cylinder. Bunch of ratchet straps around the bar & cylinder. Tightening the straps will push the bar into the cylinder while the straps will conform and hold to a circle the rest of the way around the cylinder.
 

Lay a bar or tubing along the weld of your cylinder. Bunch of ratchet straps around the bar & cylinder. Tightening the straps will push the bar into the cylinder while the straps will conform and hold to a circle the rest of the way around the cylinder.

Jcaz,

Its just easier to have the cylinder rolled and straighten out.
 

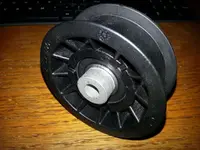
Surprisingly the sprocket end of the cylinder turns true once the sprocket and chain was installed. The tension on the chain is not tight or loose when I rotate the cylinder by hand. The last photo is the belt pulley I am going to use to adjust the tension on the belt to engage or disengage the rotation of the cylinder.

T70.jpg T71.jpg T72.jpg T75.jpg
 

Last edited:
Surprisingly the sprocket end of the cylinder turns true once the sprocket and chain was installed. The tension on the chain has not tight or loose when I rotate the cylinder by hand. The last photo is the belt pulley I am going to use to adjust the tension on the belt to engage or disengage the rotation of the cylinder.

<img src="http://www.treasurenet.com/forums/attachment.php?attachmentid=862881"/> <img src="http://www.treasurenet.com/forums/attachment.php?attachmentid=862882"/> <img src="http://www.treasurenet.com/forums/attachment.php?attachmentid=862883"/> <img src="http://www.treasurenet.com/forums/attachment.php?attachmentid=862884"/>

Nice! Leave that weld on the inside and put a ring on the far end and roll baby roll. Those rocks don't care if the cylinder is perfect....
 

On the adjustable leg, think about how much weight is being held by that one center bolt. Maybe get a special hardened bolt or at least carry spares in case you lose it or break it.

Build is looking really good overall :-D
 

On the adjustable leg, think about how much weight is being held by that one center bolt. Maybe get a special hardened bolt or at least carry spares in case you lose it or break it.

Build is looking really good overall :-D

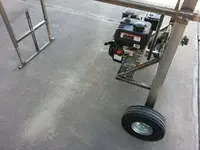
Kevin that's the least of my worries. Just checked the front as it stands right now has 53 pounds on the leg. That's going to go down once I start drilling holes and will go back up wants dirt, rock, sluice, and water is running through the trommel. The grade 8 bolt is plenty strong but most likely I will be using a quick release pin so I can make height adjustments on the fly if needed.

Nice! Leave that weld on the inside and put a ring on the far end and roll baby roll. Those rocks don't care if the cylinder is perfect....

Most likely I will. Really don't want to grind the weld as I want the added strength of the weld. The angle iron will hide the weld.
 

Last edited:
Started the trommel today and I am a little disappointed that at idle the trommel was rotating 34 RPM’s per minute, I suppose that Idle speed of the engine is over 1000 RPM’s. The Pulley, Sprocket, RPM calculator said I should have had 24 RPM’s based on engine RPM of 1000. I will test it at this speed but most likely I will go to a 14” or 16” pulley on the belt side of the drive. I really wanted the RPM’s to be around 20 RPM’s. I like the idea of that the engine is running at idle speed as it’s not very loud. In fact at top speed it’s not loud. Even at idle I could not stop the rotation of the trommel by hand so the trommel has plenty of torque and will not slow down. Still have some work to true up the cylinder before working on other parts of the trommel.

The discharge end of the trommel needs work in the cylinder to get the slight egg shape back to being round. I have not even welded the large sprocket to the cylinder. Update: I should have read the engine manual before today. Minimum RPM's is 1800. So this is why the cylinder RPM calculations were off.


Last edited:
Started the trommel today and I am a little disappointed that at idle the trommel was rotating 34 RPM’s per minute, I suppose that Idle speed of the engine is over 1000 RPM’s. The Pulley, Sprocket, RPM calculator said I should have had 24 RPM’s based on engine RPM of 1000. I will test it at this speed but most likely I will go to a 14” or 16” pulley on the belt side of the drive. I really wanted the RPM’s to be around 20 RPM’s. I like the idea of that the engine is running at idle speed as it’s not very loud. In fact at top speed it’s not loud. Even at idle I could not stop the rotation of the trommel by hand so the trommel has plenty of torque and will not slow down. Still have some work to true up the cylinder before working on other parts of the trommel.

The discharge end of the trommel needs work in the cylinder to get the slight egg shape back to being round. I have not even welded the large sprocket to the cylinder.

YouTube Link: https://www.youtube.com/watch?v=AOLwfn7LUCs&feature=youtu.be

Looks like you will only need a few stitch welds to attach that large sprocket. I bet you are itchin to put some pay dirt through that thing! Looking good man. Even though you made it compact and light it looks like you will need some thing like a four wheeler to haul it into some areas. Lol have you thought of a detachable hitch to go into your adjustable leg setup?
 

Oh and another question. Looking back at your build do you think you could have used a smaller engine? Less hp= less gas lol
 

Now u know why pro welder s are so well paid! Still, sounds like you are making great progress!
 

Now u know why pro welder s are so well paid! Still, sounds like you are making great progress!

My problem was the seam had an apex in it so welding compounded the problem. I should have taken the cylinder back and had the cylinder re-rolled before welding. I have been welding over 40 years and very skilled at Mig, Tig, Gas, and Arc welding. I have yet to weld the sprocket and I may still get a wild hair to take the cylinder back to the shop and have it put back in the rollers and trued up.
 

Last edited:
Oh and another question. Looking back at your build do you think you could have used a smaller engine? Less hp= less gas lol

I can't answered this question until we get the trommel loaded up with dirt and rock. I was amazed how quiet the engine from Harbor Freight is. The same engine on my buddy's Gen. has a larger cylinder style muffler and is much louder. On the second pull the engine fired right up. I ran the engine at a number of RPM's to break it in. Will change the oil a few times after running 30 min. to make sure to clean out any metal shaving left behind during assembly. For what I have read in Kart forums these engines will last if taken care of. At idle speed once broken in I will find out how many hours I get out of a tank of gas. The manual says 3 hrs. from 0.9 gallons at 50% throttle. To me that rather impressive.

Even though you made it compact and light it looks like you will need some thing like a four wheeler to haul it into some areas. Lol have you thought of a detachable hitch to go into your adjustable leg setup?

For now there is no plans to be towing the trommel as its not needed. If I grab the discharge end of the trommel and raise it up I can get it to a balance point its very easy to move around. If at some point I should need to tow it I would need a Quad and put much larger removable wheels.
 

Last edited:
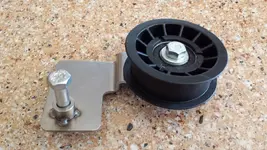
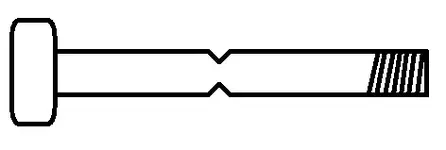
Was out digging around in my storage unit and found this bracket. It appears it will work to support the belt tension pulley. The bracket will be spring loaded but for added assurance I will be installing breakaway bolts in the event of a lock up of the trommel. The breakaway bolt will break causing the belt to slip. Will have extra bolts while out mining.

T78.jpg break.png
 

Top Member Reactions

Users who are viewing this thread

Back
Top