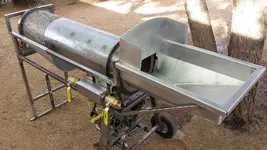
12 INCH TROMMEL BUILD

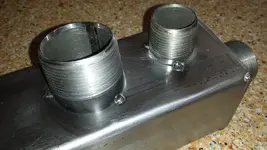
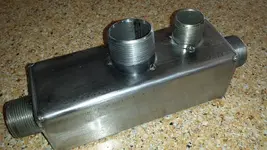
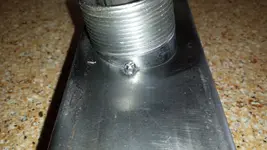
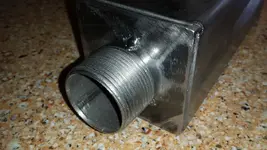
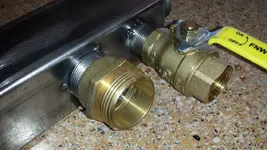
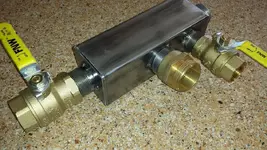
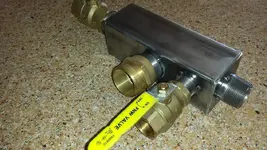
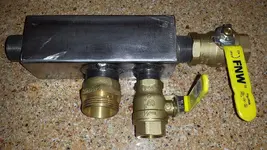
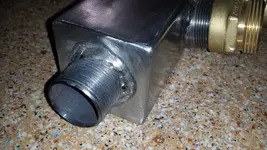
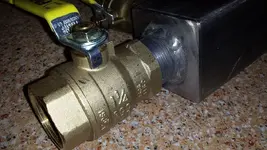
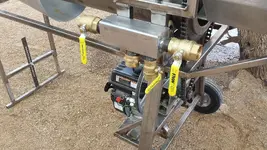
I thought I would finish up my water manifold today only to learn that my Argon bottle was empty. I was able to tack it together. This is much better that the PVC abortion thing I made. More compact and still will handle the water needs. The brass valves are a plus over the PVC valves. I am using 1.250" valves on either end as the inside of the ball valve is about 1.125" and these valves will be attached to 1" threaded pipe. The 1" valve may or may not be used for the sluice. It all depends on the water flow into the sluice from the trommel. Thr Gold Hog Mats need lots of water to run correctly.

T285.jpg T286.jpg T287.jpg T288.jpg
T289.jpg T290.jpg T291.jpg
 

Last edited:
I thought I would finish up my water manifold today only to learn that my Argon bottle was empty. I was able to tack it together. This is much better that the PVC abortion thing I made. More compact and still will handle the water needs. The brass valves are a plus over the PVC valves. I am using 1.250" valves on either end as the inside of the ball valve is about 1.125" and these valves will be attached to 1" threaded pipe. The 1" valve may or may not be used for the sluice. It all depends on the water flow into the sluice from the trommel. Thr Gold Hog Mats need lots of water to run correctly.

<img src="http://www.treasurenet.com/forums/attachment.php?attachmentid=973756"/> <img src="http://www.treasurenet.com/forums/attachment.php?attachmentid=973757"/> <img src="http://www.treasurenet.com/forums/attachment.php?attachmentid=973758"/> <img src="http://www.treasurenet.com/forums/attachment.php?attachmentid=973759"/>
<img src="http://www.treasurenet.com/forums/attachment.php?attachmentid=973760"/> <img src="http://www.treasurenet.com/forums/attachment.php?attachmentid=973761"/> <img src="http://www.treasurenet.com/forums/attachment.php?attachmentid=973762"/>

Much more better than PVC. Good job! where did you get the steel nips? :-)
 

Much more better than PVC. Good job! where did you get the steel nips? :-)

Hi Stan,

I threaded them and then cut each down to size using a 4" grinder with a cut off disc, then used a stationary belt sander to get each nipple flat or angled such as the main inlet.
 

Last edited:
Hi Stan,

I threaded them and then cut each down to size using a 4" grinder with a cut off disc, then used a stationary belt sander to get each nipple flat or angled such as the main inlet.

I have looked a little for weld on steel female pipe thread bosses without finding a source. Used to get some aluminum ones for racecar projects but that info is in storage in MO. ( You will have a very nice piece of equipment when finished.
 

The ones I use at work are called weld-o-let. You cut a hole and these line right up. I couldn't find the size I needed so I used a 3/4 cap and cut it off with a1/16th grinding disc and welded that on. Grainger for all your industrial needs lol.
 

I have looked a little for weld on steel female pipe thread bosses without finding a source. Used to get some aluminum ones for racecar projects but that info is in storage in MO. ( You will have a very nice piece of equipment when finished.

Stan try Ferguson Plumbing Supply in the Phx. area. They will have what your looking for. My buddy runs the Tucson division of Ferguson but is in the Phx. stores nearly everyday as well. The females that your searching of are used to punch into steel pipe. FERGUSON You will need to call and find out which branch has them.
 

The water manifold is completed. Now I need to locate another 1-1/4" FNW valve. This is going to be difficult as it was discontinued at the first of the year due to the lead content. Going to check eBay. Reason I want this valve is the ID opening is bigger than all other ball valves. My buddy who runs Ferguson Plumbing Supply told me that his stock was all pulled and replace with the green handle FNW brass ball valves that have lower lead content.

T292.jpg T293.jpg T294.jpg
 

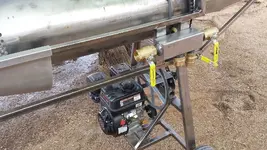
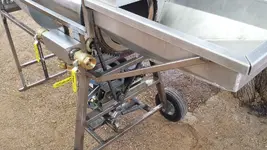
A few updated photos of the water manifold mounted and where the project is currently at as of today. This project was to be a short build and has dragged on for nearly one year. With my brother battling throat cancer, myself having shoulder replacement surgery, and now going in for a revision of my left knee due to breaking my kneecap on my replaced knee joint it has not been a very good last 8 months.

After my knee surgery the trommel will be taken up to Justbent's shop to finish up the hopper then off to paint followed by plumbing.

Thanks Lanny for the kind words. It helps to get me jump started again.

T295.jpg T296.jpg T297.jpg T298.jpg
 

Last edited:
Your header looks so nice! I'm very impressed with your skills. You will be able to pound dirt through that thing for years to come. I can't wait to see a test video. Mine will have the sluice mounted under it tomorrow and will be going out for final testing on Sunday. After my late start I never would have figured I would be done before you, but without your inspiration I never would have started this project. My hat is off to you. I hope your knee surgery goes well and I wish you a speedy recovery. Hopefully you will be able to see the gold again soon.
 

Your header looks so nice! I'm very impressed with your skills. You will be able to pound dirt through that thing for years to come. I can't wait to see a test video. Mine will have the sluice mounted under it tomorrow and will be going out for final testing on Sunday. After my late start I never would have figured I would be done before you, but without your inspiration I never would have started this project. My hat is off to you. I hope your knee surgery goes well and I wish you a speedy recovery. Hopefully you will be able to see the gold again soon.

Layn, the plan is for a speedy recovery and never in my wildest dreams did I ever think I would still be building this trommel. The plan was to use the trommel during last winter. Kinda lost interest for a good 4 months with my brothers situation then my shoulder and now my knee, but I am bound to get it done before May 11th.
 

Last edited:
AZ, your trommel is looking wicked good. This old machinist is really impressed.
 

AZ, your trommel is looking wicked good. This old machinist is really impressed.

TR is been a long haul getting this trommel where its at today. Right from the beginning I had issues with the cylinder not being round, still have issues but there is no turning back now as I am not about to re-drill 1434 holes. Although it had entered into my head. I am a perfectionist and like things done correctly but I had to bite my lip and just move forward. If I could have located a 12" thin wall pipe I would not have had the cylinder rolled. I had made it perfectly clear to the shop that the cylinder needed to be round and yet the guy in charge turned over this job to a greenhorn who had no clue how to run the roller. At the end if the trommel does what I hope it does I will not notice the wobble of the cylinder as it makes its 25 revolutions per minute.

Thx. for stopping by and having a look. Hope to be running dirt soon. :thumbsup:
 

Keith,
Looking good. No spray bars and now a diffuser. I know you're taking your time on this. I've been taking my time on putting my spray bars together for the hopper. Finally got all the parts to do it. But just can't seem to find the energy and time to finish it. Plus I'm sitting on the dirt from a spot I wanted to test for Jeff. I know he's waiting for the result and I feel bad because I'm letting my pain dictate my actions. So unlike me. I really need to get re-motivated, but I do have to pay the bills. Ughhh.
Hope all is well with you and your brother keeps improving.
How was LH and your drywashing/vacuuming up there?
 

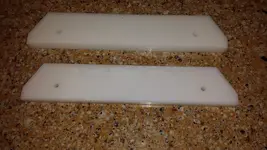
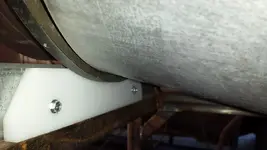
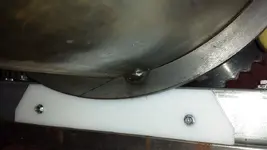
Some of the finishing touches of the build was to keep the cylinder from walking due to being angled downward on the discharge end. Made up a half dozen bushing that are mounted to the Unistrut that supports the four wheels that the cylinder rides on. The discharge end of the trommel this bushing will take a beating so will need to be changed as it wears. Both ends have a wide surface to wear on so it will take some time to wear out as the cylinder is rotating about 24 RPM's. Two self tapping screws to remove the bushing and replace.

T300.jpg T301.jpg T302.jpg
 

Keith,

Hope all is well with you and your brother keeps improving.
How was LH and your drywashing/vacuuming up there?

Never took it out of the truck. My brother did not feel up to going out and I was there to visit him so spent the weekend with him. He will be at the Mayo Clinic on Thursday and will be down for my surgery on Friday. He's doing good and we just got to see how each passing month goes. Has his good and bad days as it takes a long time for the chemo to leave the body. I too have lost interest but I am back and ready to get the trommel finished.
 

Top Member Reactions

Users who are viewing this thread

Back
Top