pulse valve mineral jig build... need valve seat design help

After some research I found out that when using a jig to do the primary reduction a 16:1 is a very good ratio. That's what an IHC tapered jig, used in a round configuration gets. They run the cons into a second and 3rd jig to get to an eventual reduction of about 4,000:1. So, considering I only had 1 1/4" of shot, and no sand bed above the shot, and didn't do any tweaking of the water flow, maybe that 6.5:1 isn't that bad.
Jim

Id say that 6.5 to 1 for a jig that is set up for gems with 1 1/4"steel ragging with no fine tuning running as a roughing jig on gold is Excellent!!
Look at this way 1 gal 231ci at 6.5= 15.015ci a us. cup is 14.4375ci

Bill
 

Many thanks, Bill. I guess it just seems low compared to other methods. The offsetting thing with jigs is they recover very fine gold fairly well. The answer for guys that use jigs for gold is to rerun the cons....maybe two or three times. I think, with some work, I could probably improve on that 6.5: 1, too.
But, I just posted that test while waiting on Ken's results. I don't want to hijack his thread on his pulse-valve unit.
Jim
 

Jim and Bill,
good info posts on reduction ratios etc.. Feel like i"m getting smarter by the day.. You guys post what ever suits you,, wont hear me complain, thats for sure..

Pulse valve test update-
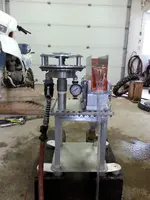
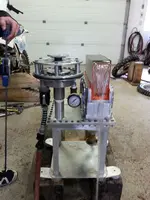
- Hard pluming the stand pipe, i only had 1 collar to work with, so i started at the lowest position the valve can go.
- i extended the screen box height to simulate the same water level. from input to out flow. ( manometer test ) sort of.
-First test the screen box water level was 2 " higher than pulse valve water level.
- second test , i lowered the screen box out flow to the same water level as the pulse valve.
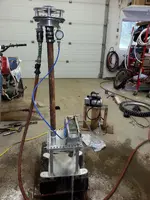
-third test , long stand pipe., 34 " water level difference.
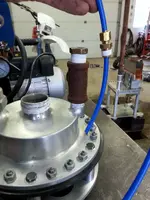
-Plumbed in a 1/4" hard plastic line (blue) to vacuum out air in pipe stand
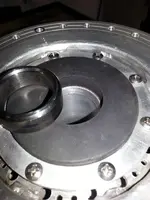
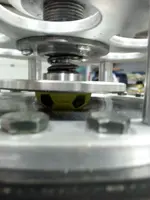
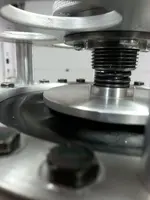
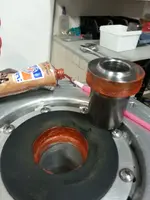
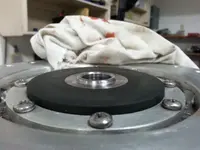
-fourth test, manufactured a steel ring seat, with a narrow curved top ,to focus on a small surface area to seal against the diaphragm gasket.
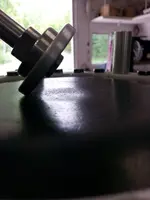
-fifth test, changed the 3.3/4" valve stem disk to the original smaller disk, 1.13/16"
-also tried slipping different "O" rings, rubber disks, and a half rubber ball , under the valve stem disks. . Also different compression springs.
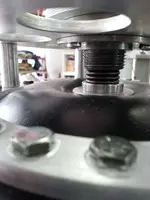
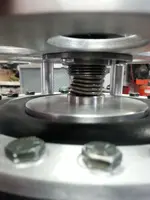
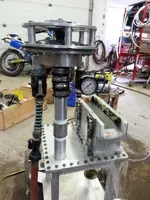
20160528_152309.jpg20160528_153641.jpg20160528_195236.jpg
 

Last edited:
I expected a certain amount of air trapped in the top area of the stand pipe, this would surely compress and take out the pulse power effect.
Letting the water supply run for two or three minutes, mostly ALL of the air had been displaced out through the screen box , even the 34 " stand pipe test. (wow)
I turned off the water supply, run the vacuum pump, expecting the screen box water level to go down,(never did). i did get some air. it was not easily measurable
20160529_144451.jpg20160529_144847.jpg20160529_145952.jpg20160529_160807.jpg20160529_161641.jpg20160529_154702.jpg
 

ALL Results were all the same as before, no pulse, water leak by.. I cranked down hard on the heavy spring, the spring compressed over it self. lol
I still have ideas to test, i am noodling as well, going through paper and ink. Lol. Drawing out a Russau 2 in 2 out rotary type switch thingy .and others..
The blue vacuum line was pushed in to the top gasket area. The vacuum pump pulled the gasket right down (pic) and a wood chuck
,ground hog?under the shed today,
20160525_124853.jpg20160529_170335.jpg

20160528_154755.jpg20160528_210917.jpg20160529_154252.jpg

Thanks for looking and reading.. any input is greatly appreciated.. Ken
 

Last edited:
Did you ever try the lighter spring, Ken?
Jim
 

I'm starting to think the water is leaking past where the valve seat attaches to the standpipe, rather than past the valve itself. I DO think the problem is a leak in the system somewhere.
Jim
 

Last edited:
Jim,
i never tried the lightest spring on the last test, here is a pic of the three i use, left is the lightest wire, center one is the Honda exhaust valve spring, right is the cone shape and a little stiffer. . The steel ring seat i installed was just pressed in (no glue), as it was over 1 mm wider in diameter than the rubber seal discharge opening. It is possible to have a leak, but i dont think it was. I did a pressure hold test 2 times.
-Crank down hard on the spring compression knob, turn water supply on, then off right away.
-Result both times was 10 lbs pressure on the gauge. It held the pressure for 30 minutes. No leak at seat area.
20160530_195713.jpg .......... Have more to update, should be posted by morning., Thanks ..Ken
 

If you turn the water on, does water come out of the screen box?
Jim
 

If you turn the water on, does water come out of the screen box?
Jim

Yes, With the spring compressed fully, i turn the supply water back on , the valve stem lifts 1/16 to 3/32 of an inch, resulting in water leak by in to the hutch via stand pipe. - Turn water supply off, still holds 10 lbs pressure.
You can completely remove the whole valve body off of the stand pipe, hold it in your arms,- still holds 10 lbs pressure.. Unscrew the gauge, water spurts out, gauge needle drops. The supply hose valve and hose is still connected,in fully Off position.
You can visually see the valve stem lift and spring compress , every time supply water is turned on.
Depending which spring and how hard you crank down on the spring, you will see between 3 and 10 lbs pressure holding on the gauge when the supply water is off.

I know in the pictures, it looks like water is ever where. Lol, I haven't got around to building a tailings extension yet, maybe i will zip up a temporary one , so it doesn't look like everything is leaking. Lol Ken
 

Last edited:
That sounds OK. If the valve is closed, you just shouldn't see water from the standpipe flowing through the jig. If the water in the standpipe gradually leaks down, you have a leak. That would prevent correct function.
Something else occurred to me.....I wonder if there is some necessary ratio between the diaphragm diameter, and the size of the standpipe? Also, I notice that in all the pulse-valve jig videos I've seen, the springs are much lighter than yours. Once the valve closes, the vacuum in the standpipe should hold it closed, until the pressure under the diaphragm lifts it for the next pulse. When the valve opens, the pressure drops, and the spring is there only to push the valve closed again....don't need much spring tension for that. Also, it seems like the top of the valve seat should be maybe 1/4" to 1/2" below the surface the diaphragm is mounted on.
When the valve opens, the vacuum in the standpipe, as the water drops, will suck in more water, until the valve is closed by the spring.
Jim
 

Last edited:
Excellent points Jim,
I will add a ( leak down test over time) when supply water is off, to my testing schedule., will have to add a tailings extension as well. (to measure water )
(...I wonder if there is some necessary ratio between the diaphragm diameter, and the size of the standpipe?).. Good question, i am thinking the same, so i will be testing a reduction in discharge port size to 3/4 inch, should be similar to those other video jigs Bill posted. The seat will be 1/8 " higher than gasket mount level.
Lowering the seat to 1/4 or 1/2 below will have to wait, as i am following your golden trouble shooting rule ( Thou Shalt only make one change at a time ). Lol
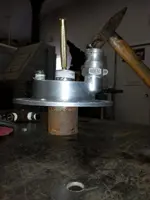
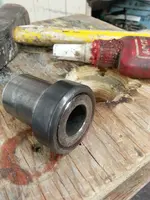
I removed the temporary steel ring seat with a brass punch and support collar on the main rubber seal., so not to disturb the silicone glue that holds the main rubber seal down to diffuser plate... Then machined a heavy steel collar with a 3/4 " hole ,to the ring I.D. .. Then machined a smooth narrow rim to simulate a 3/4 " O.D. pipe. This will be the next seat test. I glued the ring and 3/4 bushing with loctite, press fit . This time pressing the new seat assembly into the rubber main seat, i used silicone to seal, considering the internal leak probability.
20160530_145307.jpg20160530_154628.jpg20160530_164034.jpg
20160530_164216.jpg
 

Next batch of tests will include - plumbing the stand pipe into the bottom of the hutch as suggested by Bill, and trying a few changes here and there, It will probably be into the weekend before i post any results of any new tests.

THANKS TO EVERYONE WHO READS THIS THREAD,!!! and if you have any insight, experience, information on ANY mineral jig, operations, systems, stories, recovery methods, pictures, good to know stuff, etc. Please post.. Thanks again.. Ken
 

I'm a big fan of the "one change at a time" rule. The only thing I would now add, after reading your post, is the valve seat being higher than the diaphragm mount sounds really bad. I guess the water level will be higher than the edge of the diaphragm when the valve opens, but it seems like it would work better if the seat were level with, or lower, than the edge of the diaphragm. But I understand that things don't always work the way it "seems" they should...LOL
Jim
 

Hey Ken,
here's a good video. Two things of interest....note that the valve seat is well below the diaphragm mount. Second thing has to do with what we discused earlier about the size of the diaphragm relative to the size of the screen box when using a pulse-valve jig for gems. Note how small this guy's box is. He's getting a good pulse through the box....should handle gems easily. Of course, his feed rate would be slow because the small box size. But it is a lesson in designing a pulse-valve jig for gems. I think it would work better yet if he used a larger-diameter standpipe.
 

Last edited:
BIll.....I see you posted that video earlier....my apologies..... It's a good vid, and I wanted to point out those two items.
Jim
 

BIll.....I see you posted that video earlier....my apologies..... It's a good vid, and I wanted to point out those two items.
Jim

Jim no apologies needed that's why I posted them in the first place so we could look at them as many times as needed. some times things move faster then one can catch first time around.

Bill
 

Every pulse jig video I've ever seen running has a thin diaphragm.
If you watch them run, you'll see the diaphragm will bulge before the valve opens.

The way I see it, the job of the diaphragm is to accumulate a charge of water as it expands until the internal pressure exceeds the load of the coil spring forcing the valve open.
The swollen diaphragm then acts as a spring to keep the internal pressure high enough to allow the charge of water to pass through the valve.
Once the diaphragm has expelled it's charge of water it relaxes to a point where the coil spring can then seal the valve closed and the process starts anew.

With the very thick diaphragms that your running, there is not enough flex to allow the diaphragm to swell and accumulate a charge of water before the critical pressure is reached that opens the valve.
Hence, no pulsing action, just a high frequency buzz as the pump pressure alone exceeds the coil spring pressure, then snaps closed a fraction of a second after the chamber pressure drops bellow the spring pressure.

I think the design of the seat is a red hearing, just about any surface that is flat and smooth should seal under even a modest coil spring pressure.

Trying a thinner diaphragm certainly couldn't hurt and would be an easy variable to check.


Just my .02,

John
 

SpecJet - John, thanks, for the well written ,easy to understand feed back. !

The way you see it, is exactly what it looks like, watching the other jig videos.

The way i see it, the job of the diaphragm gasket is to provide flexibility to operate the opening of the valve.
The lighter type of diaphragm gasket would require a lighter spring, which would handle lower pressure, which would fluidize less material.
The other jig videos are running very low pressure, my guess is 1 or 2 lbs, they rely on the weight of the water flow and a wave motion(so to speak)

The water is charged already by the water pump and supply hose,, i just need to pulse the charge at a higher pressure to fluidize 10 lbs of rock effectively.

The wide flat valve seat did leak easier than a narrow focused rim contact point. The high frequency vibration on a previous test was a result of using a 2 inch "O" ring which sealed better and created the buzz.
My quest has been to find a trigger or trip mechanism or pulse method to handle the higher pressure. I believe the diaphragm and spring need to be somewhat substantial to handle the required pulse energy needed.

( Trying a thinner diaphragm certainly couldn't hurt and would be an easy variable to check.) yes, you are right, i will add that to my test list.

Thanks again for the reply..... Ken
 

Top Member Reactions

Users who are viewing this thread

Back
Top