Cleaning Wheat Pennies

Hi everyone, I'm coming back to this thread because I found another Indian Head penny at that farm site and I tried some techniques to clean it.

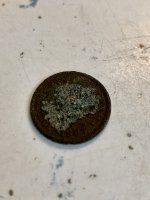
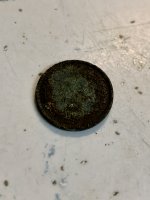
First, here's what it looked like once I gently removed the dirt with water and a "sensory brush" (like a very soft surgical scrub brush).
I was able to see the date (1897) but wanted to see if I could recover more detail.

Front and Back
ZZvKuui.jpgDOQiryX.jpg
Notice that there is detail around the outer edge visible.

Next I used warm peroxide, and while it bubbled it didn't really do much to remove the heavy buildup.

So - I tried electrolysis. My thinking was that the penny wasn't worth much and I wanted to see what could be done to remove the buildup on both sides.

I did two rounds of 30 minutes each and then a 3rd round of 45 minutes.
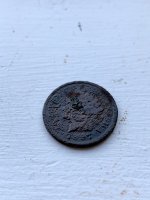
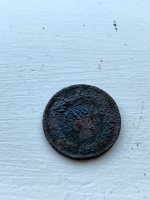
Here's what it looks like now with some oil applied (OO I can't figure out the "lightly brushing" thing, but maybe I need practice):
rCxfNVf.jpgh3tQfwS.jpg

My thoughts: I think the penny lost a lot of detail because of the electrolysis. It's most noticeable to me along the outer edges, where I think the fine markings went away. The back seems especially damaged by the electrolysis, because now I can't see much of any detail on the back.
Yes, the electrolysis did remove most of the corrosion (I left a little on purpose, to show what it looked like before), but I think it took copper away with it.
I could argue that the ground here in New Jersey caused the majority of the corrosion, and that would be true - the penny wasn't in great condition when I found it.
But I think my pictures show that electrolysis also took away some of the detail.

I'm going to be hesitant to use electrolysis in the future.
 

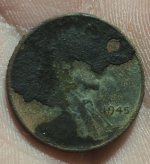
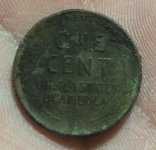
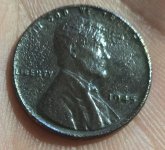
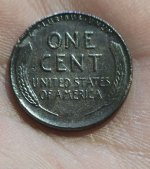
I know I'll catch some "p00p" for this but It works for me. I decided to use this 1945 wheatie as an example. Upon digging this up yesterday, (August 2024) there was a lot of crust built up on the front of the coin from the harsh environment in which it was located. I actually found that using the Dremel 300I with, first a soft wire brush attachment, was affective in removing the loose dirt and corrosion. I did not press down hard AT ALL! It seemed to provide the results I was looking for, as long as I paid attention to the amount of pressure being used, the RPMs of the Dremel and amount of time spent on each side/section of the coin. Doing this haphazardly will SURELY result in negative results, so please pay attention to what you're doing. After approximately 3 minutes on each side, I then switched to a medium sized cotton swab attachment. When using this attachment, along with a copious amount of "Mother's Mag and Aluminum Polish", all you need to ensure is that you do it repeatedly in all directions, at about 3/4 full RPM, and again, with a healthy amount of Mother's on it the entire time. Then use a soft cloth and it will sparkle!

PLEASE REMEMBER TO WEAR SAFETY GLASSES!!! THE DREMEL SPITS PIECES OF DEBRIS EVERYWHERE AND IT WILL TAKE YOUR EYE OUT. Most of us only have 1 pair....cherish them.

(P.S.A. DO NOT use this on coins that may have significant monetary value!! I do not take responsibility for your use of this method and any damage to your property that it may cause! I simply use this on coins that are severely corroded due to them spending centuries underground).
 

Attachments

  • 20240830_220445.jpg
    20240830_220445.jpg
    185.1 KB · Views: 8
  • 20240830_220454.jpg
    20240830_220454.jpg
    214.5 KB · Views: 8
  • 20240830_222247.jpg
    20240830_222247.jpg
    188.3 KB · Views: 8
  • 20240830_222303.jpg
    20240830_222303.jpg
    215.8 KB · Views: 8
Last edited:
As long as they are not a rare or tough date, I just tumble all of mine at the end of the year. After that, they go into either plastic coin tubes or the paper penny rolls that you can buy online.
 

Top Member Reactions

Users who are viewing this thread

Back
Top