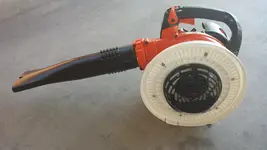
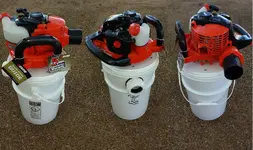
Build Your Own Vacuum / Blower

That's great! I hope you have some great success with your venture. just don't be suprises when that tool guy or Echo develops their own version and stops buying from you.sell all you can now! but good luck!

Russ just building them for fun, not out to make money, heck I posted on how to build it so others can build a vac that's better than any other vac currently on the market. In fact I did not charge labor for the one above, just helping a fellow forum member who contacted me. They (Tool Guy or Echo) can have at it, I know it will not be of the quality of the Viper-Vac. The SKIL guy on the other hand may take the idea and run with it, but the vac's have been around for years so let him have at it.
 

Last edited:
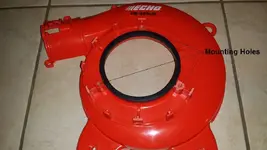
First of all, nice quality build AzViper. I just thought to offer a couple possible modifications for those that don't want to disassemble the blower or modify the housing in any way. When I built mine I only had to remove about 1/16'' off the 3 tabs, no other mods and didn't have to disassemble the blower other than removing the guard from the motor.

Instead of using the guard inside I just used some small chicken wire and fender washers. I still used a bulkhead, but because of the type lid that my bucket came with I used a piece of 3/4'' plywood on top. Motor is attached with a little longer screws through original holes from the bottom so no drilling necessary in the housing. Where the large hole from the motor seats to the bulkhead.....no sealer or silicone used. Instead I took a piece of vacuum line from auto parts and slit it length wise to make a gasket which is easily fitted to the lip of the motor for an air tight seal.

I use the Rigid vacuum cleaner hose available at Home Depot because it is a little longer and almost indestructible. Also might be a little larger diameter. I was able to use ABC plastic threaded fittings in the bucket with only 2 fittings, one being a 90 degree elbow to make the hose attachment point. Also different attachments are sold for this Rigid brand hose as well.

Either way these vacs are awesome gold getters and a necessity in the desert for cleaning bedrock and dry washing. Been using mine for years. Dennis
 

Cheaper 6 gallon bucket only $6 I also found white Food Grade bucket lids at Home Depot for $2 built in seal for you budget minded folks. I found also that by using AZ Vipers compression fitting and cutting where indicated, you can make 2 inlet tubes for 2 different buckets so give it to a buddy and save them $10 or chip in $5 each

Great design Viper thanks for sharing
 

Last edited:
Any Tucson Desert Gold Digger members floating around in the forums at next months meeting the club will be selling raffle tickets for a new Viper-Vac including all the goodies to go out and crevice vac the gold. I am not sure when the raffle will be but tickets will be available at the next meeting. The club has a new updated website. Click on the link in the first sentence.
 

The difference is my way doesn't void the warranty by cutting or drilling anything. My bucket was free and so was the plywood. Getting bolt pattern is just an easy template made by tracing on paper and transferring. My hose is actually smaller diameter, but no clogging issues. Also not that long as 6 foot is ample. My hose, crevice tools, brush, scoop, gloves and other tools easily fit inside with room for more stuff if needed. Been using the same hose, bucket, and motor for over 5 years now with no issues. Similar designs and I am sure both work equally well. Dennis
 

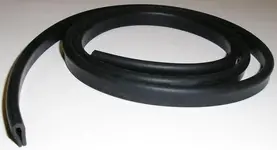
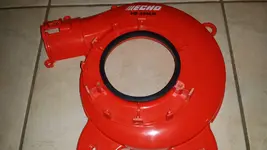
The blower would have to be completely disassembled in order for someone to see the holes drilled and most likely the small engine shop that would be performing the repairs would not even question the three holes as these holes are already in place but not penetrated to the inside from the factory. No need to slit vacuum hose as there is a rubber product that slips over the edge of the hole on the blower that's low profile and works like a charm. In my case I have made a drill template so no need to dissemble the housing. Granted not everyone is going to have the ability to make these cuts.

Rubber Edge.jpg
 

Last edited:
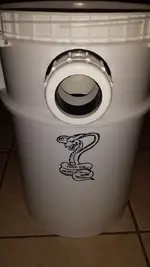
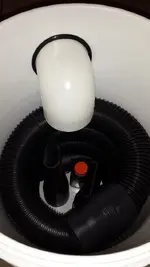
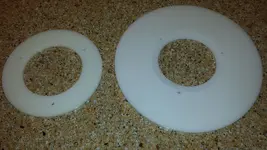
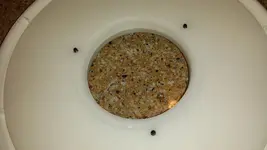
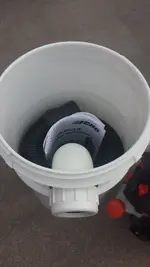
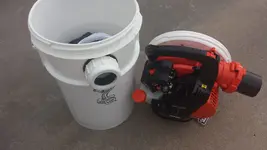
I got started on the new Viper-Vac to be raffled off to help raise funds for the our local club. As you can see the vac will nearly double the amount of dirt that can be picked up due to the location of the inlet. It was only when I decided to make my own finger guard that will allow for the raising of the inlet. With the factory finger guard the guard is to deep and would have hit the 90 degree elbow. By drilling out the bulkhead in a series of holes the bulkhead adds strength to the lid while providing a finger guard.

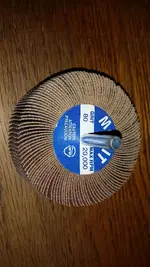
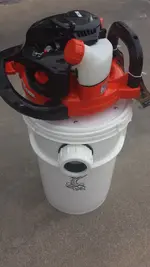
To use the 2.5" 90 degree elbow that I have used I cut both ends of the 90 degree elbow so it gives more room from the bottom of the elbow to the bottom of the bucket and to fit closer to the edge of the bucket. I also had to enlarge the inside of the elbow to fit the inlet of the compression fitting. Home Depot at least in my area sells two different brands of 2" compression fittings. So you need to find the brand that is larger than the ID of the inside of the 2.5" 90 degree elbow and machine the inside of the elbow to fit. Otherwise the other brand of the compression fitting will not work with either a 2" or 2.5" elbow. To machine out the elbow I use a sanding disc as pictured. The sanding disc fits tightly inside the elbow and will removed the material to fit the compression fitting that you will cut in to.

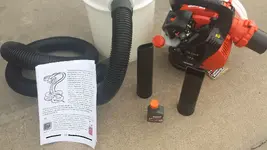
I have included two different crevice tools for the raffled Viper-Vac plus the 2.5" x 8' hose.

B16.jpg B119.jpg B17.jpg B18.jpg B120.jpg B121.jpg
 

Last edited:
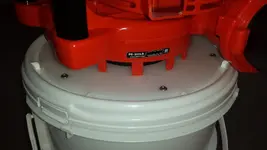
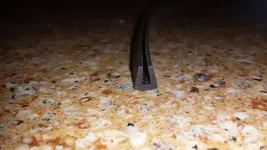
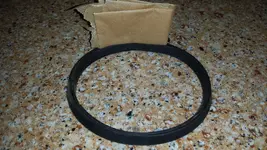
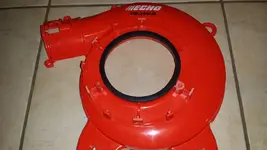
The latest Viper-Vac is completed that will be raffled off next month at Desert Gold Diggers in Tucson, Arizona. I cut a recess area for the rubber seal to sit in on the upper bulkhead, this making for an air tight seal. I used a U shape rubber seal as seen above but with a flat bottom that fits into the recess area of the bulkhead. I super glued the seals two ends making a O ring that stretched onto the blower housing. Some lucking winner will get this custom Viper-Vac. Six stainless steel 10-24 machine screws and stainless steel lock nuts were used to pull the bulkhead to the lid together on the outer edge while the 3 stainless steel #10 screws passed through the finger guard, bulkhead, lid, and bulkhead into the blowing housing.

B126.jpg B125.jpg B124.jpg B27.jpg

B131.jpg B132.jpg B134.jpg
 

Last edited:
This is the rubber edge used to make the sealing O ring. This seal is perfect to line the blower edge. Its 3/32" ID by 1/4" ID and fits like a glove. Just cut the rubber about 1/8" shorter than the diameter of the intake on the blower. Make sure the cuts are straight and even. Apply very very little Super Glue to the edge of the rubber. Next bring the two edges together and hold while the Super Glue dries. Now you have an O ring that will fit tight and seal to the face of the bulkhead. Make sure that the gluing of the two edges of the seal is done NOT on the blower. I fold wax paper a number of times so it fits into the groove to glue the edges. This aligns the edges and keeps the rubber sides of the grove from sticking to each other.

Rubber Edge.jpg B158.jpg B24.jpg B23.jpg
 

Last edited:
Super! That looks like just the thing to make that seal.

Yep its perfect fit. This rubber edge molding can be purchased in many different widths, depths, flat bottom, round bottom, etc. What I purchase works very well.
 

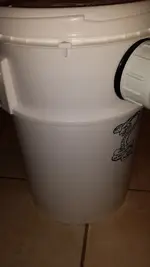
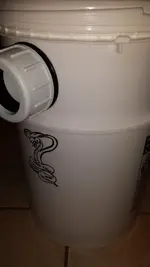
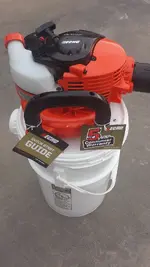
The Viper-Vac is built to be used as a vac and a blower for use with a drywasher. With its 2.5" inlet the blower can remain on the 6 gallon bucket off the ground and away from sucking any dirt into the intake while being used as a blower while using a drywasher. With its small lid size the blower with its attachment can be used around the home just as the blower was intended to be used. So the end user can offset the cost with the better half (WIFE) and have a blower / vac for many uses.

B133.jpg B137.jpg B138.jpg B139.jpg
 

Looking good!
 

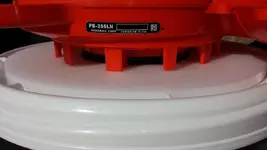
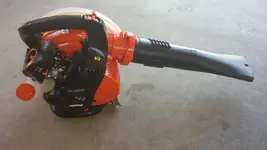
You can order the PB-255 through Home Depot or through Speedway Sales I have looked at all other blowers and none offer the simplicity to mounting the blower. Other users have taken other blowers and bolted through the blower housing, of which is not a great alternative cause that will place undo stress on the plastic housing that was not designed to be bolted in those positions.

With the PB-255 the split seal fits over the outer edge and with the three stainless steel # 8 screws will screw the housing onto the bulkheads, lid, and finger guard using threaded holes that are molded into the blower housing.

Click on the links above to purchase the blower...


Mounting Holes.jpg
 

Hey AZViper, do you sell these kits with the screw on lids, if so how much are they ?
 

I am interested in purchasing the kit. I already purchase the PB251 Blower.
 

Top Member Reactions

Users who are viewing this thread

Back
Top