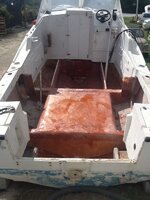
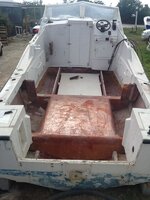
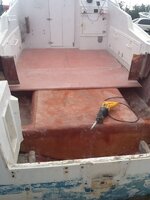
Boat ownership.......the pitfalls and the pleasures....

No Ram, its very scratchy and super firm, just like a solid sanding block......really easy though to cut or carve with a knife
 

Got a question though.........would you have just glass on the transom or an Aluminium plate too? On the top that is for the engine to rest on.....

No need for a plate. That isn't the way to repair a transom. I've seen that fail more than once, especially if it is mechanically attached. If you do go that way, I recommend you grind/cut the top down and thickly re-glass it. If you have a rotted/damaged transom, replace it. You will see why after you cut it out. It's not that big a deal. Once the transom is removed and the area is ground and ready, use that as your pattern to mark the wood for cutting. Keep in mind that the boat gets wider as you go forward. Cut three layers of 3/4" plywood (preferably marine grade or pressure treated). Grind the surfaces and using the matte, sandwich them together and screw them tight with drywall screws as you go. If you use pressure treated plywood as a core, simply pre-grind it with 36 grit, then with a 25% resin to 75% acetone mix, wet it all over to soak in to the wood. Start glassing it in after that kicks and while the surface it still tacky. Set the new transom in place about a 1/4" forward to compensate for the thickness of the glass on the outside of the stern. Tie it in to fore and aft stringers and the sides, varying the lengths of glass so as to spread the load. Use matte and woven roven to both tie it in and over the whole thing. I use a minimum of three layers of structural glass over the transom and additional to tie it in to the sides. Don't put too much glass on at once. The heat build-up can weaken the strength and even cause the resin to crack. Let the layers kick and cool as you go. Your glass guy will know how much to put on at a time. No hurry Mon, you're on island time! On the exterior, just use finish glass to pretty it up. All your strength will come from your work on the interior.
 

No need for a plate. That isn't the way to repair a transom. I've seen that fail more than once, especially if it is mechanically attached. If you do go that way, I recommend you grind/cut the top down and thickly re-glass it. If you have a rotted/damaged transom, replace it. You will see why after you cut it out. It's not that big a deal. Once the transom is removed and the area is ground and ready, use that as your pattern to mark the wood for cutting. Keep in mind that the boat gets wider as you go forward. Cut three layers of 3/4" plywood (preferably marine grade or pressure treated). Grind the surfaces and using the matte, sandwich them together and screw them tight with drywall screws as you go. If you use pressure treated plywood as a core, simply pre-grind it with 36 grit, then with a 25% resin to 75% acetone mix, wet it all over to soak in to the wood. Start glassing it in after that kicks and while the surface it still tacky. Set the new transom in place about a 1/4" forward to compensate for the thickness of the glass on the outside of the stern. Tie it in to fore and aft stringers and the sides, varying the lengths of glass so as to spread the load. Use matte and woven roven to both tie it in and over the whole thing. I use a minimum of three layers of structural glass over the transom and additional to tie it in to the sides. Don't put too much glass on at once. The heat build-up can weaken the strength and even cause the resin to crack. Let the layers kick and cool as you go. Your glass guy will know how much to put on at a time. No hurry Mon, you're on island time! On the exterior, just use finish glass to pretty it up. All your strength will come from your work on the interior.

Aquanut strikes again!

Great advice, worth a fortune in gold!
 

No need for a plate. That isn't the way to repair a transom. I've seen that fail more than once, especially if it is mechanically attached. If you do go that way, I recommend you grind/cut the top down and thickly re-glass it. If you have a rotted/damaged transom, replace it. You will see why after you cut it out. It's not that big a deal. Once the transom is removed and the area is ground and ready, use that as your pattern to mark the wood for cutting. Keep in mind that the boat gets wider as you go forward. Cut three layers of 3/4" plywood (preferably marine grade or pressure treated). Grind the surfaces and using the matte, sandwich them together and screw them tight with drywall screws as you go. If you use pressure treated plywood as a core, simply pre-grind it with 36 grit, then with a 25% resin to 75% acetone mix, wet it all over to soak in to the wood. Start glassing it in after that kicks and while the surface it still tacky. Set the new transom in place about a 1/4" forward to compensate for the thickness of the glass on the outside of the stern. Tie it in to fore and aft stringers and the sides, varying the lengths of glass so as to spread the load. Use matte and woven roven to both tie it in and over the whole thing. I use a minimum of three layers of structural glass over the transom and additional to tie it in to the sides. Don't put too much glass on at once. The heat build-up can weaken the strength and even cause the resin to crack. Let the layers kick and cool as you go. Your glass guy will know how much to put on at a time. No hurry Mon, you're on island time! On the exterior, just use finish glass to pretty it up. All your strength will come from your work on the interior.

John,

Thanks, Francis suggested not putting the Ali angle iron back on the transom and I was after a valued second opinion which I got in spades, thanks so much.....

Ps please let me know about the cookout and any other events next year as soon as the dates firm up, I would like to try and attend.
 

You can buy Nida Core both finished and unfinished with glass work already done... this is the expensive stuff... BUT it is PERFECT The strength and look is bar none... AND lightest weight which trnsfers into everything else when it comes to boats or anything that is motor driven... Lighter weight less drag... lighter weight less gas... lighter weight better performance .... etc etc etc.
Well worth the money... buy it plain for cheap... shop around some dealers can order for cheap. THEN glass yourself. OH also ... It does not sink.
 

All this talk about boats has me excited about mine again. Tomorrow I am going to pull a hub off to get bearing and seal numbers and I'm going to order new hubs and bearings. It already has new tires so with the new springs and hubs I'll have no fear towing it anywhere...

sent from a potato with gravy!!...
 

Yep I had that fear. Ill be driving and see my boat pass by me. Hey that looks just like my boat. Oh shiiii
 

Dave,

There is a new substance just like the scratchy foam they put flowers in to stand them up ( in UK it's called Oasis and is dark green)

It's super light and provides a platform to mold fiberglass around, pictures to come when we do it.....

Oasis is open cell, meaning it absorbs and holds water (that's why they use it for flowers). You sure that's what you want in a boat?
 

Hi Burn,

Oasis is the nearest " feel" I could describe to what the foam is. This stuff is definitely closed cell and has caused a couple of swimming pools at the front of the boat as we haven't put the drains in yet ( from rain) the levels haven't gone down😊

I am sorry to cause any confusion but as an ex Brit. This stuff feels just like that Oasis we used to see every time Mum got some flowers ha ha
 

You can buy Nida Core both finished and unfinished with glass work already done... this is the expensive stuff... BUT it is PERFECT The strength and look is bar none... AND lightest weight which trnsfers into everything else when it comes to boats or anything that is motor driven... Lighter weight less drag... lighter weight less gas... lighter weight better performance .... etc etc etc.
Well worth the money... buy it plain for cheap... shop around some dealers can order for cheap. THEN glass yourself. OH also ... It does not sink.

Nida Core is expensive. I've used the Penske products in the past with good results for the customers that could afford it.
 

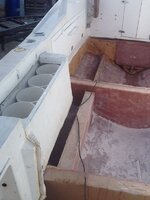
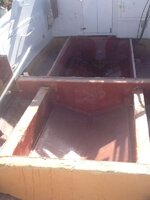
Today's update.

1. Port side old tank rack being cut out
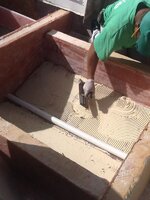
2. Floor mastic going in to stick the thermal foam to , forward drain pipe in to take water to bilge at rear
3. Blocks holding down floor ( Francis made the blocks too ha ha)
4. Ice/ fish hold nearly finished 125 gal fuel tank goes in forward space.......

image-2982935725.jpg


image-1804542715.jpg


image-4033443880.jpg


image-3037529831.jpg
 

Looking great! How long until you launch?

sent from a potato with gravy!!...
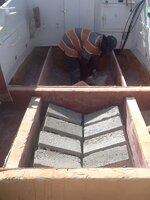
 

Probably 2 to 3 weeks......going to Nassau on the 10th I'll buy some hardware bits and pieces there hinges etc
 

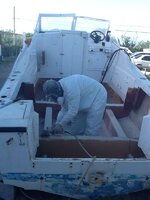
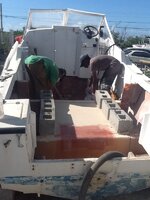
Today's update

1. Francis sanding the tops of the stringers ready for the top of the fish / ice hold
2. Fish ice hold top on being held down by the blocks again
3. Fish hold finished ready for floor and then the hatch cut on it
4. Fuel tank in front after floor reinforcing
5. Sub floor starting to be put in ran out of hardner more coming tomorrow ha ha ( we do live in the islands after all )

image-445331171.jpg image-1731209775.jpg image-3057886184.jpg image-4289766148.jpg image-3697690347.jpg
 

Last edited:
Today's update........

Wot no hardner??


image-2464477122.jpg
 

that's what you get for living in the islands dude!
 

Nice one Jeff,

What's the temp outside your house??

Ps happy thanksgiving!!
 

prob 28f now.
well made point
 

Top Member Reactions

Users who are viewing this thread

Latest Discussions

Back
Top