You are using an out of date browser. It may not display this or other websites correctly.
You should upgrade or use an alternative browser.
You should upgrade or use an alternative browser.
A GUIDE TO VAULT TREASURE HUNTING (Condensed)
- Thread starter sandy1
- Start date
Ditlihi
Banned
- Joined
- Aug 20, 2016
- Messages
- 1,227
- Reaction score
- 4,796
- Golden Thread
- 0
- Primary Interest:
- All Treasure Hunting
CDS, there is a huge amount of misinformation out there about these treasures and bad people who continue to spread this bad information to the uneducated newbies.
I agree, most assuredly. Newbies should beware and do due diligence.
Ditlihi
Banned
- Joined
- Aug 20, 2016
- Messages
- 1,227
- Reaction score
- 4,796
- Golden Thread
- 0
- Primary Interest:
- All Treasure Hunting
I find the statements in bold to be very interesting. Your methodology seems to rest on a phenomenon proven to be in contradiction with your claims. Interesting indeed.
Yes, i agree with that. Because if you look for those burial pit notches and find one, the cache is usually very close by. So i dont know why he is tell people now that they wont be close to them.
Thanks, Dog. You noticed that too, eh? I don't know why either.

sandy1
Bronze Member
- #1,884
Thread Owner
Left out the most relevant part.CDS, there is a huge amount of misinformation out there about these treasures and bad people who continue to spread this bad information to the uneducated newbies.
(The Treasure Hunting Information I have posted is tested tried and true)
Crosse De Sign
Gold Member
- Joined
- Jun 19, 2013
- Messages
- 5,808
- Reaction score
- 5,903
- Golden Thread
- 0
- Location
- ~: Hell And Back :~
- Detector(s) used
- White's MXT ~ TM800 ~
- Primary Interest:
- Other
CDS, there is a huge amount of misinformation out there about these treasures and bad people who continue to spread this bad information to the uneducated newbies.
(The Treasure Hunting Information I have posted is tested tried and true)
You may have some new fans, or birds...


Why else, would there be likes from the same likes.

Yes, I know it's good info (the best). Just seeing, out there workin'.

Too bad for the hovering, just waiting to get the truth kernels,
 who
wholikely have never ever recovered treasure, or where's pics of the proof?
All for trying to create doubt. You can only help so many though, 10-4.

Here's to ya', Amigo. The real deal, & a good soul...

Last edited:
Maverick1
Bronze Member
That's entirely relative.
Due diligence.
Ditlihi, i had my doubts for a while, but now it is clear as daylight that this Cornucopia is empty.
Crosse De Sign
Gold Member
- Joined
- Jun 19, 2013
- Messages
- 5,808
- Reaction score
- 5,903
- Golden Thread
- 0
- Location
- ~: Hell And Back :~
- Detector(s) used
- White's MXT ~ TM800 ~
- Primary Interest:
- Other
CDS, there is a huge amount of misinformation out there about these treasures and bad people who continue to spread this bad information to the uneducated newbies.
(The Treasure Hunting Information I have posted is tested tried and true)
Naysayers are nagging relentlessly, for no good reason,
just to tear down... Not helping anyone at all...
Last edited:
Quinoa
Bronze Member
- Joined
- Nov 25, 2011
- Messages
- 1,916
- Reaction score
- 3,333
- Golden Thread
- 0
- Location
- Purgatory
- Detector(s) used
- Garrett atx pi 12+20inch coil, Garrett mh series, Garrett 2500+t-hound attchmnt, fisher tw-6 two box, Pulsestar pro ii with various coils up to 98 inches, pulsemaster pro w/1.2 m coil
- Primary Interest:
- Other
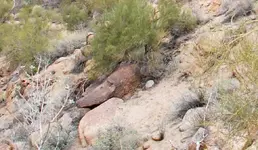
I saw this picture a long time ago on the ancient lost treasures site. SteveNM46 ?
sdcfia
Silver Member
I saw this picture a long time ago on the ancient lost treasures site. SteveNM46 ?
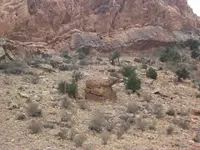
Yeah, that's the hat I wore on the Utah forums years ago. In all fairness, I didn't take this particular photo, but an old friend of mine, now deceased, did - in Arizona. Of course, I've posted loads of my own stuff all over TNet and elsewhere too - but all obvious landmarks with no dominant right brain required to notice. I provide coordinates too, if requested. Here's a good one located in Big Bird Canyon in the fabulous Cookes Range. If you like criss-crossing surface stones, I imagine you could find as many as you want on this hill and every other hill in the southwest. Me, I like things easier to recognize.
elh
Sr. Member
- Joined
- Aug 10, 2015
- Messages
- 494
- Reaction score
- 591
- Golden Thread
- 0
- Primary Interest:
- All Treasure Hunting
Ditlihi, i had my doubts for a while, but now it is clear as daylight that this Cornucopia is empty.
Right maverick, you have got to be talking about YOUR horn. Now don't it feel good to confess

 ho, ho, ho. Santa has a bag full.
sandy1
Bronze Member
- #1,893
Thread Owner
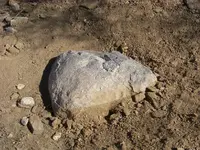
I wanted to clear up the arrows found at treasure sites so here are couple more arrows at a treasure site that are just trying to mislead.
Notice it is a different color to draw your attention.
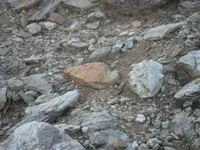
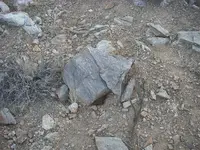
and the one I showed before
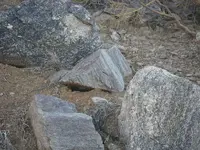
Notice that these arrows are just free loose rocks and are alone (these are enticers) the arrows that are important are either shadow arrows or found with another much more important marker or permanent wedge type arrows.
Notice it is a different color to draw your attention.


and the one I showed before

Notice that these arrows are just free loose rocks and are alone (these are enticers) the arrows that are important are either shadow arrows or found with another much more important marker or permanent wedge type arrows.
sandy1
Bronze Member
- #1,894
Thread Owner
I remember many years ago when I first started to recognize all the little distracting markers all over these sites and it confused the hell out of me, I was lost amongst all the little enticers everywhere, it wasn't until I started to slowly understand which markers were important and which were not that I was able to start understanding what markers I needed to look for at each new site and which ones to ignore. This is why I try to only show the Important Markers to everybody.
sandy1
Bronze Member
- #1,898
Thread Owner
My Technical Guide to Vault Treasure Hunting (Aura Capturing)
(#1)
Now that I have covered the basics of vault treasure hunting, its time to cover the technical aspects of locating these treasures.
(#2)
The First thing to understand is that I use Auras to locate these treasures:
I capture these auras with a Pentax Optio w10 camera and have gotten over 100 long distance auras from different treasures with this particular camera (all from at least a half mile away from the mountain) however (There are different cameras that can capture these auras as well)
Ones I know for sure are the (iPhone 7) and the (Pentax Optio w30)
As long as the camera can take multiple pictures automatically called interval or timelaps shooting with a intervalometer, which means you can set a time in between each shot, on the w10 the minimum is 10 seconds in between each picture taken, and it will take a thousand pictures, it takes about 3 hours to get all one thousand pictures.
You need to make sure whatever camera you try that it has the ability to automatically take pictures without you taking the pictures yourself.
It is very difficult catching Auras even with a camera, these Auras are faster than lightning and happen in full daylight, this also makes them invisible to the human eye.
Many times it will take thousands of pictures to capture just one aura, even when you are taking pictures of a mountain that has multiple caches on it.
Here is how the auras are created, The Aura phenomenon:
There is intermittent radiation that comes from the sun and hits different areas of ground sporadically and this happens very fast within a hundreth of a second, if this radiation happens to hit on a buried treasure(s) and you happen to be taking a picture of that area within that 1/100 of a second (with the right camera) you will capture a Photon Burst/Aura that is a result of the radiation bouncing/reflecting off of the treasure. This also has to do with solar winds/geomagnetic storms which effect the earths magnetosphere.
Here is the Equipment that I use in order to capture the auras from the buried treasures.
You can buy these on ebay.
Camera Pentax Optio W10 (discontinued, must buy used)
2: (New Batteries) for the same camera and a (Charger)
2: (SD 2GB Memory Cards, Full Size not Micro) (NOT the SDHC cards)
1: (Tripod for the camera)
1: (SD Memory Card Reader with USB connection, for transfering pictures to your computer)
(#3)
How to Capture Aura(s):
(Camera Instructions for the Pentax Optio W10)
(Use a 2GB SD (not sdhc)
(Don't Forget to Format)
How to format the memory:
Install the SD card
Turn on camera by pushing and holding the small round button on top, then push the lowest button on back closest to screen (Menu Button). Then locate the 4 buttons surrounding a circle button the middle is the Ok button and the four around it are for navigating: First screen will be Rec. Mode navigate to the right then you are in settings navigate down and format is lit up, navigate right and then up and then hit the OK middle circle button and that formats the memory.
(Charge Batteries)
(Read the formatting instructions first)
Turn on Camera
Push bottom left button (Menu Button) closest to the screen and navigate down to recorded Pixels and set at 6M (7M if using the w30) by navigating right and using the OK button then go down to Quality level and set at 2 stars make sure to press OK to set it, this makes sure you get 1000 shots on your memory card.
Now push lowest left button (Menu Button) again to get back to the picture taking screen.
It should say you have close to 1300 Pictures (just over 1000 on the w30) available in the upper right with a 2GB memory card.
If you have issues with sunlight changing due to shade from trees and clouds its a good idea to set the white Balance for Daylight.(this option is in the menu just below the settings for the Pixels and Quality)
Now back to the Navigation buttons: Push the upper of these five buttons several times untill you see (Drive mode interval shoot on the screen)
Now Push the middle round OK button of those five buttons Twice until interval lights up in Pink.
The Interval needs to be set at 10 Seconds
Navigate down onto Number of Shots Navigate right and up or down to get 1000 shots if you are at 2 it will jump to 1000 if you go down one click, Make sure to Click OK button to set it. (Start time leave at 0) Click Ok again and the fields go grey (no more Pink) then it will go back to the ready to take a picture screen in a few seconds.
Now Hit the right Navigation button three times for infinity shooting this keeps it from running down the battery because of autofocusing on every picture. Make sure to Hit OK to set it.
If everything has been done correctly you should have a: (P in white in the upper left corner This is what programming mode it is in) (if using the w30 you must make sure the P is being used not the auto pict to change this you have to push the Mode button just under the OK button) (a no flash sign) (the interval shooting sign) and (the little mountain sign for infinty shooting) on the upper left of the camera.
There should be around 1300 shots available on the upper right or just over 1000 on the w30. (Not all 2GB SD Cards Hold the Exact Same Amount of Pictures, as long as it holds more than 1000 pictures your good to go)
Where to set up the camera
Set up the camera on a steady tripod around 1/2 of a mile from the hill.
(Look at Picture #1a for an example of the very best distance for capturing auras from a hill. (You can zoom in a bit from this distance also)
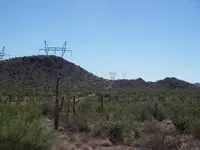
What's important is that you are close enough to see the Foliage/Trees etc. on the hills in the pictures.(you will need these later for alignment purposes)
Get at LEAST 1/8 of a mile of mountian in the picture, this increases your odds of catching an aura by covering lots of ground (the treasure is probably in a place your not expecting) also further away from the mountain helps for better pinpointing, this is very Important because you want to capture the entire aura on the mountain, if you are too close to the mountain, you may only catch a small part of the aura (because it is a photon/light burst bouncing off the treasure from the sun ) and catching only a portion of it can make the aura difficult to pinpoint on the mountain.
(Look at Picture #1b which is about a mile from the hill but zoomed in quite a bit) (This is the absolute furthest from the hill you should ever try to take pictures from)
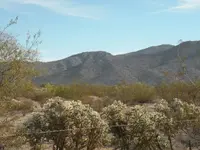
(VERY IMPORTANT make sure to mark the tripod spot for later) Take pictures During daylight hours (while sun is up) (Do not point the camera towards the sun, you don't want colorful prisms of light on the pictures from the sun)
Then just zoom in or out on the hill and click the shutter button it will start taking pictures every ten seconds for about 3 hours. make sure to check/verify that the the camera is coming on every ten seconds for a couple shots (you will see it flash onscreen for a second while it is taking the picture, the screen goes black in between the shots.)
It can take up to ten thousand pictures to capture an aura even in a good treasure area.
(these auras are rare and hard to capture)
(Take these camera instructions with you on site, in case any questions arise about how to use)
(#4)
Here is what you need to be able to scan/look for an aura:
First you need a full size monitor/tv 19" is a good size.
Second, you need a Photo Viewer that is fast and also Overlaps one picture Directly over the last one shown. (Side Scrolling Photo Viewers Do Not Work)
I use Honeyview for this purpose, this is the ONLY way to find an aura as each picture is shown over top of the last one and allows you to see a small anomaly very quickly as you look through each picture that replaces the last one.
I use a simple magnifying tool on windows 10 from the Windows ease of access menu, this allows me in conjuction with honeyview to look at a specific section of each picture by magnifying it up to 300 or 400 percent while I am scanning through each photo for an aura.
The Picture before the Aura will have nothing and then the Next picture with the Aura and then the picture after the aura will have nothing on it, which is telling you the aura was just in that one picture.
Make sure that what you think is the Aura is not a Bird or a Bug or Pollen which can be in the air close to the camera. General rule of thumb, if you see something in your photos in more than 1 picture within a series of ten pictures its probably birds flying around the mountain or bugs/pollen close to the camera. The auras are much more rare than that. You will see a few white or cloudy blotches in some pictures (probably dust particals in or on the camera lens) here and there (up in the sky etc.) that are not treasure which is why it is imparative that you verify the aura with the markers at the aura's location.
In my area the auras are generally, mostly white with some black mixed in (as the aura burns out they show more black) Sometimes I will Catch a Gold Aura as well. (I ignore the black ones as they are generally birds) Remember these auras only last a split second.
(#5)
After finding an aura:
(print the aura picture) take that picture and a better camera back to the exact tripod spot you caught the aura from and (take zoomed in pictures of the aura spot with the better camera)
(Make an extra copy of your aura picture)
(Using the computer paint program) Make a plus (+) mark on the copied aura picture (using the line tool on the shapes toolbar, no freehand drawings) (the brightest part of the aura goes in the middle of the plus) Make sure the lines of the plus are exactly horizontal and vertical and very long for accuracy. Try to copy/transfer the exact location of the aura onto the new zoomed in picture with a plus (+) mark. (SEE VERY IMPORTANT BELOW and the Example Pictures) (Aura spot goes in the middle of the plus (+) on the new zoomed in picture) (be aware that you can easily be off up to 10 feet on the hill from human error as it is not always easy to make a perfect transfer from the aura picture to the zoomed in picture especially if the aura is big and not pinpointable) (Look for the brightest spot in the aura, usually that is the exact spot to put in the middle of the plus on your picture) (Print this zoomed in Plus marked picture)
(VERY IMPORTANT) Make absolutely certain that when making the plus on the new zoomed in picture that the ends of the plus are as long as you can get and touching bushes or something that is identified in the first aura picture, because taking the zoomed in picture will almost always be at a slight angle to the original aura picture, which means that the Plus mark lines will most likely not be horizontal and vertical (most likely the whole plus will be angled or tilted left or right) unlike on the first aura picture plus which has perfect horizontal and vertical lines, this can really throw off the location.
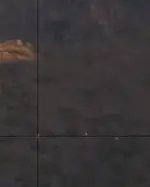
EXAMPLE Picture #2 : Picture #2 is a picture of 3 separate auras/treasures with the left aura marked with a Horizontal and Vertical Plus.
(This picture #2 has been cropped down, it was originally showing a half mile of mountain and was taken a mile away from the mountain)
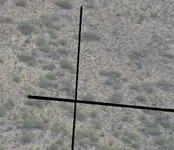
EXAMPLE Picture #3 : Picture #3 is the zoomed in picture of the same marked aura spot on the mountain as picture #2. (Picture #3 was taken from the exact same tripod spot as the original #2 aura picture was taken from (a mile from the mountain) with a much higher resolution Camera)
Notice how the Plus is NOT horizontal and Vertical on picture #3 but at an angle this is due to human error on the angle of the camera either on the tripod (not being level) or while taking the zoomed in picture by hand (Be very aware of this difference and compensate for it by using the bushes rocks etc. as guides just as I have in this picture)
(#6)
After Finding the Aura on the original Picture and transferring it to the second Much Better Picture with a plus mark, it is time to go to the aura site:
Using two people with walkies or phones, one person stays at the original aura picture tripod location with the marked zoomed in photo and the other person goes to the aura location on the mountain.
(Don't forget your drinking water)
(Important Make sure the Person on the mountain is wearing a:
(Neon Yellow Shirt) and (Sitting Down) so the person at the tripod spot can be more accurate in pinpointing)
The person (at the tripod spot where the aura was originally caught ) using binoculars pinpoints the person on the mountain with the plus mark on the zoomed in picture which should be the aura spot on the mountain (use the bushes trees etc. to visually match up the plus spot in the picture to the aura spot on the mountain) (getting the person dead on the plus/aura spot is critical for success, assuming that the plus was accurately marked on the picture as well)
(I have had to redo the plus transfer of the aura to the better picture on occasion to be more accurate)
After pinpointing the person on the plus/aura from the original tripod spot that you first caught the aura, take another zoomed in picture (with the best camera) of the person on the mountain in the neon yellow shirt sitting down. After pinpointing and getting the picture of the person on the aura spot/mountain have the person on the mountain build a marker at that exact pinpointed aura spot.
(Make sure the person while making the marker on the hill does not take from or disturb any logs or piled rock markers/cairns he/she might find on the hill near the aura as these could be very valuable clues put there by the Modern Day Sentinels maybe even marking the dig spot)
Then take that picture and look at it on your computer and match it up with your plus marked picture to see if the person was pinpointed correctly on the mountain before going out to the mountain in case there needs to be an accuracy adjustment.
At this point you should have 3 separate pictures of 1 spot on the hill (the original aura picture, the zoomed in and printed picture with a plus mark and the final picture of your partner in neon yellow on the spot) All of these should have been taken from the original tripod spot you caught the first aura from.
Next the tripod spot person goes out on the mountain with the person that built the marker on the mountain (together) and relocates the marker (this is not always as easy as it sounds since it looks much different from the tripod point of view then when actually on the mountain looking for the little marker, the builder of the marker is the only one who knows what the mountain looks like at the spot as well as what kind of marker he/she built)
My goal here is to help people find the many buried treasure locations (by using auras) and give everybody a better understanding of what kinds of markers you will find/see at actual real treasure sites (with pictures) since that is what has been so sorely missing in most of the books that have been published. (You can view the different markers found at treasure sites in my guide by clicking on the first link in my signature below)
Enjoy
(#1)
Now that I have covered the basics of vault treasure hunting, its time to cover the technical aspects of locating these treasures.
(#2)
The First thing to understand is that I use Auras to locate these treasures:
I capture these auras with a Pentax Optio w10 camera and have gotten over 100 long distance auras from different treasures with this particular camera (all from at least a half mile away from the mountain) however (There are different cameras that can capture these auras as well)
Ones I know for sure are the (iPhone 7) and the (Pentax Optio w30)
As long as the camera can take multiple pictures automatically called interval or timelaps shooting with a intervalometer, which means you can set a time in between each shot, on the w10 the minimum is 10 seconds in between each picture taken, and it will take a thousand pictures, it takes about 3 hours to get all one thousand pictures.
You need to make sure whatever camera you try that it has the ability to automatically take pictures without you taking the pictures yourself.
It is very difficult catching Auras even with a camera, these Auras are faster than lightning and happen in full daylight, this also makes them invisible to the human eye.
Many times it will take thousands of pictures to capture just one aura, even when you are taking pictures of a mountain that has multiple caches on it.
Here is how the auras are created, The Aura phenomenon:
There is intermittent radiation that comes from the sun and hits different areas of ground sporadically and this happens very fast within a hundreth of a second, if this radiation happens to hit on a buried treasure(s) and you happen to be taking a picture of that area within that 1/100 of a second (with the right camera) you will capture a Photon Burst/Aura that is a result of the radiation bouncing/reflecting off of the treasure. This also has to do with solar winds/geomagnetic storms which effect the earths magnetosphere.
Here is the Equipment that I use in order to capture the auras from the buried treasures.
You can buy these on ebay.
Camera Pentax Optio W10 (discontinued, must buy used)
2: (New Batteries) for the same camera and a (Charger)
2: (SD 2GB Memory Cards, Full Size not Micro) (NOT the SDHC cards)
1: (Tripod for the camera)
1: (SD Memory Card Reader with USB connection, for transfering pictures to your computer)
(#3)
How to Capture Aura(s):
(Camera Instructions for the Pentax Optio W10)
(Use a 2GB SD (not sdhc)
(Don't Forget to Format)
How to format the memory:
Install the SD card
Turn on camera by pushing and holding the small round button on top, then push the lowest button on back closest to screen (Menu Button). Then locate the 4 buttons surrounding a circle button the middle is the Ok button and the four around it are for navigating: First screen will be Rec. Mode navigate to the right then you are in settings navigate down and format is lit up, navigate right and then up and then hit the OK middle circle button and that formats the memory.
(Charge Batteries)
(Read the formatting instructions first)
Turn on Camera
Push bottom left button (Menu Button) closest to the screen and navigate down to recorded Pixels and set at 6M (7M if using the w30) by navigating right and using the OK button then go down to Quality level and set at 2 stars make sure to press OK to set it, this makes sure you get 1000 shots on your memory card.
Now push lowest left button (Menu Button) again to get back to the picture taking screen.
It should say you have close to 1300 Pictures (just over 1000 on the w30) available in the upper right with a 2GB memory card.
If you have issues with sunlight changing due to shade from trees and clouds its a good idea to set the white Balance for Daylight.(this option is in the menu just below the settings for the Pixels and Quality)
Now back to the Navigation buttons: Push the upper of these five buttons several times untill you see (Drive mode interval shoot on the screen)
Now Push the middle round OK button of those five buttons Twice until interval lights up in Pink.
The Interval needs to be set at 10 Seconds
Navigate down onto Number of Shots Navigate right and up or down to get 1000 shots if you are at 2 it will jump to 1000 if you go down one click, Make sure to Click OK button to set it. (Start time leave at 0) Click Ok again and the fields go grey (no more Pink) then it will go back to the ready to take a picture screen in a few seconds.
Now Hit the right Navigation button three times for infinity shooting this keeps it from running down the battery because of autofocusing on every picture. Make sure to Hit OK to set it.
If everything has been done correctly you should have a: (P in white in the upper left corner This is what programming mode it is in) (if using the w30 you must make sure the P is being used not the auto pict to change this you have to push the Mode button just under the OK button) (a no flash sign) (the interval shooting sign) and (the little mountain sign for infinty shooting) on the upper left of the camera.
There should be around 1300 shots available on the upper right or just over 1000 on the w30. (Not all 2GB SD Cards Hold the Exact Same Amount of Pictures, as long as it holds more than 1000 pictures your good to go)
Where to set up the camera
Set up the camera on a steady tripod around 1/2 of a mile from the hill.
(Look at Picture #1a for an example of the very best distance for capturing auras from a hill. (You can zoom in a bit from this distance also)

What's important is that you are close enough to see the Foliage/Trees etc. on the hills in the pictures.(you will need these later for alignment purposes)
Get at LEAST 1/8 of a mile of mountian in the picture, this increases your odds of catching an aura by covering lots of ground (the treasure is probably in a place your not expecting) also further away from the mountain helps for better pinpointing, this is very Important because you want to capture the entire aura on the mountain, if you are too close to the mountain, you may only catch a small part of the aura (because it is a photon/light burst bouncing off the treasure from the sun ) and catching only a portion of it can make the aura difficult to pinpoint on the mountain.
(Look at Picture #1b which is about a mile from the hill but zoomed in quite a bit) (This is the absolute furthest from the hill you should ever try to take pictures from)

(VERY IMPORTANT make sure to mark the tripod spot for later) Take pictures During daylight hours (while sun is up) (Do not point the camera towards the sun, you don't want colorful prisms of light on the pictures from the sun)
Then just zoom in or out on the hill and click the shutter button it will start taking pictures every ten seconds for about 3 hours. make sure to check/verify that the the camera is coming on every ten seconds for a couple shots (you will see it flash onscreen for a second while it is taking the picture, the screen goes black in between the shots.)
It can take up to ten thousand pictures to capture an aura even in a good treasure area.
(these auras are rare and hard to capture)
(Take these camera instructions with you on site, in case any questions arise about how to use)
(#4)
Here is what you need to be able to scan/look for an aura:
First you need a full size monitor/tv 19" is a good size.
Second, you need a Photo Viewer that is fast and also Overlaps one picture Directly over the last one shown. (Side Scrolling Photo Viewers Do Not Work)
I use Honeyview for this purpose, this is the ONLY way to find an aura as each picture is shown over top of the last one and allows you to see a small anomaly very quickly as you look through each picture that replaces the last one.
I use a simple magnifying tool on windows 10 from the Windows ease of access menu, this allows me in conjuction with honeyview to look at a specific section of each picture by magnifying it up to 300 or 400 percent while I am scanning through each photo for an aura.
The Picture before the Aura will have nothing and then the Next picture with the Aura and then the picture after the aura will have nothing on it, which is telling you the aura was just in that one picture.
Make sure that what you think is the Aura is not a Bird or a Bug or Pollen which can be in the air close to the camera. General rule of thumb, if you see something in your photos in more than 1 picture within a series of ten pictures its probably birds flying around the mountain or bugs/pollen close to the camera. The auras are much more rare than that. You will see a few white or cloudy blotches in some pictures (probably dust particals in or on the camera lens) here and there (up in the sky etc.) that are not treasure which is why it is imparative that you verify the aura with the markers at the aura's location.
In my area the auras are generally, mostly white with some black mixed in (as the aura burns out they show more black) Sometimes I will Catch a Gold Aura as well. (I ignore the black ones as they are generally birds) Remember these auras only last a split second.
(#5)
After finding an aura:
(print the aura picture) take that picture and a better camera back to the exact tripod spot you caught the aura from and (take zoomed in pictures of the aura spot with the better camera)
(Make an extra copy of your aura picture)
(Using the computer paint program) Make a plus (+) mark on the copied aura picture (using the line tool on the shapes toolbar, no freehand drawings) (the brightest part of the aura goes in the middle of the plus) Make sure the lines of the plus are exactly horizontal and vertical and very long for accuracy. Try to copy/transfer the exact location of the aura onto the new zoomed in picture with a plus (+) mark. (SEE VERY IMPORTANT BELOW and the Example Pictures) (Aura spot goes in the middle of the plus (+) on the new zoomed in picture) (be aware that you can easily be off up to 10 feet on the hill from human error as it is not always easy to make a perfect transfer from the aura picture to the zoomed in picture especially if the aura is big and not pinpointable) (Look for the brightest spot in the aura, usually that is the exact spot to put in the middle of the plus on your picture) (Print this zoomed in Plus marked picture)
(VERY IMPORTANT) Make absolutely certain that when making the plus on the new zoomed in picture that the ends of the plus are as long as you can get and touching bushes or something that is identified in the first aura picture, because taking the zoomed in picture will almost always be at a slight angle to the original aura picture, which means that the Plus mark lines will most likely not be horizontal and vertical (most likely the whole plus will be angled or tilted left or right) unlike on the first aura picture plus which has perfect horizontal and vertical lines, this can really throw off the location.
EXAMPLE Picture #2 : Picture #2 is a picture of 3 separate auras/treasures with the left aura marked with a Horizontal and Vertical Plus.
(This picture #2 has been cropped down, it was originally showing a half mile of mountain and was taken a mile away from the mountain)

EXAMPLE Picture #3 : Picture #3 is the zoomed in picture of the same marked aura spot on the mountain as picture #2. (Picture #3 was taken from the exact same tripod spot as the original #2 aura picture was taken from (a mile from the mountain) with a much higher resolution Camera)
Notice how the Plus is NOT horizontal and Vertical on picture #3 but at an angle this is due to human error on the angle of the camera either on the tripod (not being level) or while taking the zoomed in picture by hand (Be very aware of this difference and compensate for it by using the bushes rocks etc. as guides just as I have in this picture)

(#6)
After Finding the Aura on the original Picture and transferring it to the second Much Better Picture with a plus mark, it is time to go to the aura site:
Using two people with walkies or phones, one person stays at the original aura picture tripod location with the marked zoomed in photo and the other person goes to the aura location on the mountain.
(Don't forget your drinking water)
(Important Make sure the Person on the mountain is wearing a:
(Neon Yellow Shirt) and (Sitting Down) so the person at the tripod spot can be more accurate in pinpointing)
The person (at the tripod spot where the aura was originally caught ) using binoculars pinpoints the person on the mountain with the plus mark on the zoomed in picture which should be the aura spot on the mountain (use the bushes trees etc. to visually match up the plus spot in the picture to the aura spot on the mountain) (getting the person dead on the plus/aura spot is critical for success, assuming that the plus was accurately marked on the picture as well)
(I have had to redo the plus transfer of the aura to the better picture on occasion to be more accurate)
After pinpointing the person on the plus/aura from the original tripod spot that you first caught the aura, take another zoomed in picture (with the best camera) of the person on the mountain in the neon yellow shirt sitting down. After pinpointing and getting the picture of the person on the aura spot/mountain have the person on the mountain build a marker at that exact pinpointed aura spot.
(Make sure the person while making the marker on the hill does not take from or disturb any logs or piled rock markers/cairns he/she might find on the hill near the aura as these could be very valuable clues put there by the Modern Day Sentinels maybe even marking the dig spot)
Then take that picture and look at it on your computer and match it up with your plus marked picture to see if the person was pinpointed correctly on the mountain before going out to the mountain in case there needs to be an accuracy adjustment.
At this point you should have 3 separate pictures of 1 spot on the hill (the original aura picture, the zoomed in and printed picture with a plus mark and the final picture of your partner in neon yellow on the spot) All of these should have been taken from the original tripod spot you caught the first aura from.
Next the tripod spot person goes out on the mountain with the person that built the marker on the mountain (together) and relocates the marker (this is not always as easy as it sounds since it looks much different from the tripod point of view then when actually on the mountain looking for the little marker, the builder of the marker is the only one who knows what the mountain looks like at the spot as well as what kind of marker he/she built)
My goal here is to help people find the many buried treasure locations (by using auras) and give everybody a better understanding of what kinds of markers you will find/see at actual real treasure sites (with pictures) since that is what has been so sorely missing in most of the books that have been published. (You can view the different markers found at treasure sites in my guide by clicking on the first link in my signature below)
Enjoy
Last edited:
Crosse De Sign
Gold Member
- Joined
- Jun 19, 2013
- Messages
- 5,808
- Reaction score
- 5,903
- Golden Thread
- 0
- Location
- ~: Hell And Back :~
- Detector(s) used
- White's MXT ~ TM800 ~
- Primary Interest:
- Other
Nice camera, aura & locating guide. 

Crosse De Sign
Gold Member
- Joined
- Jun 19, 2013
- Messages
- 5,808
- Reaction score
- 5,903
- Golden Thread
- 0
- Location
- ~: Hell And Back :~
- Detector(s) used
- White's MXT ~ TM800 ~
- Primary Interest:
- Other
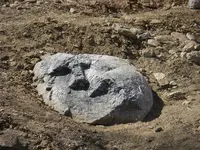
Here is a carved rock I came to that was right dead on an aura that I caught.
Notice the 7 an the lower left and the T and the shadow arrow in the middle that is pointing out the little shadow down to the left.
View attachment 1496557
Very nice carved rock & observations. How did you read this one,
& especially with it being right on the aura spot? Ever had a
carved rabbit laying right on a spot like that before?
Last edited:
Similar threads
Users who are viewing this thread
Total: 3 (members: 0, guests: 3)


