12 INCH TROMMEL BUILD

AzViper

Bronze Member
Sep 30, 2012
2,038
2,251
Arizona - Is there any other state worth visiting
Detector(s) used
Fisher Gold Bug Pro, Nokta FORS Gold, Garrett ATX, Sun Ray Gold Pro Headphones, Royal Pick, Etc.
Primary Interest:
Prospecting
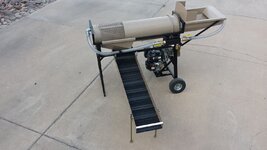
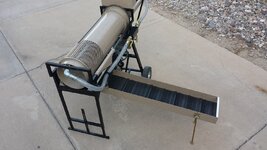
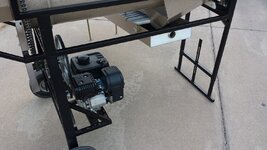
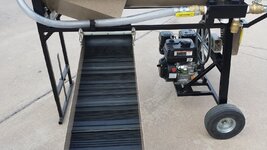
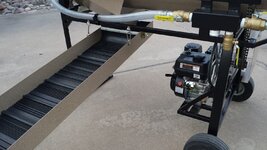
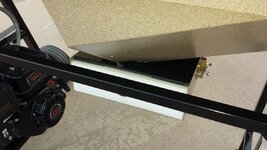
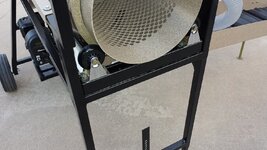
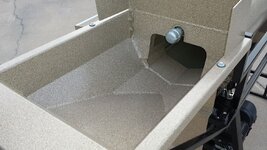
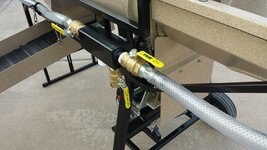
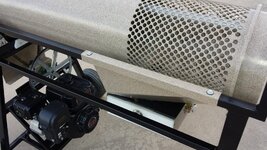
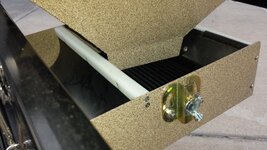
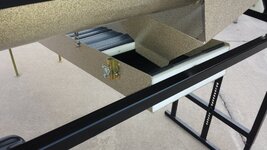
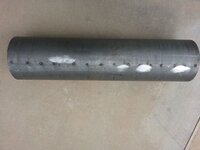
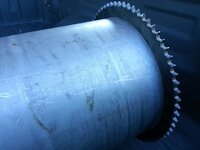
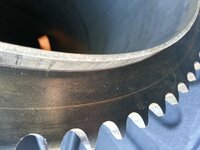
This thread has gotten very large and you will need to work through all the pages to view all the images of this build. The project started out to be completed quickly but family and medical issues popped up during the course of the build. Each of the 1434 holes were drilled by hand. This allowed for a much stronger cylinder over using expanded metal. The classifying area is much smaller than others used. More of the cylinder was reserved for breaking up and cleaning before heading to the classifier. Here are updated photos of the finished trommel.


Page 34 has all the photos of the finished trommel.


1.jpg 2.jpg 6.jpg 7.jpg
8.jpg 11.jpg 13.jpg 15.jpg
16.jpg 555.jpg 222.jpg 333.jpg


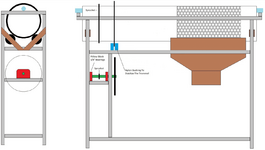
I will begin my trommel build soon. Been gathering ideas and have come up with a plan. I am a believer that the classification area does not need to be all that large. The idea is to wash and tumble the rocks/dirt prior to the rock/dirt arriving at the classification area. Furthermore The spray bar will be mounted inside the cylinder so that the rocks get washed properly while 3/4" angle iron welded in the solid section of the cylinder as shown in the diagram below. Using this method will allow the rocks to fall away while still agitating the rocks. There will be no issues with rocks climbing the walls of the cylinder due to centrifugal force while maintaining a cylinder RPM between 18 and 30 RPM's due to the RPM of the engine. My gear reduction will be, Engine 2" pulley to a 12" pulley, then a 1.625" sprocket to a 14.69" sprocket. At 1000 engine RPM the cylinder will rotate 18.5 RPM's. At 1500 engine RPM's the cylinder will rotate at 27.5 RPM's.

The cylinder will have 1/2" holes drilled in this configuration. 3/4 inch angle iron will be welded to the inside..

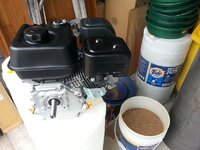
I picked up the rolled 1/8" cylinder. Will use the drill guide to punch mark where the holes will need to be drilled. The solid rolled steel cylinder will be strong due to its solid design and not made from 3 separate pieces of metal. After reading the reviews on the Predator 6.5 HP engine in the go kart forums it was a no brainer not to try the motor, if it does not work out then a Honda will be put in its place. Picked it up for $79.00 new.

w7ta.jpg sprocket3.jpg sprocket2.jpg lpnz.jpg

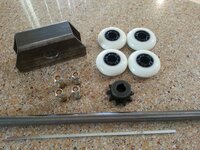
The 14" sprocket, 2" sprocket, 2" pulley, 12" pulley, 3/4" flange bearings, roller blade wheels are on the way. Everything else I can pick up locally. I have all the square tubing in the shop. Hopefully I can begin soon. I have a poker table to finish up for a client this next week.

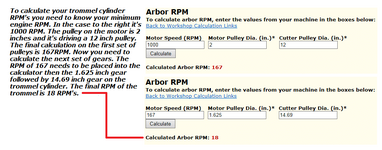
Here is a nice RPM / Pulley Calculator. Very easy to use. Just enter data into three of the four boxes to arrive either pulley size or RPM whatever you choose. If you need to use a secondary step-down reduction of RPM's make sure you use the RPM from your first calculation to get your final RPM. You can also download the calculators so it runs from your computer. EXAMPLE: In this example I knew my engine RPM, sprocket size, and pulley size. The calculator calculated my final cylinder RPM.

UPDATE: I added a new calculator for RPM's the old calculator was removed by the designer.

RPM CALCULATOR

RPM.png drawing.png Drill Temp.png
 

Last edited:
Awesome I have been slowly picking up spare items to build me a trommel one day in the near future, say by next year.....KEEP US POSTED as to how it goes!!
 

Are you planning on connecting the motor directly to the drive gear or are you going to install a clutch in line?
 

Why such a small classification area? All the commercial units seem to be full length?
 

Why such a small classification area? All the commercial units seem to be full length?

No need to have a large classification area. Everything that needs to drop into the sluice will in the 12 inch area that I have reserved for classification. The first 30 inches will have the angle iron welded as seen in my drawing. This area is designated for the washing and tumbling of the rocks. I have seen a handful of trommels with much smaller classification area. Commercially made trommels are over priced and as far as I am concern the reason they build the cylinder full length is that they are taking a cheap approach and using expanded metal. The approach I am taking with my cylinder is far superior than what's on the market and what I have seen in the forums. Yes it will be time consuming to drill the holes and maybe I should have paid to have the holes pre punched and then rolled.
 

Last edited:
Are you planning on connecting the motor directly to the drive gear or are you going to install a clutch in line?

Jog will be done like yours, but you have a gear reduction on your Honda. I will need to use a larger pulley to get down to the 18 to 24 cylinder RPM's. I understand your GX 160 has a gear reduction along with a clutch. I have seen plenty of trommels without a clutch. I may set it up so I have a lever to disengage the belt while starting.
 

Last edited:
No need to have a large classification area. Everything that needs to drop into the sluice will in the 15 inch area that I have reserved for classification. The first 30 inches will have the angle iron welded as seen in my drawing. This area is designated for the washing and tumbling of the rocks. I have seen a handful of trommels with much smaller classification area. Commercially made trommels are over priced and as far as I am concern the reason they build the cylinder full length is that they are taking a cheap approach and using expanded metal. The approach I am taking with my cylinder is far superior than what's on the market and what I have seen in the forums. Yes it will be time consuming to drill the holes and maybe I should have paid to have the holes pre punched and then rolled.
Yeah, after jog's thread,... I was kidding.

Were the angle running the whole length? If so, would you want holes in the classifier section where the angle will run?
 

Yeah, after jog's thread,... I was kidding.

Were the angle running the whole length? If so, would you want holes in the classifier section where the angle will run?

Post number 1 I address the length of the weld angle iron within the cylinder. As I said earlier the idea is to completely wash the rocks prior to the classification area. The 12" is plenty of length for anything smaller than 1/2" to fall through the 1400 plus 1/2 holes that will be in the classification area of the cylinder.
 

Last edited:
Why not just make your material stay in the hopper longer so it gets washed there first?
 

Why not just make your material stay in the hopper longer so it gets washed there first?

The idea is to get the material from the hopper to the trommel as quickly as you can to allow the trommel to do the work so that the user can continue to load the hopper. The pre-washing within the hopper is not going to scrub the rocks clean.
 

Last edited:
Hello AZViper, I like you idea/ design and look forward to seeing your results. One thing I would do to your pipe is to weld the seam and not rely on spot welds. You might also want to add a welded band at each end around the pipe. Just a thought. Breaking down out there is no fun so try to anticipate what could happen and 'fix-it' before leaving.

HH, yelnif
The Jog's build for friend thread mentioned the 14" sprocket at surplus center. That would be 1 ring. I haven't seen it discussed, but most trommels I've seen have a ring at the input to prevent water and material from flowing out the front. I guess you could cut the sprocket to perform both duties.

Some trommels (certainly not most) that I've seen have a nugget catch at the poop end which would reenforce the back end.

Not sure where the 14.69" sprocket is measured from. Whether its the overall diameter or from the saddle of the teeth of the sprocket. Until it arrives I will not know. If its the overall diameter then I have 14.69" minus 12" = 2.69" divided by 2 = 1.345" that will be raised above the cylinder. Parts are slowly trickling in. I need to pick up a fresh bottle of 75/25 mix of gas for my TIG and MIG welders. The flange bearings and sealed bearings for the wheels will be here this week. I made up the flange bearing cradle from 2" x 3" tubing I had in the shop. Once the bearing are here I will be able to drill and get them aligned and mounted. The plan is to make the cradle adjustable so that I can make fine adjustments to the chain tension. Although this will also make a change to the 12" pulley. I believe I will make the motor mount adjustable so that I can make tension adjustments on the pulleys/belt.

lv27.jpg
 

Last edited:
The idea is to get the material from the hopper to the trommel as quickly as you can to allow the trommel to do the work so that the user can continue to load the hopper. The pre-washing within the hopper is not going to scrub the boulders clean, the tumbling and water being jetted onto the boulders will. The nozzles I will be using spray in a circular pattern. I will have 6 mounted on the spray bar within the solid section of the trommel and 3 within the classification area.

So you have said my trommel spins to fast and you are going to slow yours way down. If the trommel is spinning real slow and you keep stuffing the hopper won't the material get backed up or overload the drum? Sounds to me like you will have to feed the hopper at the same speed as what the drum is turning, "slow".
 

So you have said my trommel spins to fast and you are going to slow yours way down. If the trommel is spinning real slow and you keep stuffing the hopper won't the material get backed up or overload the drum? Sounds to me like you will have to feed the hopper at the same speed as what the drum is turning, "slow".

Remember what you have said, Angle, Angle, Angle of the trommel determines the rate of flow not the speed of the cylinder turning. I was not the only one who said it was spinning to fast. My trommel will run about the half the speed of your trommel. There so many variables one can do to the inside of the cylinder. I like your design but prefer the spray bar on the inside.
 

Last edited:
Not sure where the 14.69" sprocket is measured from. Whether its the overall diameter or from the saddle of the teeth of the sprocket. Until it arrives I will not know. If its the overall diameter then I have 14.69" minus 12" = 2.69" divided by 2 = 1.345" that will be raised above the cylinder. Parts are slowly trickling in.
If you click the Drawing tab on Surplus Center - 50X72B 50 PITCH 72 TOOTH SPROCKET it opens a window showing overall diameter or outside tooth to outside tooth.

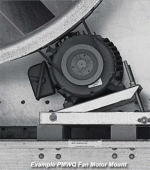
Hanging hinged motor

pmwq_large_series_motor.gif

But you've probably seen that before looking at those gorgeous tables. Pretty common with electric belt driven in woodworking.
 

If you click the Drawing tab on Surplus Center - 50X72B 50 PITCH 72 TOOTH SPROCKET it opens a window showing overall diameter or outside tooth to outside tooth.

But you've probably seen that before looking at those gorgeous tables. Pretty common with electric belt driven in woodworking.


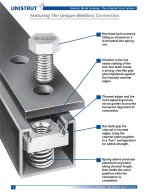
Thanks... I had looked at the page but had not clicked on the drawing tab. Common in exhaust fans, coolers, FCU's, table saws, etc. Until I start tack welding everything together I have yet to decide on the adjustment of either the flange bearing cradle or engine. Whatever I do it will be very simple. I may use non plated Unistrut (For Welding) where the engine can slide either direction on the Unistrut then bolt down. This may be an option for the bearing cradle as well. I use Unistrut all the time.

Unistrut_2009_No-16_6.jpg
 

Hello AZViper, I like you idea/ design and look forward to seeing your results. One thing I would do to your pipe is to weld the seam and not rely on spot welds. You might also want to add a welded band at each end around the pipe. Just a thought. Breaking down out there is no fun so try to anticipate what could happen and 'fix-it' before leaving.

HH, yelnif

Yelnif the entire seam will be Tig welded. The spot welds are in place to hold the seam together temporary. Thanks for your suggestion on beefing up the ends of the trommel.
 

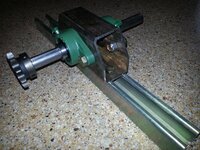
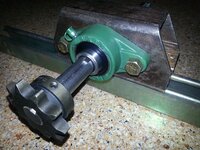
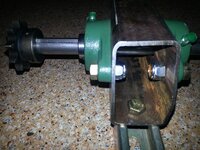
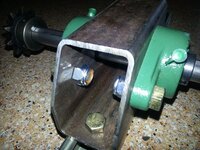
Here is the cradle with bearings attached. I used four separate bolts to mount the bearings. Using two bolts passing through the tubing you risk collapsing the rectangle tubing unless spacers are used on the inside of the tubing against the walls of the tubing. I have decided to use Unistrut to bolt the cradle to the Unistrut, this will allow for slight chain tension adjustments by sliding the cradle away from the center of the cylinder to tighten the chain tension. I will use Unistrut as motor mounts also this allowing me to slide the motor to make tension adjustments to the belt/ pulleys. Granted the shaft is longer than I need and will cut so that the sprocket and pulley are as close to the bearings as possible so there is less stress on the shaft.

crhg.jpg 05vh.jpg 7jig.jpg yssh.jpg
 

Yelnif the entire seam will be Tig welded. The spot welds are in place to hold the seam together temporary. Thanks for your suggestion on beefing up the ends of the trommel.
MDVGA posted this in the sluicing forum. Thought the ends were rather clever idea. It also shows a slow rotational speed.


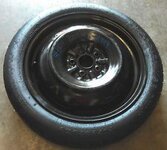
So instead of welding a band or 16" bike tire to the outside to use a serpentine belt, use a trailer tire or donut spare from a junk yard.

m33RYXSaKHO4zq74LuM5rhw.jpg
 

Top Member Reactions

Users who are viewing this thread

Latest Discussions

Back
Top