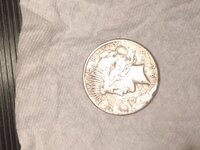
THIS is How to Clean BLACKENED Silver Coins

BuckleBoy

Gold Member
Jun 12, 2006
18,132
9,700
Moonlight and Magnolias
🥇 Banner finds
4
🏆 Honorable Mentions:
2
Detector(s) used
Fisher F75, Whites DualField PI, Fisher 1266-X and Tesoro Silver uMax
Primary Interest:
All Treasure Hunting
Hello All,


I don't understand why folks take baking soda and rub it into their blackened silver coins, removing metal, and destroying them for future generations of people who will inherit them. I also don't understand why folks buy expensive silver polishes, cleaners, or dips for anything silver, including flatware or fine dining silver. You don't need it. All you need is hot water, baking soda, and aluminum foil. Here's why:

Polishes, Scrubs, Cleaners, and Dips remove the tarnish from silver, but they also remove a tiny amount of silver as well, along with that tarnish. In the case of "touchless" dips, they remove less good metal, but they still remove some along with the tarnish that they eat away. In the case of polishes, you are removing some good silver through rubbing. Same with a baking soda paste used to "polish" a coin, destroying its value forever. In most cases, you can tell that the coin or object has been cleaned because it is scratched or looks unnatural.

Instead of wasting your money on polishes or dips, take a small glass bowl and line it with aluminum foil, shiny side turned up.
Boil water on the stove or in the microwave
Put a couple tablespoons of baking soda in the bottom of the bowl which was lined with aluminum foil
Drop you silver that you'd like to remove the tarnish from in the bowl on top of the dry baking soda
Fill the bowl with a couple inches of boiling hot water over the item you're cleaning
Wait 2-5 minutes. You should smell a rotten egg smell, or perhaps might see yellow flakes floating on the water. This is sulphur, and it is not dangerous.
Take the coin or item out of the water (careful, it's very hot!) and turn on the tap water in the sink (drain plug in!)
Rub the coin gently between your fingers under running water to remove the tarnish that remains (this is no more destructive than normal circulation wear on coins)

Repeat the above sequence of steps as necessary until the coin no longer bubbles in the baking soda/boiling water solution in the bowl. At that point, it's done all it can do.

The secret to this is that this is the ONLY cleaning method for silver coins (AND beach-dug silver of any sort!) which does not remove good metal as well as tarnish. This method actually turns the tarnish BACK INTO SILVER! Here is a website which details the chemical reaction taking place:

Remove Tarnish from Silver

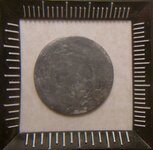
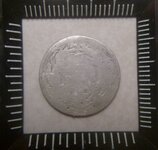
And here is an 1875 Seated Dime I dug the other day. Before/After photos. Please feel free to post your own before/after photos on this thread if you try this cleaning method. I'd love to see your results!
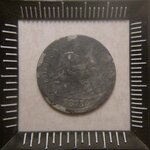
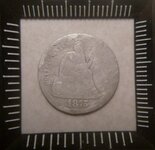
HPIM4900.JPGHPIM4902.JPG

HPIM4901.JPGHPIM4903.JPG

Cheers,

Buck
 

Last edited:
I have used a similar treatment on iron artifacts that electrolysis would have been too harsh on. I use Distilled water and baking soda as my electrolyte and wrap foil lightly around the artifact....yada yada....in short it is called galvanic coupling and I never thought to try something similar on coins but I like your results.
 

Hey Buck!! Thanks for the wisdom!! I'll give it a try!! Hope you're well!! GOOD LUCK and GOOD HUNTING!! VERDE!!
 

Hello All,


I don't understand why folks take baking soda and rub it into their blackened silver coins, removing metal, and destroying them for future generations of people who will inherit them.

Being a tad overly dramatic aren't you? We aren't talking about ultra rare, MS-65 grade coins we are cleaning. They are common coins which were carried in pocket change (the horror! ) for years and often decades before going into the soil for many more decades to follow.

baking soda isn't removing metal, and it isn't affecting value.

Having other methods of cleaning is always a good thing, but no reason to act like it's the ONLY way.

Baking soda polishing most certainly is removing metal. Anytime you polish something, metal is removed. How do you think it gets shiny without a chemical reaction? Why make them worse (collector value) through a cleaning method just to gain a little eye appeal for your display case, if you don't have to make the collector value go down in order to get that same eye appeal?

The reason I am so ecstatic about this cleaning method is because after using this, I don't understand why anyone would use any other method for silver coins. Unlike copper coins, which vary greatly in how they survive from area to area geographically (sugar sand, deep south, north, waterlogged soil, clay soils), silvers pretty consistently bear very little heavy corrosion when dug unless salt is present. At most, they will be tarnished. This method turns that tarnish back into silver.

If you own anything that is silver that you buy pastes, dips, or polishes for (like silver dinnerware), why pay much more money for those expensive chemicals when this method does the same thing for only a couple bucks in cost, and is also safe and non-toxic.

I encourage you to be open minded and try this method, look at the coin with a magnifying glass and hold it in your hand afterward and compare the results, rather than being negative without giving this a try. That's the difference between someone who wants to contribute something to this forum and one who wants to pick a fight. Post some before/after photos for everyone and we can all have an honest dialog about this cleaning procedure.

Most of my cleaning methods I've developed over 22 years of detecting. So rather than experimenting (wonder what happens if I squirt ketchup on a dug coin?), I stick with what works with me. And I am generally excited to share that, not only on this forum, but in dozens of metal detecting articles in magazines to try to help save others all the cleaning method disasters I've made throughout the years.

Best Wishes,

Buck
 

Last edited:
I have used a similar treatment on iron artifacts that electrolysis would have been too harsh on. I use Distilled water and baking soda as my electrolyte and wrap foil lightly around the artifact....yada yada....in short it is called galvanic coupling and I never thought to try something similar on coins but I like your results.

I was hesitant to post this method, but after cleaning dozens of dug, blackened silver coins in this manner, I've come to realize that the cleaning method is basically idiot-proof. The reaction only involves the silver sulphide, and it stops once the coin is devoid of tarnish. In other words, you could leave the coin in the electrolyte forever and it would not harm it. What strikes me is that the coins look natural afterwards, like they've come from circulation, not dug out of the ground, and certainly not unnaturally shiny or "whizzed."

Best Wishes,

Buck
 

I have seen silver coins that came out of New Orleans after hurricane Katrina that were completely black from sitting in water after the flooding. This would have been the way to clean them.
 

Thanks for the tip Buckleboy and I hope one day to find something worthy of cleaning with this method. I actually got really lazy a week or so ago and lined our laundry room sink with foil and did this to a few pieces of silver that are in a set I inherited. It did the trick but I think next time I will use silver polish when I wanna burn a few calories.
 

Last edited:
Thanks for this post Buck, here's a coin that I'd like to remove the 'field black' from! :thumbsup:
Dave
 

Attachments

  • 20141130_195124-1_resized.jpg
    20141130_195124-1_resized.jpg
    82.2 KB · Views: 1,011
  • 20141130_195141-1_resized_1.jpg
    20141130_195141-1_resized_1.jpg
    70.6 KB · Views: 824
This post is very educational and the instructions are clear and precise. I have used this method for years and it does work.
 

Thanks for this post Buck, here's a coin that I'd like to remove the 'field black' from! :thumbsup:
Dave

Dave,

That should turn out very well. Make sure the water is boiling. Careful removing the coin, but leave it in there until the bubbling stops. At that point it's done. Would love to see a before/after photo.

Cheers,

Buck
 

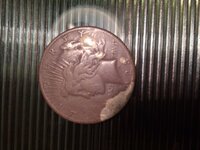
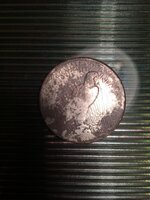
!!! IT WORKS!!!!!

BEFORE:

IMG_2114.JPGsilver dollar.jpg


AFTER:

IMG_2139.JPGIMG_2138.JPG


I love it! The damage you can see to the left of the date and to the right of her head is from a baking soda paste i applied ( bad idea!) before i heard about this method.

This worked great. it took multiple applications so dont give up hope after the first couple times!
 

You can do the same thing without all the fuss & fanfare by hawkin' some saliva on the shiny side of some foil - laying the coin on it - folding it over and squeezing with fingers... If you smell rotten eggs and feel the coin heat up ya know its working. Repeat with a new strip of foil and another hocker until you get the desired results. No joke lol! Eventually it will be as clean as its gonna get and will no longer make the rotten egg smell or produce heat. However I'd suggest a very thorough soap and water washing for the hands, and the coin afterwards lol!. No need to wash dishes or search for ingredients ;) So easy a caveman can do it!
 

BEFORE:

View attachment 1096572View attachment 1096573


AFTER:

View attachment 1096584View attachment 1096585


I love it! The damage you can see to the left of the date and to the right of her head is from a baking soda paste i applied ( bad idea!) before i heard about this method.

This worked great. it took multiple applications so dont give up hope after the first couple times!

That's a GREAT result! I agree, don't give up. The hot water helps speed things along, so multiple applications are sometimes needed if the coin is really tarnished.

Congrats--and also a BIG congrats on digging that great silver dollar!

-Buck
 

Ill try to be short, in my comments

Last Sunday I dug my first SL Quarter it's a 1925 'Full date ' & in est, A solid F-12 Condition.
I know it's about a $ 10 Coin.
Since it's mt first , I likely would not take $200 For it ,'Crazy Right'?
Any how When cleaning my older better cond, Silvers I hate nothing more than putting those micro scratches on the coin's surfaces .
I usually use the softest Make up brush to remove the dirt & noticed that even the softest brush can leave those pesky scratches.
My ? is There is Brown areas on the coin 'that i,m pretty sure is dirt stains that a tooth brush would remove but also leave those scratches.
In your opinion would do you think this cleaning method will work well on such a coin ( not black but brown areas esp, in the lettering).
I wrote down the Directions & am going to try this method tomorrow 'don't party /Drink anymore so I should be up to it'

As you likely can tell from my other posts in C&P I tend to worry a-lot. --Oh well Ill live.
Ill check this forum before I do it in case you have had bad experiences with dirt still on the coin.

Let you know how it turns out.

Happy new Year
davers:thumbsup:

I've found that soaking then blasting water on dug silver coins usually loosens and removes any dirt in the letters and designs on the coin. I use this method specifically for tarnished silver.

I also use a makeup brush for removing dirt, and I stab at the coin with the brush (under running water), rather than rubbing with the brush. Works well :)

Best Wishes,

Buck

Thank you for the quick reply.
I "May" try to take some before & after pic's so you can see what I describe .
We have a-lot of Red clay in our N Ga,. dirt and it's kinda like a reddish Stain.
Whatever happens I won't blame you.:thumbsup:

Funny I also use hard running water to get "most" dirt off my Rare Dug Silver even tried Using a Can of Compressed air W/The tip underwater 'to blast with water' worked Well -Thought about using the hose but that would likely end with me having to find said coin all over again.

GL In 15
Davers
 

Thanks BB .

It Worked just Fine.:thumbsup:
 

Top Member Reactions

Users who are viewing this thread

Back
Top