UPDATE:
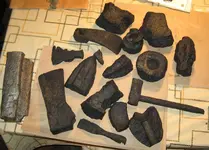
I have decided that I greatly prefer Apple Cider Vinegar (ACV) for cleaning iron relics. I do still dip them in EvapoRust afterwards to displace the water, let them air dry (the evaporust keeps them from flash-rusting), then bake in the oven and season while hot with a thin coat of Crisco.
My original post is below, praising Evaporust. I still like the product, but it is just to expensive ($22/gallon for Evaporust vs. $5/gallon for Apple Cider Vinegar)
Regards,
Buck
Original Post:
Hello all,
Put away the rubber gloves, the belt sanders, the toxic chemicals, the risk of shock, dangerous fumes, and expensive copper tubing. I broke down and tried something this week and was quite pleased with the results. The product is called EvapoRust, and it is for sale in most auto parts stores. It has no toxic fumes, is PH neutral, biodegradeable, and removes rust like a champ.
This method is a little more expensive in the long run than electrolysis, at $22/gallon for the product--but the starting cost of a good electrolysis setup is easily twice that amount. Therefore, I would reserve this method for gun locks and pieces, ramrods, trade axes, and relics that are composed of several independent pieces of different metals including iron (iron padlocks with brass key escutcheons, pocketknives with brass, gutta percha, or synthetic sides, guns with brass parts, etc.).
This product will only react with iron oxide (rust). It will not remove good iron (unlike electrolysis, which removes iron as well as rust). The process works slowly, and it needs very little attention from the user--so it is possible to remove a relic if it looks like it is getting thin (didn't have much good metal left in the first place). If you let the product air-dry on the relic, it will keep it from rusting for another week or two, so you have time to think about how far you wish to go.
EvapoRust leaves the metal looking very grey in color (unlike the black look of electrocuted iron). I will be baking these relics with crisco or oil in the oven after using EvapoRust (much like seasoning a cast iron skillet), so they will get a little darker in during that final process.
Iron that is pitted deeply by rust will still show major pitting after using EvapoRust. Iron that has a light layer of rust will come out fairly smooth. But this is no different from electrolysis, which leaves the same pits unless you stop it prematurely and end up with rust spots still coming through.
This is the ONLY way I have found to remove rust from the Insides of gun parts, lock plates, and the handle holes in antique tools. Electrolysis just can't do that.
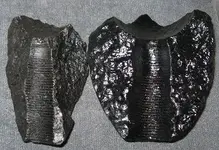
So, here are the results--followed by a few tips. I tried this on a cast iron stove leg that had a nice design. Before and after photos:
View attachment 440977
View attachment 440978
All of the rust is gone, and it is ready to be "seasoned." I will post another photo after the seasoning is done.
A few tips: You must SUBMERGE the relic in the product. So this means that the large relics will use much more product than the small ones. I used half a gallon on the stove leg. Due to the cost, I have begun grouping my relics by size. The bigger ones better be darned good ones to get the EvapoRust bath. The small ones, not as important decision because they will take less amount of liquid to cover them. Doing large, really rusty relics will be expensive! This is because you will probably have to change the liquid once. A good rule of thumb is 2 times the amount of liquid to cover the relic. I could do two old farm tools with one gallon (likely not worth 10 bucks each), but I could probably do 4 lock plates from muskets with the same amount (Well worth the $5 investment per lock plate). Or I could do a dozen small horse harness buckles or gun tools with that same gallon. You can always figure out how much you'll need by submerging the relics in water and then pouring the water off into a measuring jug and remembering that you'll need twice the amount to finish the job.
Second, the product's effectiveness becomes greatly reduced after it gets totally full of rust and turns black. You can minimize the amount of rust in the product by taking the relic out of the bath periodically and scraping loose rust off and washing it down the drain. This also means that as the very first step you should knock as much rust off the relic as possible before putting it in the bath (provided it isn't fragile).
I have had good luck with ziploc baggies to submerge the items. I have also used marbles to raise the liquid level to cover a relic if my container has a lot of empty space around the relic.
Next tip: the product Does evaporate, so whatever you have the relic bath in should be sealed if possible--even if just with plastic wrap.
Update #1: I tried the product on an iron padlock with a brass keyhole, and the product started removing the rust, yet left the green patina of the brass intact on the face of the lock. So it does not appear to affect any other metal besides rust. (I allowed the lock to soak overnight.) 
One last thing--if you have previously oiled a relic, then EvapoRust will NOT work on it. I have tried to touch up some minor rust spots on items I had already "seasoned"/oiled, and it was not effective. Evidently the oil interferes with the product's ability to remove the rust.
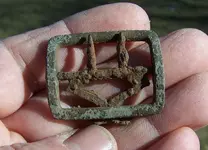
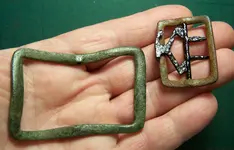
I'd love to know your experiences if you try this. Please post to this thread. Now it's time for me to clean some horse tack. I really like the large "D" buckle. The tongue is frozen in place with rust. I have never had much luck with electrolysis on small buckles like the rectangular one in the photo below. So it'll be interesting to see how it turns out. Starting them today--and the "before photo" is below:
View attachment 440979
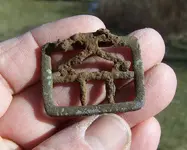
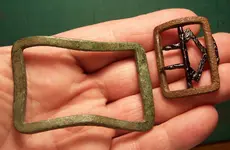
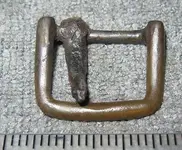
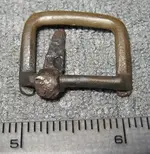
Update #2: The small buckles are finished. Now working on the stirrups in the first photo above. The D-shaped buckle's tonuge now turns and slides freely.  These were originally the same shade of gray as the stove leg "after photo" above. After heating in the oven, applying a thin coat of crisco, and baking for an hour, they look exactly the same as a piece that has undergone electrolysis.
  View attachment 441855
View attachment 441856
Regards,
Buckleboy



 These were originally the same shade of gray as the stove leg "after photo" above. After heating in the oven, applying a thin coat of crisco, and baking for an hour, they look exactly the same as a piece that has undergone electrolysis.
