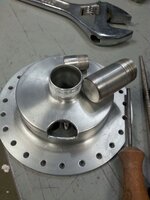
pulse valve mineral jig build... need valve seat design help

spudnick

Jr. Member
Feb 23, 2016
65
22
ALBERTA
Detector(s) used
Tesoro Lobo SuperTRAQ
Primary Interest:
Other
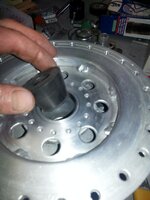
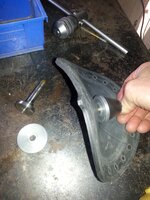
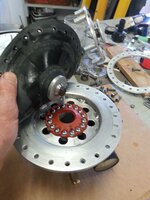
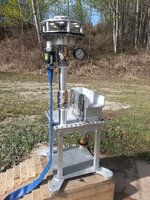
Howdy all, i am in need of valve operation ideas for a water powered pulse valve . I have a mostly built mini portable jig , but i am unable to get the pulse going. It will only vibrate at best.. I have a video of it, will try and load it....Heres a few pictures for now.. 20160503_130231.jpg20160503_185948.jpg20160503_201432.jpg The red 3/16 silicone seal with a aluminum disk was my first valve seat seal attempt. Then i changed to a rubber cone shape seal with a tight fit to the discharge pipe. Both attempts were similar. The water pressure lifts the valve enough to leak and thats it. Just sits there and leaks. Haha. lol. Any advice would be greatly appreciated.... Thanks alot .. Ken P.S.... Thanks to >Jim in Idaho < for his help and knowledge on mineral jigs.. 20160502_113523.jpg
 

I'm not too familiar with this sort of device, but I know of a very reliable idea that might help. I'll try to describe the thought but please don't expect too much.

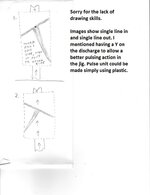
Imagine a water line that comes to a Y. One outlet continues to your jig while the other outlet runs a line back to the water source, assuming this is a recirc system. Inside this Y is a flipper valve - water loads up and pressurizes one side, then the valve flips and directs water through the other side of the valve. You would adjust your pulse modulation by varying the water pressure, or by changing the size of the valve (trial-and-error). ....Think of riding in a car with your hand sticking out the window. You turn the leading edge slightly up and the air wants to force your hand further up. Lower the edge of your hand and air pressure forces your hand down.

scan0002 - flipper sketch 1.jpg
 

A lot of firsts for me today..My first thread posting, my first cell phone video , my first youtube video post. haha. My apologies if the video seems amateurish, was the best i could do... kcm, your drawing is good, easy to understand. The analogy of a side window wind current is a flash back for sure.. Lol. .Think we all been there and done that .. will jot down your ideas on my note pad as they are of interest.. Thanks for the reply... Ken
 

Sorry I can't watch the video - cellular data limits, you know. :crybaby2: I can download them when I go to town, but there sssooooo many others to download that I never get them all.
I've seen videos of other similar looking jig systems - the upright style; not the shot in the box style. Not exactly sure how the upright units get the pulsating action, but it's awful hard to beat simplicity. This design "should" work for either type device.
 

I've got a couple of ideas. I think your diaphragm may be too soft for it's diameter. The movement on the valve is small...you don't need that much flex in the diaphragm. On the valve, I'd try a flat valve...get rid of the taper. When you make the changes, do them, on at a time. I'd change the diaphragm first. Just make the movable portion of the valve a large plate. Leave about 1" around the edge for flex. You could glue rubber to the bottom of the plate where it contacts the top of the pipe, to act as a seal. Or, use a thicker diaphragm material, and let the diaphragm act as the valve seal. Maybe the top of the pipe needs to be larger in diameter, too. That would allow a small movement of the top plate to allow a fairly large volume of water to flow momentarily, which is what you want.
Jim
 

Last edited:
Maybe think about using a hydraulic ram pump setup to create the pulse action to the diaphram. I believe you can set the pulse rate by changeing the input water flow pressure.
 

I've got a couple of ideas. I think your diaphragm may be too soft for it's diameter. The movement on the valve is small...you don't need that much flex in the diaphragm. On the valve, I'd try a flat valve...get rid of the taper. When you make the changes, do them, on at a time. I'd change the diaphragm first. Just make the movable portion of the valve a large plate. Leave about 1" around the edge for flex. You could glue rubber to the bottom of the plate where it contacts the top of the pipe, to act as a seal. Or, use a thicker diaphragm material, and let the diaphragm act as the valve seal. Maybe the top of the pipe needs to be larger in diameter, too. That would allow a small movement of the top plate to allow a fairly large volume of water to flow momentarily, which is what you want.
Jim
I think the diaphragm is acting like a spring and damping out the valve action. That, along with the valve leaking, is why it's not working. A little leaking through the valve probably wouldn't matter if the diaphragm is solved.
Jim
 

I've got a couple of ideas. I think your diaphragm may be too soft for it's diameter. The movement on the valve is small...you don't need that much flex in the diaphragm. On the valve, I'd try a flat valve...get rid of the taper. When you make the changes, do them, on at a time. I'd change the diaphragm first. Just make the movable portion of the valve a large plate. Leave about 1" around the edge for flex. You could glue rubber to the bottom of the plate where it contacts the top of the pipe, to act as a seal. Or, use a thicker diaphragm material, and let the diaphragm act as the valve seal. Maybe the top of the pipe needs to be larger in diameter, too. That would allow a small movement of the top plate to allow a fairly large volume of water to flow momentarily, which is what you want.
Jim

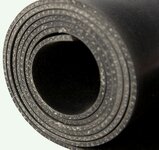
Good ideas Jim !!!.. the diaphragm in the picture and video is 2 layers of tractor tire tube, glued together. I am looking for a reinforced rubber , like conveyor belt, maybe 1/8 " single ply ? That would stiffen things up. Will also try the flat rubber seal on the disc as well on the main body. The larger disc idea makes sense as well.. Its on my list .. Now all i need is the time to do it. ..Haha ..... thanks for the reply
 

Maybe think about using a hydraulic ram pump setup to create the pulse action to the diaphram. I believe you can set the pulse rate by changeing the input water flow pressure.

Thanks for the reply Mike, The Hydraulic ram concept delivers a lot of force, amazing how far they can move water. I am using a small 1" gas powered centrifugal water pump to supply the diaphragm valve .That pump will be my hydraulic ram force. The diaphragm valve should act as a trip mechanism, similar to a hydraulic ram trip valve. But in reverse. These 2 concepts have similarities for sure... This thread is like a Think Tank.. nice to shoot around a few great ideas... I do appreciate it for sure. thanks again to every one ... Ken
 

I think the diaphragm is acting like a spring and damping out the valve action. That, along with the valve leaking, is why it's not working. A little leaking through the valve probably wouldn't matter if the diaphragm is solved.
Jim

Yes, i can get my head around that for sure Jim.. and making changes one at a time is good advice for trouble shooting.. I did order 3 square feet of 3/16 " cloth reinforced rubber sheet yesterday, for the main diaphragm gasket. While i am waiting on delivery, i will make wider diameter compression disks, they would cover more diaphragm rubber and provide more seal surface area. What are your thoughts on seal hardness ; soft (silicone) would seal easier, harder rubber ( shore A70 ) would take the continuous hammering and may be easier to mount ? Thanks in advance. cloth reinforced rubber 1.jpg
 

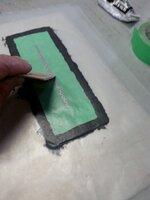
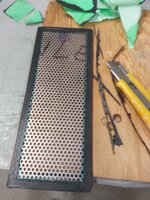
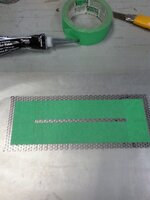
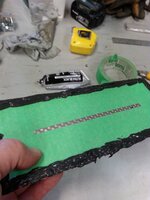
Make Your Own Gasket..( For all the handy do it yourself people.). ..Here is the rv tube type silicone gasket method i used on the screen box punch plate screen. Cover the areas you dont want silicone on with painters tape,, apply silicone where needed,, place on wax paper,, add silicone to other side,, place wax paper on top,, spread with a straight edge.., Let dry for 2 days,, or more.. Peel off wax paper,, trim excess silicone.. Done.. You get a uniform thickness, and a clean manufactured look. Lol.... Ken20160409_172425.jpg20160409_173624.jpg20160409_174345.jpg20160411_171116.jpg
 

Ken, that is a terrific system for making gaskets! I'm going to incorporate that into my jigs...thanks for the great idea!
On your pulse jig....I think what has happened is the leaking valve made you increase the spring strength to try to make it quit leaking. The reason it doesn't pulse is the spring is too strong. As you decrease the spring adjustment, the valve starts to vibrate. That means it's getting closer to pulsing as the spring is decreased. The entire problem probably rests with the valve design. Solve that, and you'll probably have a working setup, without changing anything else.
jim

That is Super Jim,, i feel better as i have been picking you brain for info on jigs for the last many months on different threads,. Lol. ..Here is a few more pictures on the screen box assembly... I do have many pictures stored on building this jig from scratch. If you or anyone need a specific detail on building technique , material type and or method on what ever., Just ask.... Ken

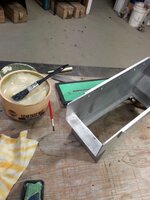
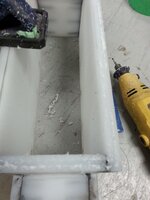
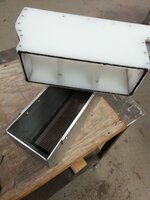
20160417_221539.jpg20160418_082324.jpg20160418_091350.jpg

I am a big fan of car paste wax as a release agent , rub it on and off with a cloth on parts you don"t want an adhesion to. And you get a clean,non greasy coat that even 2 part epoxy doesn't even stick to the areas. .The bottom of the polypropylene screen box liner was center grooved with a ball cutter using a dremel tool. I then applied a bead coat of silicone ,which creates an " 0" ring type seal. I let the silicone set up for an hour, then set the plastic box in place. Let it sit again with its own weight for 6 hours , then pressed firmly in place, and installing the side bolts to secure in permanent position .
 

Last edited:
Good job Spud!! It's nice to run across the inventive type folks - they're gettin' far to scarce nowdays!!

2 thumbs up! :icon_thumleft::icon_thumright:
 

I really like your aluminum work, Ken. I'd like to build one of my mineral jigs from that material, but don't have the skills. I'm stuck working with ABS, which isn't too bad.
Jim
 

Good job Spud!! It's nice to run across the inventive type folks - they're gettin' far to scarce nowdays!!

2 thumbs up! :icon_thumleft::icon_thumright:

kcm, we need more folks like you, i have read a few of your posts on other threads. You are always helpful and leave positive comments and feed back. very nice to see. And i noticed on your profile you have a tesoro silver uMax. So this is for you.. and its probably not even your birthday. Haha.. Ken

20160510_144149.jpg20160510_144615.jpg20160510_124139.jpg

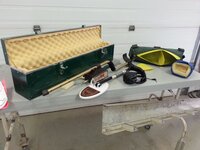
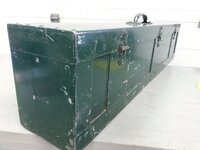
Metal detector protector case build. .(. I built this case about 25 years ago, so i have no construction pics to share..) and ( yes i am old. Haha. ) The green box is all aluminum , made from recycled commercial "C" framing. Which i picked up at the scrap yard.. It is a very rigid alloy that does not want to bend.. There is a similar piece in the picture coming up from the table leg for comparison ..( same material as i used to build the mineral jig screen box ).. The Top, Bottom and Ends are "C" channel.. Notice how the ends wrap around to the front and back . That design adds a lot of strength.. No welding required as it is fastened with rivets, and a few handle ,hinge bolts.. So all you need is to drill a few holes. .The top lid over laps the side walls , then rest on support plates to latch down closed. This adds strength again. I have used this box for a step and sitting bench many times. Very, sturdy........................................................................

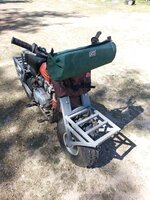
The green fabric case to the right , i find very handy. I placed a sheet of thin yellow plastic curled up inside the bag. Cut 2 plastic circles for end caps. The blue bag with foam liner slips over the control knobs for protection and water proofing. The measurements are 6" diameter x 20" long . Great for back packing or strapping on to quads or bikes, etc. Only pain is reassembly of the detector. But this Lobo is easy and fast to knock down if needed.. Keep in mind the coil size..The elliptical coil helps compact the case size as well. This post may be getting off topic, but as long as we are learning and having fun. . Lol.. Ken
 

So this is for you.. and its probably not even your birthday. Haha.. Ken

I'm sure that aluminum case has sentimental value after all these years, so I'll settle for the soft case. You can mail it to:

Package Delivery - Copy.gif
kcm
1234 Middle of Nowhere Road
NW Minnesota


Hi - Copy.gif


kcm, we need more folks like you, i have read a few of your posts on other threads. You are always helpful and leave positive comments and feed back.

Its About Time - Copy.gif
It's about time somebody noticed!


Proud to be an American - Copy.gif
 

I really like your aluminum work, Ken. I'd like to build one of my mineral jigs from that material, but don't have the skills. I'm stuck working with ABS, which isn't too bad.
Jim

Well Jim , i just watched your 3 part video on youtube " Dry (waterless) Jig " .Awesome Build.. You have the skills for sure.! Just lack of experience with aluminum. You would pick it up fast. But aluminum can be a big pain unless you work with it often. I have a lot of trouble with it, warping, blow outs , Wire size, wire feed rate, pre heat, when not to preheat, material thickness, using heat sinks etc. So I put in a big effort on finish details, filing grinding, sanding my crappy welds. Haha. Only reason i did it this way, i had the material, tools, some prior know-how ,and i plan on keeping the jig forever.. Lol.. I have never worked with ABS sheeting. I do like the durability of abs. Just a matter of redesigning structure joinery to by-pass any aluminum welding,. and choosing fasteners suitable for multi material joints and connections.

20160319_212115.jpg20160321_175315.jpg
 

Many thanks, ken. We had a saying in the concrete business...."a broom finish can cover a lot of sin"....LOL I'm pretty good with a grinder and file myself...ha!
Jim
 

Top Member Reactions

Users who are viewing this thread

Back
Top