old pliers?

Moe (fl)

Hero Member
Jul 25, 2007
731
97
Florida
Detector(s) used
Minelab, Whites, Tesoro, Garrett
Primary Interest:
All Treasure Hunting

Attachments

  • a1.JPG
    a1.JPG
    45.1 KB · Views: 1,022
  • a2.JPG
    a2.JPG
    43.5 KB · Views: 1,021
bigcypresshunter said:
woody50 said:
Our Archo service here uses only caustic soda...
Where do I buy this?
Caustic Soda is also called lye, and its real name is Sodium hydroxide. It is a white substance and you can get it in pellets, flakes, or granules. Its the main substance of Draino, but DON'T us that, there are aluminum shards in it, would ruin your work. I buy it here in the hardware store, as a drain unstopper. In the plastic can are no salt crystals or aluminum like in draino. You should be able to find it by you. Using it keeps the water cleaner (at least that is my experience), there is nothing worse than looking at the water after some time using other products and getting that rusty dirty water; BAAAH that is really bad! I recommend everyone try it. But, of course be VERY careful with electrolysis! Don't leave it on and walk away for hours on end, you might not have anything left.

Best is to start with low current and voltage and move gradually up when you don't get the results you want. Its better to use 500ma and 40 volts for two or three days than 10A 60V for 5 minutes......
 

Upvote 0
Moe (fl) said:
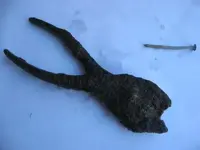
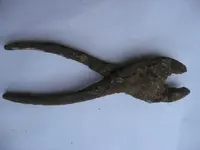
Water is getting dirtier (rusty color). It has been running for over 24 hrs. What kind of fumes are released during the electrolysis process? The electrolysis tank is outside.

Hi Moe. Although I am not an expert about the fumes, to be simple about them, it is only oxygen and hydrogen, produced by the separation of the ions in water. But both of them are explosive, so better outside! During the process of electrolysis hydrogen bubbles are released and the chlorides are expelled from the metal. Some times sulfur fumes are created, you can smell that.

Here under find some tips that I want to tell you about, I hope you don't mind and can gain some information about electrolysis.

NOTE: Performing electrolysis can be dangerous: Noxious Fumes, Chemical Burns, Toxins/Poisonous Vapors, Splashing Chemicals and Electrical Shock so be CAREFUL! Much depends upon the electrolyte that you use, and the processes that


Some tips from me:

FIRST remember the words: Slow and Easy. That is the way to perform electrolysis!

Electrolytes :
Sodium hydroxide or lye (my favorite)
Calcium Carbonate
Soda Ash
Salt (my unfavorite)
Sodium bicarbonate

Oxygen will be created at the anode, so use anodes made of stainless steel because they will not react with the oxygen.

DO: If you use alligator clips to attach coins and soft materials to the cathode, file down the teeth, the can cause scratches! And don't mess around with the clips to increase the current, you can only make more scratches. Remove the object, carefully remove the clip, and replace it softly. But normally the current will increase most of the time gradually by itself. For coins and small objects I use as a tank a plastic take away container, when dirty just throw it away, it is hard and messy to clean glass or other reusable containers.

DO: Use something to fix the distance RELIABLY between the Anode (+) & Cathode (-) or Coin to be cleaned. If they get too close the current will rise and you could lose metal from your object or coin! If they touch, the power supply will short circuit which may damage the equipment or cause a fire (if you don't have a variable power supply).

DO: Use distilled water, I usually warm it up a bit I start, it makes the process start up quicker.

DO: Power Supply. Use a power supply, stabilized and variable, both voltage and current. I use one for small objects that has a range from 0-40V and 0-400ma, which is enough for all of my work so far. If not cleaned I just repeat until it is. But you can use other power supplies that deliver more current, but the important thing is to be able to adjust the voltage and current. I have found with difficult object, objects with much oxide on them, that I use first a higher voltage to break down the resistance, and after a few minutes the current begins to raise, then I control the current and voltage until the object is bubbling along just fine.

DO: Adjust the current down to the point the fizzing slows down and then bring it up high enough to do the job. Any higher current will just take metal away from the coin. Never go over 2 Amperes and try to stay under 1 Ampere (for small objects such as coins.)

DO: ANODE- I use stainless steel objects (mostly stainless steel forks and spoons that I find on the beach in the summertime, by beach resorts. Just save them and take them home). Actually most utensils are made of poor stainless steel, it would be better to use a high grade of stainless. The forks and spoons are attacked because of the impurities in the cheap metal. Be sure to change or cut off the bad part of the anode (stainless steel) when you change water, don't reuse it.... DO this every time you repeat the process. Oxygen will be created at the anode, so use anodes made of stainless steel because they will not react with the oxygen.

-DON'T: never leave a good coin alone with electrolysis !!!!! You will be sorry sooner or later.

-DO: Use distilled or rainwater or you may add minerals and impurities that can ruin your object. After electrolysis be sure to rinse the object. Also above the 30 volt level there is a SHOCK HAZARD, so be carefull, remember about the electrolyte!

-DO: Important! Before handling your object SHUT DOWN THE POWER SUPPLY!

DO: After some time the water will become warmer and the object will become covered in the remains of the oxide, not pretty for sure. Kitchen SALT can be used but gives the most awful remains! SHUT DOWN the power supply, remove the object and CAREFULLY clean it under running water if you can. Replace the water and replace or use a new part of the stainless steel anode. Then repeat if the object is not clean enough. To give you an example, using 25V and about 300ma I can usually get my silver coins clean in about 2 to 5 minutes, some I have to either leave in longer or increase the voltage or current. You DON'T have to use 5A to clean a coin, you will only destroy it.

DO: NOW, when you think you are done! You must rinse out the coin in clean distilled water then you MUST put new distilled water in a clean container and use a fresh Anode (+) Electrode and do it again WITHOUT the Electrolyte (sodium hydroxide or lye , Calcium Carbonate, Soda Ash, Salt, Sodium bicarbonate, or Sodium hydroxide). This step is essential to remove all traces of the electrolyte from the coin! You will have to turn the voltage up higher on your power supply just to get a little fizzing. This is normal as distilled water is not a great conductor. After adjusted for slight fizzing, you can let it sit for 7-12 hours (under supervision checks.)

These are only a few tips from me, there are many methods and everyone has their own personal way to do it. But just be careful!
 

Upvote 0
Thank you Woody50 for the detailed response!

After 56 hours at 12V 1AMP, I stopped the electrolysis. Some of the buildup/encrustation started to get loose. I rinsed the pliers and will let it dry for a couple of days. The water was very rusty and will have to clean the tank before the next electrolysis treatment.

Hope to post pics in a few days. Happy Hunting!

Moe
 

Upvote 0
Slow and steady like that, I'm sure your results will be great. :)


I look forward to the photos.
 

Upvote 0
Hello.

Here are two pictures taken this weekend (after the last treatment). I had to remove some of the encrustation with a light hammer. I then did 24 hrs of electrolysis and this is the result. It is starting to look better. I will still need another round of electrolysis to remove the rest.

HH!
Moe
 

Attachments

  • a1.JPG
    a1.JPG
    33.2 KB · Views: 413
  • a2.JPG
    a2.JPG
    32.3 KB · Views: 414
Upvote 0
Moe (fl) said:
Hello.
Here are two pictures taken this weekend (after the last treatment). I had to remove some of the encrustation with a light hammer. I then did 24 hrs of electrolysis and this is the result. It is starting to look better. I will still need another round of electrolysis to remove the rest.
HH!
Moe
Its coming along just great. Have to be carefull with the hammer at all times. Most metal objects that have been in the earth a long time lose ions to the soil, and all (expect maybe gold) become porous, from a little to a lot. So porous=fragile. I usually, after a few jolts of electrolysis, wait a little bit of time, and then use a probe in areas where I am sure that there is no metal, places were it should be open. Little by little I break away the oxide and little by little its finished...
 

Upvote 0
at times, I use a electric engraving tool to chip off bits of encrusted stuff to be able to make contact .
 

Upvote 0
ivan salis said:
at times, I use a electric engraving tool to chip off bits of encrusted stuff to be able to make contact .
Me too sometimes!
 

Upvote 0
Moe (fl) said:
Hello.

Here are two pictures taken this weekend (after the last treatment). I had to remove some of the encrustation with a light hammer. I then did 24 hrs of electrolysis and this is the result. It is starting to look better. I will still need another round of electrolysis to remove the rest.

HH!
Moe
I forgot to say that I often wrap a wire around the artifact for a better connection and attach the alligator clip to the wire. It also saves the clips by keeping them above the waterline.
 

Upvote 0
bigcypresshunter said:
Moe (fl) said:
Hello.
Here are two pictures taken this weekend (after the last treatment). I had to remove some of the encrustation with a light hammer. I then did 24 hrs of electrolysis and this is the result. It is starting to look better. I will still need another round of electrolysis to remove the rest.
HH!
Moe
I forgot to say that I often wrap a wire around the artifact for a better connection and attach the alligator clip to the wire. It also saves the clips by keeping them above the waterline.
Yes, forgot that in my message, I do that also!
 

Upvote 0
Here are recent pics after many hours of electrolysis.

HH.
-Moe
 

Attachments

  • pl1.JPG
    pl1.JPG
    30 KB · Views: 225
  • pl2.JPG
    pl2.JPG
    28 KB · Views: 215
  • pl3.JPG
    pl3.JPG
    23 KB · Views: 214
Upvote 0
Pity, but it looks like a common pair of pliers to me.....
 

Upvote 0
bigcypresshunter said:
woody50 said:
Pity, but it looks like a common pair of pliers to me.....
yes but good experience with the electrolysis
Great good that you have learned a bit about electrolysis. It is handy for some things, but you have to be careful with rare or valuable things, you can ruin stuff very quickly with it....
 

Upvote 0
woody50 said:
bigcypresshunter said:
woody50 said:
Pity, but it looks like a common pair of pliers to me.....
yes but good experience with the electrolysis
Great good that you have learned a bit about electrolysis. It is handy for some things, but you have to be careful with rare or valuable things, you can ruin stuff very quickly with it....

Exactly right. I practiced with a few stirrups before putting my friend's dug musket lock plate through the process.


Anything more than 2 amp is asking for trouble, IMO. And delicate things you'd want to do with maybe 1/2 amp.


Best Wishes,


Buckles
 

Upvote 0

Top Member Reactions

Users who are viewing this thread

Back
Top