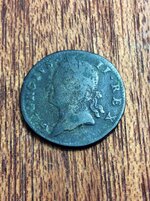
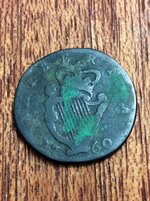
coinman123
Silver Member
- Thread starter
- #21
No before photos of this colonial brass spigot .
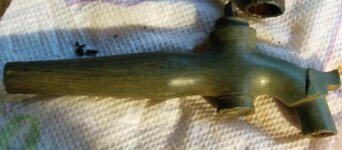
. But it came out very good. It looked just like half of Ahab's before photos of Indian Head cents, just as crusty and nasty. No real pitting though. It was completely covered with a hard crust that was a blackish-brownish color. It looked ugly. First I soaked it in hot water to loosen up to crud on it. I wanted to do hydrogen peroxide but it would waste up half the bottle and not fit in any containers. Than I scrubbed it with some paper towels. It still looked pretty bad, except there was not dirt on it but that black crust was all over it. I than did the unthinkable!! I put it in a large container of hot water, I grabbed a pull tab and scraped at it with the side of the pull tab while it was underwater, the crust slowly came of and got lost in the water it was in. I continued for and hour, tediously scraping crust off of the spigot. When I was done I noticed that there was not a single hairline scratch on the spigot, it looked a beautiful smooth green color. I'm guessing that because the spigot was brass and harder than the aluminum pull tab than the pull tab could not scratch though. I'm certainly not going to try that on any coins anytime soon though!!!
Towards the end of the year I found another spigot, this time one made out of pewter and from the mid-1800's, it was impossible to clean.
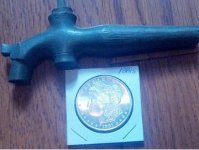
I never found the Morgan dollar in the photo, I'm using it for size, some people use clad quarters for size, I use Uncirculated silver dollars
 .
. But it came out very good. It looked just like half of Ahab's before photos of Indian Head cents, just as crusty and nasty. No real pitting though. It was completely covered with a hard crust that was a blackish-brownish color. It looked ugly. First I soaked it in hot water to loosen up to crud on it. I wanted to do hydrogen peroxide but it would waste up half the bottle and not fit in any containers. Than I scrubbed it with some paper towels. It still looked pretty bad, except there was not dirt on it but that black crust was all over it. I than did the unthinkable!! I put it in a large container of hot water, I grabbed a pull tab and scraped at it with the side of the pull tab while it was underwater, the crust slowly came of and got lost in the water it was in. I continued for and hour, tediously scraping crust off of the spigot. When I was done I noticed that there was not a single hairline scratch on the spigot, it looked a beautiful smooth green color. I'm guessing that because the spigot was brass and harder than the aluminum pull tab than the pull tab could not scratch though. I'm certainly not going to try that on any coins anytime soon though!!!
Towards the end of the year I found another spigot, this time one made out of pewter and from the mid-1800's, it was impossible to clean.


I never found the Morgan dollar in the photo, I'm using it for size, some people use clad quarters for size, I use Uncirculated silver dollars

Last edited:


 Buffer are a bad idea... they use up too much electricity when I have sand paper and a trusty block of concrete right at my side
 .
.