Jeff’s Rubber Mat Miller Table

AzViper

Bronze Member
Sep 30, 2012
2,038
2,251
Arizona - Is there any other state worth visiting
Detector(s) used
Fisher Gold Bug Pro, Nokta FORS Gold, Garrett ATX, Sun Ray Gold Pro Headphones, Royal Pick, Etc.
Primary Interest:
Prospecting
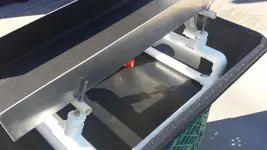
Jeff95531 contacted me in regards with some questions in regards to the Miller Table and some links on eBay. My reply was don’t buy and let me build you a rubber mat Miller Table. I told Jeff that the table does not need to be very wide or very long. With that said I will build Jeff a copy of my Miller Table but on a slightly smaller scale. Jeff will be in charge of gathering a tub and a means of securing the Miller Table where he can adjust the angle and side to side to get the water flowing evenly. (I suggest coping my PVC frame on a smaller scale)

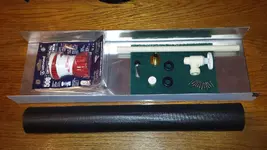
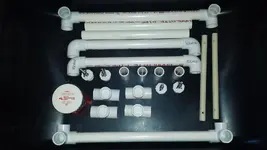
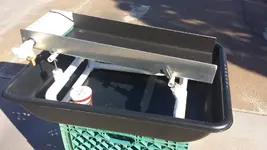
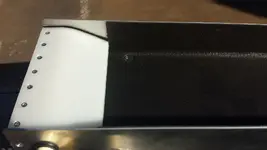
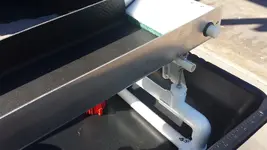
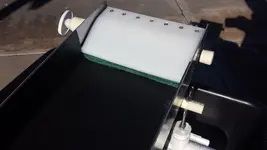
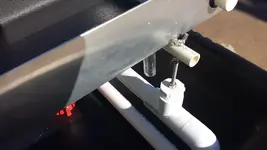
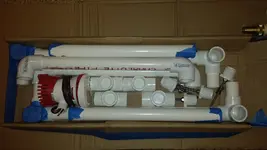
The Miller Table will be 7” wide and 24” long. Does not need to be any larger and will have a vial mounted into the upper end making collecting the gold a breeze. The parts that you see below are what are needed and some ½” nylon plate to cap the end of the table.

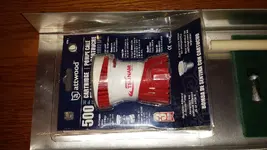
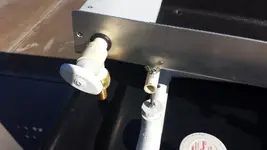
Rubber Grommets, 1/2" Pipe, Vial, Water Valve, 1/2' End Cap, Brass Hose Barb, Rubber Mat, Folded Aluminum Box, Attwood 500 GPH Pump, Scotch Brite Pad, and #6 x 3/4” Stainless Steel Screws. Not shown is the nylon plate for the end cap and water diffuser.

For anyone that has not seen the finished Rubber Mat Miller Table here is a link to my larger table and video's of the table working. Rubber Mat Miller Table

Jeff1.jpg Jeff2.jpg Jeff3.jpg
 

Last edited:
Upvote 0
I don't give like's easily (check my give count) but AZ has outdone himself......again!
Practical wisdom, actual knowledge and kindness to fellow diggers....3 traits that are hard to find in one person.
Now if we could share a shot or 6 of Pendelton, I might give him another like..........someday.........maybe :occasion14:
 

Jeff,

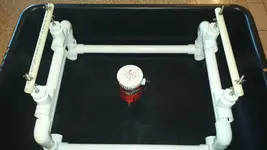
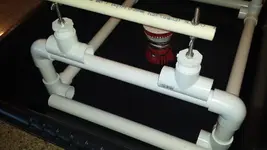
Here is the frame. As we discussed you need to purchase the small mixing tub at Home Depot. Once the frame is assembled it will fit the tub. I would assemble the bottom first and check that it fits within the tub flat before apply super glue to the joints. Then install the four 2" long PVC pipes in the four corners followed by place water in the frame so it does not float. Then place the cross bars in place. The PVC is really tight fitting so you may want to lightly sand the pipes so that everything slides together easily. Note: None of the fittings have been glued either on the bottom or the cross bars although the bottoms pieces are set and only need to be glued and two of the 90 degree fittings are set in place on the cross bars, I left the other 90 degree fittings off so that you can sand the ends to make the fittings easier to adjust the length to fit onto the four corner uprights. The cross pieces I left to the point you will need to tap the fitting to fit those four corner uprights.

Then snap the four adjusters onto the the cross bars and install the cross bars that support the Miller Table. I did not have any small bungee cords, but you can buy a package of 4 at Home Depot. These are used to hold the Miller Table to the frame. Enjoy and I hope you capture that fine gold...

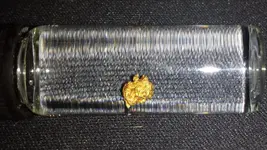
I hope I can get all frame pieces, pump, and Miller Table all in the USPS flat rate box to keep the shipping cost down... I have enclosed two vials in the package and one has a nice little nugget.


vWc4Of.jpg 32Yytj.jpg aq4iue.jpg Jeff27.jpg
 

Last edited:
AzViper, what a fine project you have put together for Jeff. I'm truly impressed with your work and kindness. It doesn't get any better than than what you've done for a fellow miner and friend.

Mike
 

AzViper, what a fine project you have put together for Jeff. I'm truly impressed with your work and kindness. It doesn't get any better than than what you've done for a fellow miner and friend.

Mike

Wow Keith. My new custom built Miller Table AND my first nugget? I don't know what to say, tho Mike did a fine job. A friend like you in this day and age? I didn't think it even existed. Hanging out/chatting/sharing with my fellow prospectors I've come to find many new friends...more than I've had most of my life. And it's not just because we have the gold fever. It's the type of people, the type that love the environment and shared enjoyment. I'll never forget this Keith and you know you'll be treated like royalty if you ever make it to my neck of the woods.:occasion14:

I already have the tub and I'll pick up the bungees. Next week is supposed to be warmer so I'll get busy classifying to feed it properly.
Thanks Buddy!
 

Jeff,

I am a perfectionist and I could not let the Miler Table / Frame leave my shop not being finished. With the exception of the of gluing the frame together, rubber hose to connect the pump to the table its a finished Miller Table. I have to say I really like this size over the much larger table I have. I took a few minutes and sanded the lower PVC pipes so you should have no issues putting the frame together and gluing the joints. Make sure you use the penetrating type super glue after you have dry fit the frame and have it sitting flat. I will get it in the mail tomorrow and you will have it no later than Wednesday.

Jeff34.jpg Jeff28.jpg Jeff29.jpg Jeff30.jpg
Jeff31.jpg Jeff32.jpg Jeff33.jpg Jeff35.jpg
 

Jeff,

Here is the frame. As we discussed you need to purchase the small mixing tub at Home Depot. Once the frame is assembled it will fit the tub. I would assemble the bottom first and check that it fits within the tub flat before apply super glue to the joints. Then install the four 2" long PVC pipes in the four corners followed by place water in the frame so it does not float. Then place the cross bars in place. The PVC is really tight fitting so you may want to lightly sand the pipes so that everything slides together easily. Note: None of the fittings have been glued either on the bottom or the cross bars although the bottoms pieces are set and only need to be glued and two of the 90 degree fittings are set in place on the cross bars, I left the other 90 degree fittings off so that you can sand the ends to make the fittings easier to adjust the length to fit onto the four corner uprights. The cross pieces I left to the point you will need to tap the fitting to fit those four corner uprights.

Then snap the four adjusters onto the the cross bars and install the cross bars that support the Miller Table. I did not have any small bungee cords, but you can buy a package of 4 at Home Depot. These are used to hold the Miller Table to the frame. Enjoy and I hope you capture that fine gold...

I hope I can get all frame pieces, pump, and Miller Table all in the USPS flat rate box to keep the shipping cost down... I have enclosed two vials in the package and one has a nice little nugget.


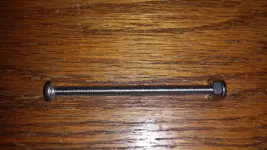
Where did you get bolts threaded all the way? None of the carriage bolts of the proper size had more than just the ends threaded. I could not find them, so I bought threaded rod and used nuts and lock washers to lock them into place. Is there a better way?

Thanks.
 

Where did you get bolts threaded all the way? None of the carriage bolts of the proper size had more than just the ends threaded. I could not find them, so I bought threaded rod and used nuts and lock washers to lock them into place. Is there a better way?

Thanks.

Hi Dave,

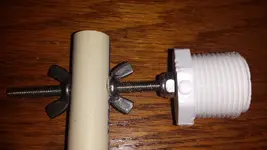
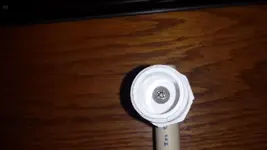
Ace Hardware, It's a 3" long 10-32 stainless steel machine screw with a nylon stainless steel lock nut. When tightening the nut all the way down I use a drill, BUT you have to go very very slow speed or you will heat up the stainless between the bolt and nut and will nearly weld the two together and you will never get the nut off of the bolt before it tighten all the way down.

20150101_152805.jpg 20150101_153434.jpg 20150101_153515.jpg
 

Wow Keith. My new custom built Miller Table AND my first nugget?

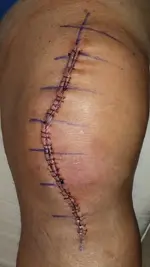
Jeff then enjoy that Arizona nugget its the nugget that cause me to have another knee surgery to replace the Patella when I fell. That nugget came from this location marked on the map.

Jeff36.jpg Jeff37.jpg Jeff38.jpg
 

Like I told Karen just today, every nugget has a story. Thanks for sharing it. I'll take it all with me no matter what.

Jeff that little nugget I can't say was worth this. The story behind this entire ordeal was I had my shoulder replaced in December of 2013. Six weeks after having the shoulder installed my buddy talked me in to going prospecting. Like a fool I knew I was going to take it easy so I just wore tennis shoes of which had no business being on my feet. I fell forward and knew I could not put my hands down and take a chance of screwing up my shoulder. My knee hit the only rock on this path and I broke off the plastic Patella. So now you have the entire story...

Jeff39.jpg
 

Ow Ow OW!!! Reminds me of when I broke my ankle. My buddy helped me up and said see if you can put any weight on it. When I did, it looked like I had a loose softball in my sock. :sad5: ooooooh thats not right.
 

Hi Dave,

Ace Hardware, It's a 3" long 10-32 stainless steel machine screw with a nylon stainless steel lock nut. When tightening the nut all the way down I use a drill, BUT you have to go very very slow speed or you will heat up the stainless between the bolt and nut and will nearly weld the two together and you will never get the nut off of the bolt before it tighten all the way down.


Thanks so much, Keith; exactly what I was looking for, but even though I asked a salesman in Lowes, they said they did not have anything that would do the job.

Dave
 

Jeff,
Jeff,

Hopefully everything arrives to you as I have planned. I covered the bottom and sides with cardboard to protect the rubber mat. Everything fit within the table. Now I just have to hope that USPS has the flat rate box in stock without running around to other post offices. If I can find this USPS flat Rate box, 23-11/16" x 11-3/4" x 3" that USPS should have on hand I should make it work. It's 5/16" shorter than the table but I will beef up the open in of the table and make sure the box say FRAGILE. Plus the entire box will be filled with shredded paper.

Jeff40.jpg
 

OUCH!! :shiver:

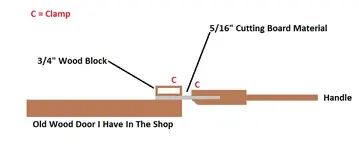
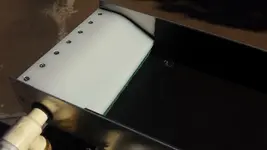
I have to ask.. How did you heat up the(Lexan is it?) plastic to bend the deflector like that?

The material is HDPE High Density Polyethylene.

Here is a drawing on how I bend the material. I take the width of the material and place the material on a hard flat surface. I align where I want to bend the material I then place another piece of hard material on the top as seen in the image. I then use a C clamp at each end to hold the material flat. I then made up the handle you see. Again I use small C clamps and clamp the handle on each end where the material that I am bending and the jig handle come together.

Using a heat gun (not blow dryer) I heat across the surface side to side while apply light pressure to the handle until the HDPE is bent at the angle I want. Using a wet dripping cloth I apply to the heated HDPE to get the plastic to return to a harden state. I then run the the diffuser through the table saw cut the front edge.

Bending Plastic.png
 

Well done AzViper ! great for times when you are chilling out on a lounge chair with your favorite flavor of coffee ! LOL
 

Top Member Reactions

Users who are viewing this thread

Back
Top