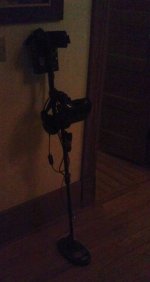
MICHIGANJAY
Sr. Member
- Dec 28, 2006
- 297
- 14
- Detector(s) used
- V3i, MXT, Equinox, Excal. 10, Ultra 1000
- Primary Interest:
- Other
Hello Friends, I want to share a notable combination of hobbies that I find interesting, yet possibly overlooked in the md world. Pepakura, is a method of crafting 3-D objects out of paper or cardboard, similar to origami. Pepakura differs from origami in that the final product is usually made from patterns cut from paper and held together with glue, and in most cases, made more durable by applying some form of hardened resin. You may have already seen examples of this as many creative individuals fabricate their own movie costumes that look very much like the genuine article. (There can never be enough Storm-Troopers!)
To make a long story short, I was distressed that my 6 yr old MXT wasn’t fitted with a backlight display-screen for when the daylight diminishes during the long winter season, thus cutting my field-time short. (Whites now manufactures the MXT-Pro with a standard backlight to alleviate this concern.) So, I set out to fabricate my own lighting unit for the MXT. I wanted something that 1.) wouldn’t tamper with the circuitry of the detector and 2.) would only display a light on the screen for me to see… This took some consideration.
After determining what I wanted in the MXT hood, I ordered a special flashlight with a LED-Light at the end of an 8 inch wire, and began constructing the cardboard template that would house the light on top of my MXT display screen. Again, this took a lot of consideration, measuring, and patience. After creating blueprints and multiple mock-ups, I finally had the design I was looking for. My supplies were simple, mostly cardstock (file folders actually), hot glue, tin (to act as basic light reflectors), Balsa wood strips, cd cases, a fiber-glass repair kit, ventilator mask, sandpaper, brushes, razors, rubber gloves, tape, scissors, spray-paint, and a few other basic implements I picked up along the way.

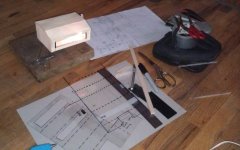
Having only worked with fiberglass a few times in the past, I read all the forums regarding fiberglass techniques and Pepakura that I could find online. Next, I began to construct the prototype from my blueprints. I folded/glued all the predetermined edges and cut Balsa wood to act as an interior frame and housing-unit for the flashlight. The hardest part for me was to finally commit to permanently securing the pieces in place with glue and fiberglass. It all felt so… final, but of course, this was the goal of the creation.
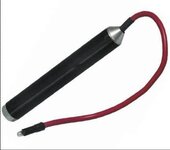
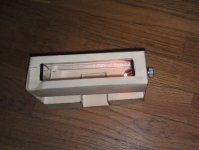
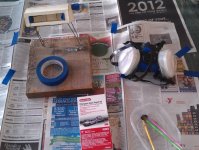
Once the Light was secured and all the folding and gluing was complete, it was time to finalize the project by using fiberglass (cloth and resin) to harden the inside and outside of the unit. (Please note: the makeshift wood and wire stand/platform used as a workbench to keep the unit off the ground during the messy phases and also the ventilator mask (very important), I wouldn’t start this endeavor without either.)
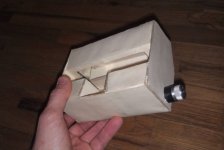
The fiberglass was sticky and messy and I did and started to dry pretty quickly once properly mixed. In retrospect, I should have blotted-down the fiber cloth as it dried as there were a few spots that continually wanted to bubble-up while drying. Over a few day periods, I applied about two layers of fiber cloth and four additional layers of fiberglass resin over the inside/outside of the unit for rigidity. I tried to sand the resin, but it only applies paper thin and there isn’t much material to remove. I guess that is what ‘bondo’ is for but I didn’t want to add any more weight to this device. When the fiberglass was complete, I applied a few coats of flat black spray paint that really brought the piece together and gave it that professional look.
Well, there it is… easy right? Believe it or not, this took me 1 ½ years to produce – as there was a lot of trial and error and as most of you know, I like to spend the majority of my time in the field or in the library researching.
With the left-over Balsa wood, I constructed a mini-flashlight holder which is attached to a microphone clip that snuggly clasps onto the upper-detector rod. The fiber-optic cable (from a previous hood attempt) runs down the shaft of my detector and places a dim spec of light on the ground in front of my coil so I can see where I’m detecting, yet not interfering with the electronics of the search coil. This was actually an afterthought to use up my spare parts and keep me occupied while the fiberglass/paint dried. I prefer a push-button flashlight over a mag-light mostly because it takes time to swivel the mag-light head on/off.
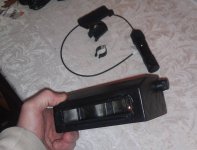
Since these pictures, I have attached strips of Velcro onto the front of the hood so I can switch-up different filters that I am in the process of creating. Red filters dissipate light quicker then blue filters, plus, I can attach one way light reflectors, narrower display windows, different filters, etc…
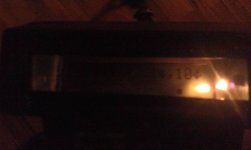
Here is a picture of the MXT display screen in dim lighting.
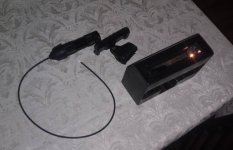
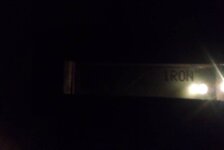
Here is a picture of the MXT display screen in complete darkness.
Here is what the unit looks like on the MXT in dim lighting. (Trust me, it feels solid as a rock, Ill have a hard time putting a dent in it.)
Considerations: This device adds a little extra weight to the detector, especially after a long day in the field. If you don’t want to mess with fiberglass or the extra weight, (i.e.…flashlight, batteries, wood, and fiberglass) you may want to consider fabricating your unit out of something a little lighter. Also, I probably should have doubled-up the cardstock as there were a few undulations in the cardboard once the sticky resin was applied.
Additionally, consider having the light-knob on the left-hand side as I’m right-handed, so it would only make sense to have the knob on the left side for easy access without having to fumble over the top of the unit to turn the light on/off while I’m holding the detector with my right hand. Other then that, I love it! This is probably one of the coolest things I have ever created…so far.
Please feel free to leave a comment (or a good name for the unit) below, as I am interested in what the community thinks. I’m sure you have ideas that you would like fabricate … so I hope this helps you on your quest!
See You In the Field. (but ya' might not see me...)
MichiganJay
___________________________________________________________________________________________
To make a long story short, I was distressed that my 6 yr old MXT wasn’t fitted with a backlight display-screen for when the daylight diminishes during the long winter season, thus cutting my field-time short. (Whites now manufactures the MXT-Pro with a standard backlight to alleviate this concern.) So, I set out to fabricate my own lighting unit for the MXT. I wanted something that 1.) wouldn’t tamper with the circuitry of the detector and 2.) would only display a light on the screen for me to see… This took some consideration.
After determining what I wanted in the MXT hood, I ordered a special flashlight with a LED-Light at the end of an 8 inch wire, and began constructing the cardboard template that would house the light on top of my MXT display screen. Again, this took a lot of consideration, measuring, and patience. After creating blueprints and multiple mock-ups, I finally had the design I was looking for. My supplies were simple, mostly cardstock (file folders actually), hot glue, tin (to act as basic light reflectors), Balsa wood strips, cd cases, a fiber-glass repair kit, ventilator mask, sandpaper, brushes, razors, rubber gloves, tape, scissors, spray-paint, and a few other basic implements I picked up along the way.


Having only worked with fiberglass a few times in the past, I read all the forums regarding fiberglass techniques and Pepakura that I could find online. Next, I began to construct the prototype from my blueprints. I folded/glued all the predetermined edges and cut Balsa wood to act as an interior frame and housing-unit for the flashlight. The hardest part for me was to finally commit to permanently securing the pieces in place with glue and fiberglass. It all felt so… final, but of course, this was the goal of the creation.


Once the Light was secured and all the folding and gluing was complete, it was time to finalize the project by using fiberglass (cloth and resin) to harden the inside and outside of the unit. (Please note: the makeshift wood and wire stand/platform used as a workbench to keep the unit off the ground during the messy phases and also the ventilator mask (very important), I wouldn’t start this endeavor without either.)

The fiberglass was sticky and messy and I did and started to dry pretty quickly once properly mixed. In retrospect, I should have blotted-down the fiber cloth as it dried as there were a few spots that continually wanted to bubble-up while drying. Over a few day periods, I applied about two layers of fiber cloth and four additional layers of fiberglass resin over the inside/outside of the unit for rigidity. I tried to sand the resin, but it only applies paper thin and there isn’t much material to remove. I guess that is what ‘bondo’ is for but I didn’t want to add any more weight to this device. When the fiberglass was complete, I applied a few coats of flat black spray paint that really brought the piece together and gave it that professional look.

Well, there it is… easy right? Believe it or not, this took me 1 ½ years to produce – as there was a lot of trial and error and as most of you know, I like to spend the majority of my time in the field or in the library researching.
With the left-over Balsa wood, I constructed a mini-flashlight holder which is attached to a microphone clip that snuggly clasps onto the upper-detector rod. The fiber-optic cable (from a previous hood attempt) runs down the shaft of my detector and places a dim spec of light on the ground in front of my coil so I can see where I’m detecting, yet not interfering with the electronics of the search coil. This was actually an afterthought to use up my spare parts and keep me occupied while the fiberglass/paint dried. I prefer a push-button flashlight over a mag-light mostly because it takes time to swivel the mag-light head on/off.

Since these pictures, I have attached strips of Velcro onto the front of the hood so I can switch-up different filters that I am in the process of creating. Red filters dissipate light quicker then blue filters, plus, I can attach one way light reflectors, narrower display windows, different filters, etc…
Here is a picture of the MXT display screen in dim lighting.

Here is a picture of the MXT display screen in complete darkness.

Here is what the unit looks like on the MXT in dim lighting. (Trust me, it feels solid as a rock, Ill have a hard time putting a dent in it.)

Considerations: This device adds a little extra weight to the detector, especially after a long day in the field. If you don’t want to mess with fiberglass or the extra weight, (i.e.…flashlight, batteries, wood, and fiberglass) you may want to consider fabricating your unit out of something a little lighter. Also, I probably should have doubled-up the cardstock as there were a few undulations in the cardboard once the sticky resin was applied.
Additionally, consider having the light-knob on the left-hand side as I’m right-handed, so it would only make sense to have the knob on the left side for easy access without having to fumble over the top of the unit to turn the light on/off while I’m holding the detector with my right hand. Other then that, I love it! This is probably one of the coolest things I have ever created…so far.
Please feel free to leave a comment (or a good name for the unit) below, as I am interested in what the community thinks. I’m sure you have ideas that you would like fabricate … so I hope this helps you on your quest!
See You In the Field. (but ya' might not see me...)
MichiganJay
___________________________________________________________________________________________
