Easy cleanup sluice

Bandmenter

Jr. Member
Oct 28, 2016
55
45
Northern Iowa
Detector(s) used
Whites GMT, Fisher F75 SE
Primary Interest:
All Treasure Hunting
Well, winter is closing in on the outside activities so what to do 'til spring? Reviewing my options I could sit around watching TV or YouTube prospecting videos, work on the wife's honey do lists or I could build something. I choose the later.

So I wanted to build a light weight clean up sluice that could also be used to run serious amounts of material. I have a source of flood sands that I should be able to access through the winter and processing in the warmth of the workshop.

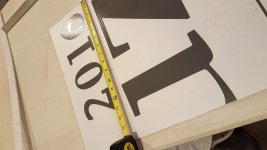
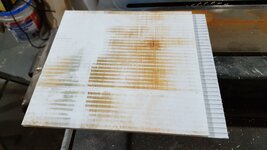
I got a hold of Kevin Bell of Snake River Products and ordered some Vortex matting, grabbed an old political yard sign then started building. Please see photo log.
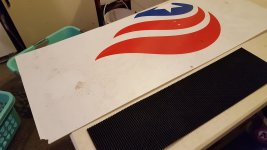
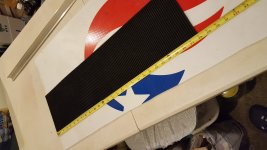
20171221_195507.jpg20171221_195828.jpg20171221_200711.jpg

Layout and measure materials determining scope of what you can build.
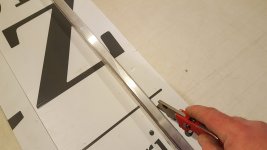
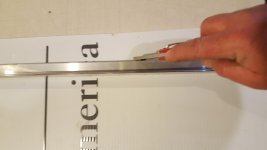
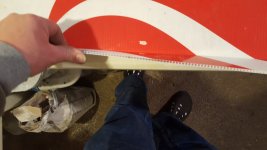
20171221_201047.jpg20171221_201111.jpg20171221_201140.jpg

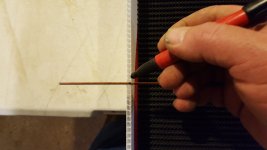
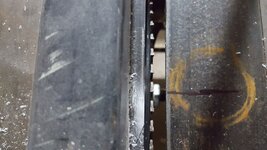
Measure and cut the material. When cutting the side of the sluice you want to just score the sign material and fold the sides up.

I will continue this post later.
 

Last edited:
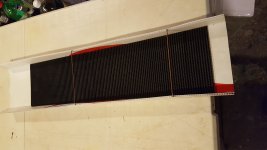
Now what you will need to do is lay in your matting to check fit. The material I have is 7x28, that being said I had to trim it down a little to get the snug fit I was looking for.

Now with this plastic material, you will need to hold the sides in a vertical position. I accomplish this with welding rods bent to fit in the channels of the material. I bend one end first, place it in the channel and measure the other side. I then duplicate the bend and drop it in the channel. You could use coat hangers that you have laying around.

20171221_202311.jpg

20171221_202109.jpg

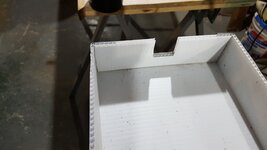
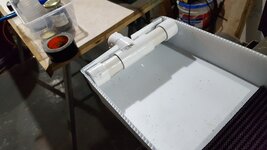
You can see the completed sluice trough, next will be the water system.
 

This is a very interesting build! Have you ever tried the plastic 90 degree rail to connect the three pieces? Might make an interesting breakdown pack sluice.
The components are sure cheap enough...I might have to stock up on vortex mat!!
 

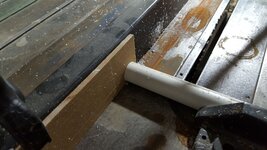
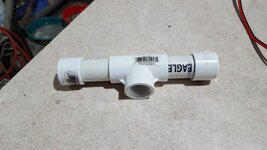
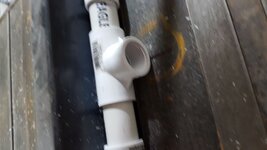
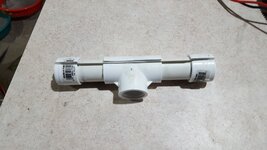
Well I finally had an opportunity to complete this project. As I said, the next phase was to build the water delivery system. The spray bar consists of a PVC tee, a little tubing and the caps. I cut every thing on the table saw for accurate and true cuts.

20171227_000515.jpg

In the photo you will see that I use a spacer clamped to the fence, the material rides to the end of the spacer and clears it before the actual cutting. This allows space between the fence and the blade to prevent kickback as the part is cut.

20171227_000435.jpg

Glue everything together before cutting the slot.

20171227_000948.jpg

20171227_001114.jpg

20171227_001242.jpg

20171227_002601.jpg

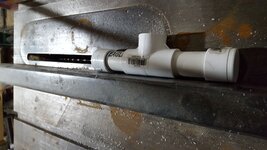
When cutting the slot in the tee, I placed a mark on the table as to where the center of the blade is. I then center the part over the blade using the fence to steady the part. Using a block, clamped the tee to the fence I then plunge the blade into the part. This will keep the part in place as well as your fingers. The slot allows for very smooth flow of the water.
 

The next thing I did was to make the mount for the tee. Using the same material I cut a piece to go the the back part of the sluice. It gives you a means to controlling the water from spilling off the back when using it as a re-circulating sluice and a place to hang the tee. I cut a section out for this. Interesting find in doing it this way is it also allows you to lift it out to rinse the buckets down and then set it right back in place. I would advise shutting off the water first.

20171227_210141.jpg

20171227_210206.jpg

20171227_210354.jpg

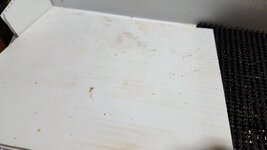
I got anxious to try the sluice so I set it up to do a first run and found that I had a rooster tail created by the large step from the sluice bed to the Vortex matting. I decided to add an insert to the sluice to take up the step. This was done by using a piece of the sign to lay into the bed and overlap the matting. Going back to the table saw, I cut a dado about 3/4 of an inch to allow for the overlap. Worked great and started to run material.

20171227_215754.jpg

20171227_215806.jpg

I hope I was able to explain things well enough, if not reply and I will try to address them. I will be posting a video in the next reply.

Dig deep, keep the color.
 

Just a quick and crude video of the sluice.


Hope you enjoyed the build and I would also encourage others to thy this as well.

Dig deep, Keep the color.

Bill Jeffries
 

Looks good.How about a in-line water flow valve.To be able to adjust water flow.
 

I did install a ball valve below the spray bar, is this what you're referring to?
 

I did install a ball valve below the spray bar, is this what you're referring to?

Cool,perfect :) You might have to experiment on the "slot in the T". I had to go with drilled holes to get a good even flow.
 

Last edited:
Bill -

Looks great! Nice fix of the "rooster tail" effect. We usually use a piece of aluminum bent into a z shape so the matting has a decent ramp. Of course we rivet it down to the aluminum sluice body then flatten the rivets. Your fix is much easier.

Let us know how the recovery is.
 

That's pretty cool.... Easy and inexpensive to put together and it appears to work pretty well....:icon_thumleft:
 

I does work quite well, I hope to do another video today to show the vortex matting load up with material and then clear.

Dig deep, keep the color.

Bill
 

Was down in the basement last night running some flood sands. Recorded a quick video of the mini sluice to show the vortex matting. The matting is pretty cool in that it has I think 8 riffles per linear inch. When I run material, you can clearly we the matting catch the sands as they run down and right before your eyes you see it clear. This is what you want to see. These flood sands are not classified other than running it through an 1/8 inch classifier to remove roots and debris. They are not concentrated at all. I really don't expect to find much in the way of gold for that reason but it does give me something to keep my head in the game and allows me to prospect some areas. Well enjoy the crude video.

Dig deep, Keep the color.

Bill


You could put a 1/4"+ high dam across the front after the pipe to level the water completely. Angle aluminum or uhmw would do well as long as it can hold the straight line.
 

Valid point Reed, therefore creating a weer effect. That's what I like about this site, one comment sets me to thinking. After I did the video, I also realized that the overlay is tweaked up a little bit in the middle causing the flow to be displaced more to the sides. I was able hold the bowed up area down with my spoon and the middle cleared right out. I will bend it down a bit and try it out. Thanks for the input.

Dig deep, Keep the color.

Bill
 

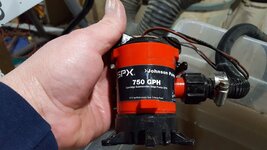
Hey Bill.Could you tell me what pump your using ? Its nice & quiet compared to mine ,thanks
 

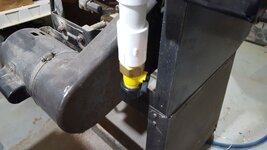
I am using a Johnson cartridge pump, 750gph. Not an expensive pump at all, about 35 dollars. Can be found at any marina, discount store or Ebay. If yours is making noise ya might want to check the impeller, it may have become abraded and is out of balance in which case it might be easier as well as cheaper to purchase a new one. You might check with Kevin Bell at Snake River Products as he does carry this brand of pump.

20180105_181644.jpg

Dig deep, Keep the color

Bill
 

Top Member Reactions

Users who are viewing this thread

Back
Top