You are using an out of date browser. It may not display this or other websites correctly.
You should upgrade or use an alternative browser.
You should upgrade or use an alternative browser.
Black Junk on Silver...
- Thread starter SugarSand
- Start date
Matejko
Sr. Member
- Joined
- Jul 18, 2005
- Messages
- 268
- Reaction score
- 0
- Golden Thread
- 0
- Location
- Warsaw-Poland
- Detector(s) used
- White's Prizm V
SugarSand said:I did it twice for 30 minutes each time
First of all, you should keep the coin in there for 6-8 hours at last. Not 30 minutes, twice...

Second thing is, to use ordinary aluminium foil, same as you use to pack sandwiches or bake.
That's because a piece of alu found in the garage has to small surface, no matter how big it is. If you take a foil and bend it, you get "bigger' surface on the same surface.
Size of aluminium's surface is important in this. Also important is that, the coin has to have a proper contact with foil. So, press it after you put it on the foil.
Hope, you know what I mean...


Good luck in further fight.

Pozdrawiam Matejko
If this wont clean your coin, there is chemical stuff called EDTA.
EDTA is a trade name, so it should be the same in English as it is in Polish.
I never used it, but I heard is the best stuff to clean silver.
hollowpointred
Gold Member
- Joined
- Mar 12, 2005
- Messages
- 6,871
- Reaction score
- 56
- Golden Thread
- 0
- Detector(s) used
- Minelab Explorer SE/Garrett GTI 2500/ Ace 250
i tried this method on a couple of silver roosies yesterday and it really works!! thanks matejko!
SugarSand
Sr. Member
- #24
Thread Owner
Thank you again, Matejko and everyone else!
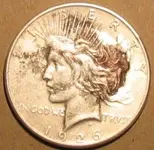
I tried Matejko's method one more time and let sit for 6 hours, and the coin did have a slight improvement.? I then tried a mix of Matejkos', Comancheros', and similar methods I have read on Internet.? Each try gave a slight improvement, and took only a few minutes because heat was applied during the process.? I have read that heat accelerates the results, and I kept it at, or near boiling.? I can tell if it is working quickly because I see small bubbles rising from the black areas.? I tried plain salt, and then salt with Sodium Bicarbonate (baking soda).? The solutions with baking soda seemed a little more aggressive.? I am pleased with the results and we have definitely removed the "black junk", and what remains looks like the toning I get with many of the silver coins I find in Iowa.
Thanks again everyone, especially Matejko, and I will try this more in the future with this coin and others.? I think this coin is an extreme case, and most can be completely cleaned by these methods.
Pozdrawiam Steve
Attachments
bk
Bronze Member
- Joined
- Jan 19, 2005
- Messages
- 1,423
- Reaction score
- 66
- Golden Thread
- 0
- Location
- SE Minnesota
- Detector(s) used
- Minelab Explorer SE pro, Minelab Explorer XS, Garrett Freedom II (3), Garrett pro-pointer.
- Primary Interest:
- Metal Detecting
That Peace dollar is looking much better. Usually when you remove the black crud with anything else, it leaves the rest of the coin looking "cleaned". In this case it does not appear to have adversely affected the rest of the coin. Thanks for the demonstration Sugar Sand, and thanks Comanchero for the technique.
SugarSand
Sr. Member
- #26
Thread Owner
Most of what I have done is an attempt to duplicate Comanchero's method, but I couldn't find an aluminum vessel without going to a garage sale, or Goodwill, DAV, etc., so I incorporated some of Matejko's method too.? They just don't have the old aluminum pans at Walmart like they had at the store when I was a kid.? Most of the solutions I found on the Internet used the continuous applied heat like Comanchero, so I used the mass of aluminum foil along with applied heat in a salt and/or baking soda solution and each try gave a slight improvement.? I'm sure if I kept going I could remove it all, but it is/was so severe that there is slight pitting on the surface, and I've almost reached a happy medium!? The principle is all the same and I found some seriously technical sites detailing the real science behind it, and as we have seen, there are many ways to use the science in real life. All I have read also says this only acts on the sulfide (black stuff), not the silver itself, so you can't damage the coin.
Comanchero has mentioned this in many posts, here is one...
http://forum.treasurenet.com/index.php/topic,10185.0.html
Comanchero has mentioned this in many posts, here is one...
http://forum.treasurenet.com/index.php/topic,10185.0.html
Slug Hunter
Jr. Member
Ii could add a little insight here as I used the salt and foil method to clean a Seated Liberty dime that came out BLACK. I toothpasted the coin to get an ID on it but had some hard tarry stuff left. I overnighted it with the salt/foil scam and it worked, BUT when I opened up the foil and rubbed the coin thinking it would melt away, I smeared the tar right back onto the surface and couldn't get it to budge. You could tell that it had lifted it, though. SO I overnighted it again and this time, I daubed the stuff off with a cuetip, and got almost all of it. It's like a tar baby, you think you have it loose and then it just pulls you back in.
Michigan Badger
Gold Member
- Joined
- Oct 12, 2005
- Messages
- 6,797
- Reaction score
- 149
- Golden Thread
- 0
- Location
- Northern, Michigan
- Detector(s) used
- willow stick
- Primary Interest:
- Other
The foil method (ultra mild electrolysis) described above is very old and has been used for probably 40 years or more. It works fairly well on mildly encrusted coins. A small current flows through the coin to the aluminum foil or pan. It can do the job on more serious cases if repeated many times. It requires washing the coin with mild hand soap and a light polishing after each session. I've run silver half dollars through this process 6 or 7 times and the buyer of the coins was most impressed with the look (it mocks original luster).
However, the same thing should be achieved much faster by a little more aggressive electrolysis. Try a test junk silver coin before you work on your dollar. Plans to make your own electrolysis unit can be found all over the internet. Also, complete ready-made units are sold on ebay. A basic flashlight battery, two wires, a little tape, two alligator clips, a stainless steel spoon, and a glass filled with salty water is all you need. Some use AC/DC power supplies in place of a battery, but I like to keep the current very low.? Too much current flow can mean damage mainly via discoloration and/or corruption to surface metal (frosty look). As the current flows through the coin to the spoon your crud will fall off. Be sure to check online plans to make sure you have the wires hooked right. You want the current to flow from the coin to the spoon--this is very important. The coin should bubble first, not the spoon.
However, the same thing should be achieved much faster by a little more aggressive electrolysis. Try a test junk silver coin before you work on your dollar. Plans to make your own electrolysis unit can be found all over the internet. Also, complete ready-made units are sold on ebay. A basic flashlight battery, two wires, a little tape, two alligator clips, a stainless steel spoon, and a glass filled with salty water is all you need. Some use AC/DC power supplies in place of a battery, but I like to keep the current very low.? Too much current flow can mean damage mainly via discoloration and/or corruption to surface metal (frosty look). As the current flows through the coin to the spoon your crud will fall off. Be sure to check online plans to make sure you have the wires hooked right. You want the current to flow from the coin to the spoon--this is very important. The coin should bubble first, not the spoon.
pilgrim770
Jr. Member
I don't know what carburetor cleaner would do to it but it sure takes everything off aluminum
U.K. Brian
Bronze Member
- Joined
- Oct 11, 2005
- Messages
- 1,629
- Reaction score
- 153
- Golden Thread
- 0
- Detector(s) used
- XLT, Whites D.F., Treasure Baron, Deepstar, Goldquest, Beachscan, T.D.I., Sovereign, 2x Nautilus, various Arado's, Ixcus Diver, Altek Quadtone, T2, Beach Hunter I.D, GS 5 pulse, Searchman 2 ,V3i
- Primary Interest:
- All Treasure Hunting
The really easy way to do the process is just to spit on the coin and then rub the affected area with the foil. You can thus concentrate maximum treatment on the worse areas. Warning ....gas will be released and the foil/coin will get hot as you rub.
bk
Bronze Member
- Joined
- Jan 19, 2005
- Messages
- 1,423
- Reaction score
- 66
- Golden Thread
- 0
- Location
- SE Minnesota
- Detector(s) used
- Minelab Explorer SE pro, Minelab Explorer XS, Garrett Freedom II (3), Garrett pro-pointer.
- Primary Interest:
- Metal Detecting
Based on the results of the cleaning that was already done on this coin, It appears to me that the crud on this coin is silver sulfide, and not an organic material such as tar or oil. Silver sulfide (tarnish) will not be removed by solvents. there are two ways to remove the tarnish.
1) Scrub the heck out of the coin with an abrasive until the material is phisically removed (bad choice) or,
2) Perform a chemical reaction to reduce the tarnish without removing any of the silver metal.
Check out the attachment:
http://scifun.chem.wisc.edu/HOMEEXPTS/TARNISH.html
1) Scrub the heck out of the coin with an abrasive until the material is phisically removed (bad choice) or,
2) Perform a chemical reaction to reduce the tarnish without removing any of the silver metal.
Check out the attachment:
http://scifun.chem.wisc.edu/HOMEEXPTS/TARNISH.html
bk
Bronze Member
- Joined
- Jan 19, 2005
- Messages
- 1,423
- Reaction score
- 66
- Golden Thread
- 0
- Location
- SE Minnesota
- Detector(s) used
- Minelab Explorer SE pro, Minelab Explorer XS, Garrett Freedom II (3), Garrett pro-pointer.
- Primary Interest:
- Metal Detecting
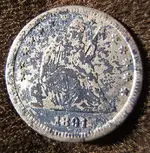
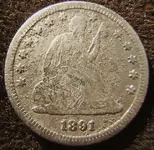
Okay, so I tried this method on a seated liberty quarter that I found under a sidewalk earlier this year.
It took a total of 15 minutes. I got rid of most of the silver sulfide, but the surface is still somewhat porous.
Nothing can be done to bring original mint luster back to the coin.
Here are the before and after pics.
It took a total of 15 minutes. I got rid of most of the silver sulfide, but the surface is still somewhat porous.
Nothing can be done to bring original mint luster back to the coin.
Here are the before and after pics.
Attachments
jon43
Hero Member
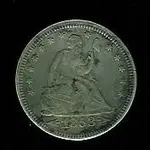
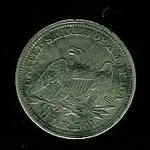
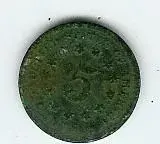
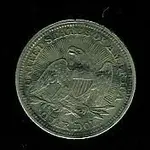
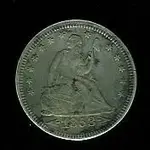
this is the oldest coin i have found here in owensboro seated lib, 25 cents 1853. it looks good but it looks like its got tar on it. i also got a 1866 shield 5 cent that is Rusty how about cleaning the shield 5 cent. if i could get the tar off the 25 cent piece that would be nice because it all ready has nice detail. any help i thank youjimmyokla said:WD-40 will melt tar or any sticky tar or oil substance and i doubt if it would hurt the coin since its metal .......works good for road tar on your car too lol
Attachments
Michigan Badger
Gold Member
- Joined
- Oct 12, 2005
- Messages
- 6,797
- Reaction score
- 149
- Golden Thread
- 0
- Location
- Northern, Michigan
- Detector(s) used
- willow stick
- Primary Interest:
- Other
bk said:Okay, so I tried this method on a seated liberty quarter that I found under a sidewalk earlier this year.
It took a total of 15 minutes. I got rid of most of the silver sulfide, but the surface is still somewhat porous.
Nothing can be done to bring original mint luster back to the coin.
Here are the before and after pics.
bk I'd try NEVR-DULL on it.
Badger
kybowhunter
Jr. Member
Matejko said:Hi SugarSand !!!
Have you tried this.:
Get a plastic or glass container, fill it with warm water (250-300ml) put 2-3 large spoons of salt into the water. Mix it properly.
Then, at the bottom of container place some aluminium foil and put your coin on the foil for a few hours.
Sounds strange, but works. I assure.
Here is a picture, how should it look like.
Pozdrawiam Matejko
Can you use this on any coin or just silver?
Stroover
Full Member
This works only on silver, since what happens is the sulphite (black gunk on silver) is attracted to silver, but moreso on alluminum. The salt in the water acts something like a current conductor making the sulphite jump off the silver onto the alluminum. The hot water acts as a catalyst to speed up the process.kybowhunter said:Matejko said:Hi SugarSand !!!
Have you tried this.:
Get a plastic or glass container, fill it with warm water (250-300ml) put 2-3 large spoons of salt into the water. Mix it properly.
Then, at the bottom of container place some aluminium foil and put your coin on the foil for a few hours.
Sounds strange, but works. I assure.
Here is a picture, how should it look like.
Pozdrawiam Matejko
Can you use this on any coin or just silver?
For copper, try mixing 1 tbs of salt to about 1/4 cup of vinagar and place your (penny) in for a few seconds or longer, depending on how oxydized the copper is. The longer you leave your penny(pennies) in, the vinager/salt solution will turn blue as a result of copper jumping off the penny into the solution (so you don't want to keep it in there for too long). Afterwards, it's fun to place something made of iron or steel in this solution and watch it get a copper coating
Southcacalaky
Silver Member
- Joined
- Oct 2, 2005
- Messages
- 3,626
- Reaction score
- 16
- Golden Thread
- 0
- Location
- Summerville, South Carolina
- Detector(s) used
- Tesoro "Eldorado", Whites "Beach Hunter ID",
I have used the foil method but used a few drops of distilled vinegar the wrapped the coin in foil. Took a few times but like the results, HH Art...
elk311
Jr. Member
- Joined
- Jan 13, 2012
- Messages
- 40
- Reaction score
- 15
- Golden Thread
- 0
- Location
- Kitsap, Washington
- Detector(s) used
- Minelabe Equinox 800, Whites Spectrum XLT (x2), Whites Coinmaster, Minelab XT18000, Compass Yukon 90B, Bounty Hunter
- Primary Interest:
- Metal Detecting
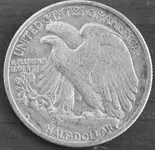
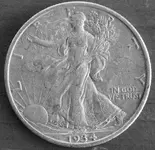
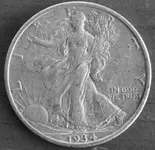
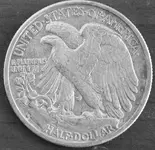
I just tried the aluminum foil, salt and warm water solution to a 1934 half dollar that I found tonight. I mixed the solution, placed the coin in and foil on top. I continued to read this thread and found out that the silver should be ON the foil and went to fix my mistake (less than 5 minutes) and the half dollar is AMAZING looking !!! I guess there was not a lot of patina but that solution ROCKS !!!
Not 6 hours, 5 minutes !!!
I'll post a picture later, it's time for bed.
Not 6 hours, 5 minutes !!!
I'll post a picture later, it's time for bed.

Newfiehunter
Hero Member
- Joined
- Oct 20, 2007
- Messages
- 742
- Reaction score
- 342
- Golden Thread
- 0
- Location
- Newfoundland
- Detector(s) used
- Currently own: Fisher CZ5, Eurotek Pro, Tesoro Vaquero, Tesoro Cortes, Vibraprobe 560, Vibradetector 720, Garrett ProPointer. Makro Pinpoiinter Used: Whites Liberty2, Garrett Freedom3, Garrett GTA 1
- Primary Interest:
- Metal Detecting
Just tried the aluminum foil method...and couldn't believe the results!!! It was fantastic!! I found there was somewhat of an odor on the coin afterwards. At least there is a less change of damaging the coin by using alligator clips during the electrolysis process.
elk311
Jr. Member
- Joined
- Jan 13, 2012
- Messages
- 40
- Reaction score
- 15
- Golden Thread
- 0
- Location
- Kitsap, Washington
- Detector(s) used
- Minelabe Equinox 800, Whites Spectrum XLT (x2), Whites Coinmaster, Minelab XT18000, Compass Yukon 90B, Bounty Hunter
- Primary Interest:
- Metal Detecting
elk311 said:I just tried the aluminum foil, salt and warm water solution to a 1934 half dollar that I found tonight. I mixed the solution, placed the coin in and foil on top. I continued to read this thread and found out that the silver should be ON the foil and went to fix my mistake (less than 5 minutes) and the half dollar is AMAZING looking !!! I guess there was not a lot of patina but that solution ROCKS !!!
Not 6 hours, 5 minutes !!!
I'll post a picture later, it's time for bed.
Here's the pics...
Attachments
Similar threads
- Replies
- 12
- Views
- 597
Users who are viewing this thread
Total: 1 (members: 0, guests: 1)


