Silver Tree Chaser
Bronze Member
Here’s a posting to bring me up to speed on a few better finds since my last post in June.
A 17th -18th Century site with a likely historical connection to King Phillip’s War is offering up more finds. I’ve been working it since last year, but it has yet to offer up a big find despite lots of time and effort. I even located the cellar hole, which was unfortunately filled with rubble (small stones cleared from the surrounding farm field over the years). I found the fire place with some bricks in place, lots of ash, and all sorts of animal bones – small rodent-like jaw bones, pig tusks, you name it. The fire place was 50” below grade! The builder’s trench and the overall cellar hole offered up very little finds for all the work involved. Every shovel full of dirt was sifted or checked with my detector. Sifting was less effective for metal targets, there was far too much dirt to search without a prized find going overlooked. It was disappointing with the lack of finds. Where did they dispose all their trash? Time equally spent detecting the entire field in comparison was far more productive.
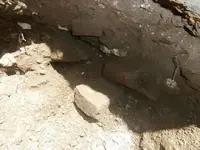
These bricks were still stacked in small groups with a layer of surrounding ash. The house was undoubtedly a New England Stone Ender.
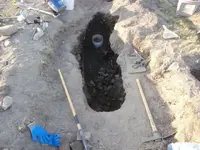
I won’t being digging another trench like this anytime soon.
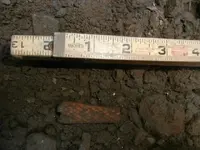
This bone-handle grip (half-segment) for a knife was sticking out the side of my trench.
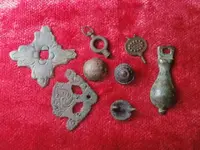
Assorted finds – furniture pieces, watch winders, 17th century buttons (one of pewter), and a plain leather mount. The watch winders and one furniture piece came from another site.
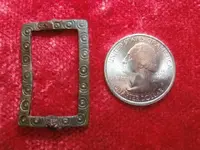
This apparent knee buckle was found at the very bottom of the trench. It’s the only complete buckle frame from the site, one frame among many fragments (plow fodder).
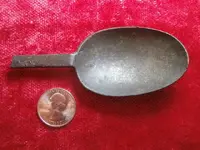
The same site has offered up about a half dozen early spoon fragments. I found this solid spoon bowl with partial handle last week while metal detecting in the surrounding field. Maker’s seal near handle is too worn to ID. I’m thinking it was a trifid-end variety.
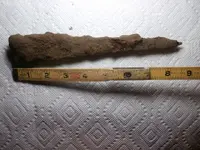
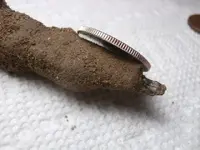
I might cook this with electrolysis. It came from the very bottom of the trench. It’s very thin based on the removal of the outer crust at the very tip (with US quarter for comparison) – too thin for door hinges of any sort. A dagger blade of some sort or just wishful thinking?
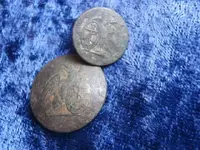
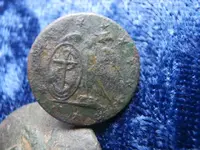
I found these two early 1800’s US Navy buttons at the same site. This site has now offered up about eight military buttons from the same period. The small button with the shield on left might be quite early. Both have complete shanks. I’ve ordered aluminum jelly to try and get at some of the gilt that is still present. I'm told that lemon juice is another option, but I think the aluminum jelly will be easier to handle.
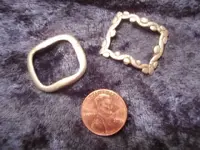
Another site that I’m working has produced a second solid silver shoe buckle, and it’s another kid’s buckle. I posted the first several weeks ago. Here’s a look at both buckles. The plain one was the most recent recovery.
Coin finds have been a little sparse – several coppers from various sites and an unidentifiable fragment from an apparent hammered silver coin (too miniscule to be worth a photo). It was found at the site with the dug trench.
I did come up with a surprising Indian Head Cent find this past weekend. I’ll be posting it up soon. I wanted to first get current with these other finds.
Good Hunting
A 17th -18th Century site with a likely historical connection to King Phillip’s War is offering up more finds. I’ve been working it since last year, but it has yet to offer up a big find despite lots of time and effort. I even located the cellar hole, which was unfortunately filled with rubble (small stones cleared from the surrounding farm field over the years). I found the fire place with some bricks in place, lots of ash, and all sorts of animal bones – small rodent-like jaw bones, pig tusks, you name it. The fire place was 50” below grade! The builder’s trench and the overall cellar hole offered up very little finds for all the work involved. Every shovel full of dirt was sifted or checked with my detector. Sifting was less effective for metal targets, there was far too much dirt to search without a prized find going overlooked. It was disappointing with the lack of finds. Where did they dispose all their trash? Time equally spent detecting the entire field in comparison was far more productive.

These bricks were still stacked in small groups with a layer of surrounding ash. The house was undoubtedly a New England Stone Ender.

I won’t being digging another trench like this anytime soon.

This bone-handle grip (half-segment) for a knife was sticking out the side of my trench.

Assorted finds – furniture pieces, watch winders, 17th century buttons (one of pewter), and a plain leather mount. The watch winders and one furniture piece came from another site.

This apparent knee buckle was found at the very bottom of the trench. It’s the only complete buckle frame from the site, one frame among many fragments (plow fodder).

The same site has offered up about a half dozen early spoon fragments. I found this solid spoon bowl with partial handle last week while metal detecting in the surrounding field. Maker’s seal near handle is too worn to ID. I’m thinking it was a trifid-end variety.


I might cook this with electrolysis. It came from the very bottom of the trench. It’s very thin based on the removal of the outer crust at the very tip (with US quarter for comparison) – too thin for door hinges of any sort. A dagger blade of some sort or just wishful thinking?


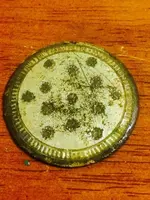
I found these two early 1800’s US Navy buttons at the same site. This site has now offered up about eight military buttons from the same period. The small button with the shield on left might be quite early. Both have complete shanks. I’ve ordered aluminum jelly to try and get at some of the gilt that is still present. I'm told that lemon juice is another option, but I think the aluminum jelly will be easier to handle.

Another site that I’m working has produced a second solid silver shoe buckle, and it’s another kid’s buckle. I posted the first several weeks ago. Here’s a look at both buckles. The plain one was the most recent recovery.
Coin finds have been a little sparse – several coppers from various sites and an unidentifiable fragment from an apparent hammered silver coin (too miniscule to be worth a photo). It was found at the site with the dug trench.
I did come up with a surprising Indian Head Cent find this past weekend. I’ll be posting it up soon. I wanted to first get current with these other finds.
Good Hunting
Attachments
Last edited:
Upvote
10


