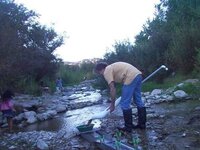
The amount of material a 3 inch hand sucker will move

deserdog

Hero Member
May 17, 2013
508
444
Primary Interest:
All Treasure Hunting
I did a test to see how much material a 3 inch would move. This is material right from the creek, after loosening it up with my digging bar. Each pan is one suction stroke. First picture is all of thematerial in a 14 inch gold pan, then the oversize in a 1/2" classifier.
pan6.jpg

pan6classified.jpg

pan7.jpg

pan7classified.jpg
 

Upvote 0
I'd like to know a lot more about how this thing operates. Since dredging is virtually banned here, doesn't seem to make a difference how big or little I use. So tell me more about how the suction is generated and materials successfully recovered? Does it all go to a container? Did you build it yourself? ???
 

Last edited:
That's pretty impressive sir!
 

I built it myself. The 3 inch that I use has a barrel 30 inches long. The seal is an adjustable rubber test plug that has 3 ridges on it. The barrel has a 45 degree elbow on the end. Very easy to use, you stick the nozzle end in the material you want to suck up, and then pull on the handle. At the end of the stroke, you just give the barrel a little twist so that the 45 points up. This keeps the material in the barrel. To empty, you just point down.
3 inch super gold sucker.JPG
 

The size and amount your 3" moves still impresses the he** outta me. I can see myself using that and dumping it all into a BGT. That would be very close to a perfect system of gold recovery here. I can't afford the BGT this year but can you elaborate more on the "guts" inside the dredge and the order they were put together? A close up picture or two? I'd like to build a 3" with adjustable to a 1" and an adapter on the 1" for a flex tube of smaller diameter hose for C&C work.
 

Last edited:
The super gold sucker is very easy to build. You just cut you 3" barrel whatever length you want. Cut the plunger piece of 1" the same size. You need a 3" schedule 40 45 degree elbow, a 3" schedule 40 slip pipe cap, a 1" schedule 40 slip pvc 90, coupling and pipe cap. You also need a schedule 3/4" schedule 40 pvc slip pipe plug. You also need a 3" plumbers test plug, the kind with 3 ridges and wing nut.

Fro the handle, I cut 2 1 1/2" pieces of 1" pvc and glue the 90, coupling and 1" pipe plug together. You cut a hole with a 1" hole saw(1 3/8") in the center of the 3" pipe cap. You drill a 3/8" hole in the 3/4" pipe plug. Most of the time, you have to heat the 3/4" pipe plug gently until it is slightly pliable, then tap it into one end of the 1" plunger piece. After it is cooled down, you take it out and put a 2" x 3/8" tap bolt through from the inside, and then take apart the the 3" test plug. You will have to trim the larger washer to the size of the smaller washer. Then bolt on one of the washers onto the bolt sticking out of the pipe plug. I use stainless steel bolts and nuts. After you have bolted the washer on, you can glue the pipe plug onto one end of the plunger shaft. Then you slip the 3" pipe cap over the shaft and you can glue the handle on the other end. This completes the plunger.

For the barrel, you just glue on the 3" 45 degree elbow on one end. I also drill 4 vent holes down about 2 1/4" from the other end barrel. They serve 2 purposes, one to vent back pressure, and 2, if you don't have them, eventually you will lay down the super sucker, and when you pull back on the plunger, you will get a face full of water.

For the 3" nozzle, I just cut a 6" piece of 3 ". Do not glue it one, it gets a lot of wear!!

Sorry for the long explanation, but I don't have any pics showing the seal on the plunger.

Here is a link that shows some more pics .
3 inch Hand Dredge Super Gold Sucker 30" Barrel Gold Mining Prospecting Tool | eBay
 

As an eBay Associate we earn from qualifying purchases.
Very cool, somewhere awhile ago I saw one that someone had fitted a foot valve at the apex of the 45 degree fitting and had a "y" fitting at the top right before the upper handle end that was used to pour out the gravel. I love to use smaller tubes and bulbs but don't usually grab them until I get to bedrock or the bottom to work the cracks. I figure until I get to the bottom it's pretty much about speed, so not wanting to waste the chance of flood gold in the overburden I just shovel directly into the BGT, for me much faster and fewer steps. Still would like to build one of those for the deep winter time holes in the creek I'm not about to wade into.
 

deserdog/Jeff,
That is an interesting "Tool" you built/are about to build. Yes pictures would be lovely from one or the other of you as I can not ebay on this computer. deserdog, thank you for sharing with all of us and best of success with your prospecting.....................63bkpke
 

I have to build a bunch of 3" super gold suckers. I will try to get some pics as I build.
 

Have you ever used (or tried to use) the dredge under water? Just looking at it, it would be difficult to sink without weights. Maybe flood the chamber with water, dive down, expel water, suck material, return to surface? Mask and snorkel time is here in the river and last year I saw plenty of great spots....just out of reach.
 

Last edited:
I can't see very well in the picture but it should have or you can easily add, a large hole at the handle end which will flood it allowing it to sink without effecting the tubes operation.
 

For gold sucker that are going to be used totally underwater I do drill a hole in the handle, otherwise it can float away too easily. Also if you are using a gold sucker all the way underwater, you need to have the cap off so you do not have as much back pressure.
 

deserdog- drill a 1" hole on opposite sides of the tube right near the cap and you will be able to leave the cap in place
 

I just built a 2" and use pool floaty material as the plug instead of the test plug. Works amazingly well. I wish that I would have built one long ago.
 

I had thought about using pool noodles for seals.
 

Thank you for bumping this thread. Very helpful!
 

Top Member Reactions

Users who are viewing this thread

Back
Top