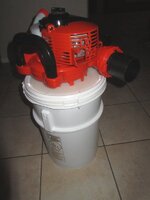
JUST BUILT THIS QUALITY VAC - BLOWER FOR CREVICING AND DRY-WASHING

AzViper

Bronze Member
Sep 30, 2012
2,038
2,251
Arizona - Is there any other state worth visiting
Detector(s) used
Fisher Gold Bug Pro, Nokta FORS Gold, Garrett ATX, Sun Ray Gold Pro Headphones, Royal Pick, Etc.
Primary Interest:
Prospecting
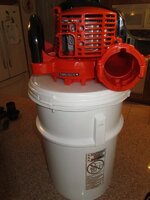
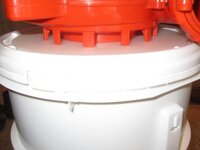
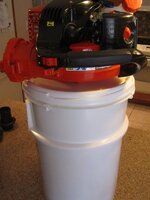
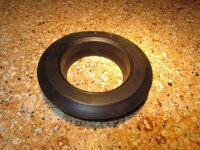
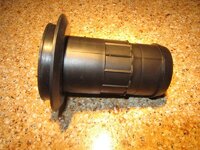
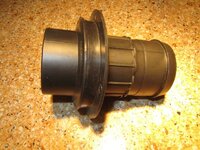
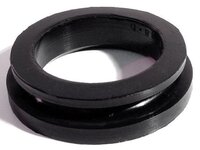
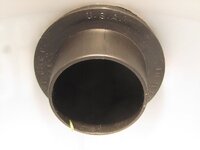
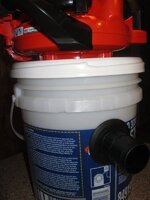
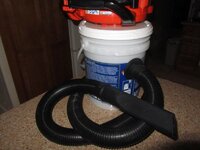
Living in Arizona I have given lots of thought and received feedback from members here in the forums. I decided to build a Vac-Blower to be used for dry-washing and working the crevices. What I wanted to build was a quality Vac that works and has great suction. To do this there can be no leakage of air being drawn into the 6 gallon bucket. I purchased a 1/4 twist lid and 6 gallon bucket. I also located a rubber grommet that is self-sealing once 2.5" vacuum adapter is pushed into the grommet. The grommet is used on very large fish tanks to penetrate glass.

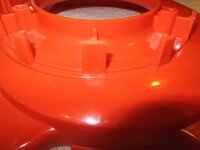
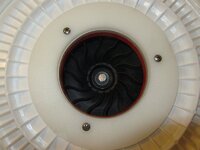
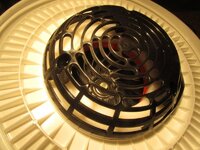
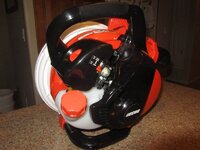
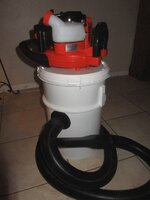
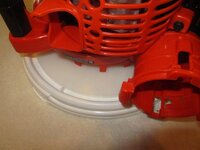
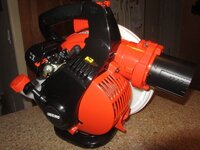
I did not like what I have seen with other home built Vacs by bolting the blower directly to the lid nor do I like how the vacuum inlet that is install on commercial made vacs. The lid over time will get brittle and break. I took 1/4” Nylon and router a circle to fit the topside of the lid and bottom side of the lid. The idea was to sandwich the lid between the two pieces of Nylon making the lid very strong. Next using a pair of calipers I took the inside and outside measurements of the intake of the blower. I then routered a hole to 4.250” to match the blower intake. Using 3 stainless steel screws that were 5/8” longer than the stock screws I mounted the blower to the lid. An Echo ultra-quiet blower motor (400 CFM & 198 MPH) was used due to how the intake guard was mounted. By removing the intake guard exposed 3 screw holes making it very easy to mount the blower to the lid. One note, about 9 small raised tabs that surround the intake needs to be filed down so the blower sits flat to the nylon sub-base.

The entire system with hose, crevice adapter weighs 16 pounds. Put on a pack frame and hit the back country.
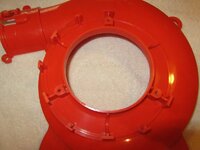
cv1e.jpg

cv7f.jpg

cv6z.jpg

cv2o.jpg

cv8v.jpg

cv3m.jpg

cv4j.jpg

cv5t.jpg
 

Last edited:
Upvote 0
That is well engineered my friend.
Very clean a thing of beauty.:occasion14:

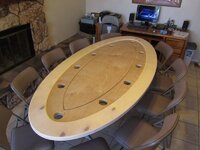
It helps having tools and machines. I build custom poker tables, I have a complete woodworking shop so today I said what the heck lets build it. I spent less than a few hours on it.
 

Last edited:
I like it, you did an awesome job and solved the problem with the lids breaking with that large bulkhead that you put together. :)
 

AZV - Thumbs up on a great mod/build, real quality:icon_thumleft: :icon_thumright:(actually two thumbs up)!

I am not familiar with the blower system so with that said:
1) Does the dirt pass through the fan?
2) Does the catch bucket need to be vented? {I've used Knee High Stockings on Shop Vacs}
3) What happens with the dust and pressure in the bucket?
4) Was the Echo used or if new how much and what store?
5) Could this be used for removing items from cracks in a river?

Really nice looking rig............63bkpkr
 

Excellent Job! :icon_thumleft:

What did you use for the vacuum hose fitting? And how did you mount it to the bucket?

Something like this? Vacuum Gas Powered Gold Vac, Rosewind Mining Supply

GG~

I do not like the intake adapter that Rose Wind Minning sales. It just pulls up tighten against the side of the bucket with no gasket in between. The rubber grommet I am using needs a 3'' hole cut into the side of the bucket. Then the grommet is inserted followed by inserting the vacuum hose adapter. As the adapter is inserted the back side of the grommet expands sealing the grommet. I also have enclosed another style of grommet.

cv9g.jpg

cv10t.jpg

cv11w.jpg

834_large_image.jpg
 

Last edited:
AZV - Thumbs up on a great mod/build, real quality:icon_thumleft: :icon_thumright:(actually two thumbs up)!

I am not familiar with the blower system so with that said:
1) Does the dirt pass through the fan?
2) Does the catch bucket need to be vented? {I've used Knee High Stockings on Shop Vacs}
3) What happens with the dust and pressure in the bucket?
4) Was the Echo used or if new how much and what store?
5) Could this be used for removing items from cracks in a river?

Really nice looking rig............63bkpkr

63bkpkr,

1) No the dirt does not pass through the fan blades. The dirt falls to the bottom and any dust exhaust out the black tube of which use to be the blower tube. When used for a Dry-Washer the black tube would be used to blow.
2) No it does not need to be vent as air is pulled in from the vacuum hose and exhaust out the black tube.
3) No Pressure within the bucket as it is not a sealed unit due to exhausting out the black tube.
4) The echo was new. I purchased online from Honda Generators - Snow Blowers - Lawn Mowers - Zero Turn Mowers as Home Depot or Lowes did not carry this model. I selected this model as its ultra quiet (65db) and once you remove the intake guard there were 3 bolts to attach the blower to the lid. When I bought the blower I got it on sale for $169.00. Echo carries a 5 year warranty.
5) Its mainly being used in dry river beds, bedrock to suck from crevices, embankments along rivers, and dry-washing, etc.

I am kicking it around of building my own Dry Washer as I can build it as good as what I can buy, but finding the time is another issue.

Here are some links on gas powered crevicing,

» Crevicing For Gold

» Dry-Land Dredging

» vacuum mining

cv12.jpg
 

Last edited:
63bkpkr,

If the vac/blower is to be used for Dry-Washer the blower would be removed from the bucket, a 3” hose hose would attached to the 3” black exhaust tube on the blower. Another option would be to cut a bunch of holes in a second bucket and attach the blower to this bucket. This would allow air to be drawn through the bucket keeping the blower off the ground.

cv13.jpg

cv14.jpg

Goodguy,

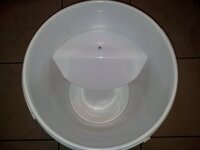
Here is an old bucket to test the grommet before cutting a hole in the new 6 gallon bucket. I think I am going to make a deflector that will attach to the inside of intake. The deflector will stand off from the intake and point downward at a 45 degree angle as seen in this drawing. This will allow the dirt to hit the deflector then fall to the bottom.

cv15.jpg

cv16.jpg

cv18r.jpg
 

Attachments

  • cv17.jpg
    cv17.jpg
    14.9 KB · Views: 143
Last edited:
Nice design and thanks for posting them, gives me a few ideas for some gas dry dredge i been daydreaming about.
 

Got everything except for the bucket and lid
Looks sturdier than regular bucket lids and you say it is 1/4 twist? That would be down right handy.


Wondering if you purchased it local

Thanks

AJones
 

Got everything except for the bucket and lid
Looks sturdier than regular bucket lids and you say it is 1/4 twist? That would be down right handy.


Wondering if you purchased it local

Thanks

AJones

Although I bought mine online you can get the same bucket at Graingers but cost more. BWAY Pail, HDPE, Wht, 6 Gal, Screw Top, UN - Storage Pails and Buckets - 7J114|7J114 - Grainger Industrial Supply

The lid is different from others but I beefed it up as seen in the photos due to being very thin where the blower is mounted. Remember do not mount your vacuum intake to close to the blower motor fan as you could possibly lose gold out the exhaust (Black 3" Tube) of the blower. I could have gone higher on the bucket but this would have placed the vacuum intake to close. Currently its nearly 6" from the fan blade.

The finished Vac / Blower.

cv20.jpg
 

Last edited:
Great design--nicely done!

All the best,

Lanny
 

Thank you for the heads up on the bucket

Got it on order


Now if it will just stop raining we might get some drywashing done this summer
Thanks again


AJones
 

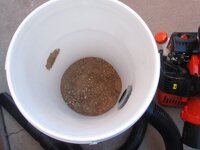
During clean up and packing everything up I removed the lid to find dirt on the side of the bucket. The dirt is hitting with enough force to accumulate on the bucket. I have yet to build the deflector but will soon.

cv21.jpg
 

Thank you for the heads up on the bucket

Got it on order

AJones

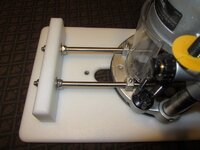
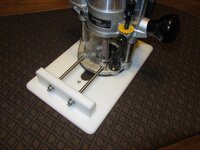
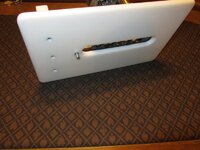
Did you get your vac built? This is the circle jig I developed to cut circles out. The pivot pin on the bottom is the key to getting perfect cut circles. I mainly use the jig for the custom poker tables I build to cut cup holder but it worked perfect to cut out the bulkheads and top of the lid.

cirjig15.jpg

cirjig14.jpg

cirjig13.jpg

cutellipse.jpg
 

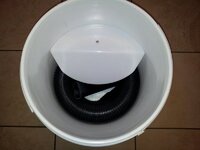
I found some time to finish the intake deflector and mount it inside the 5 gallon pail. Once installed I had room to coil the hose and attachment fit down the center. There is room for a 10" pan plus aluminum bottle for fuel and still secure the lid/blower.

cv22.jpg

cv23.jpg
 

Last edited:

Top Member Reactions

Users who are viewing this thread

Back
Top