- Jan 1, 2013
- 2,657
- 5,428
- Detector(s) used
- Tesoro Vaquero, Whites MXT, Vsat, GMT, 5900Di Pro, Minelab GPX 5000, GPXtreme, 2200SD, Excalibur 1000!
- Primary Interest:
- All Treasure Hunting
Here is a good way to build yourself an over under conversion for your dredge. It doesn’t really matter what brand you are building it for. Mine is a Proline and it works great. I built the over under so that I could run my 4” dredge with a 9hp Honda with the Proline HP500 pump maxed out for the ultimate suction. It has suction to the extreme and it still floats fine on the stock flotation though it does ride a little lower in the water.
The first thing that I did was to gather up all the parts. I bought the punch plate off of a For Sale forum and I picked up the expanded metal and the piece of aluminum from a scrap yard down in Sacramento. All in all with buying off of the forum and buying used materials from the scrap yard, I have less than $150.00 invested in the metal and enough to do both of my dredges. The most expensive part was buying the new miners moss. I had tried contacting some of the vendors that were mentioned but I never got a call back from them. I ended up buying the miners moss from Pioneer Mining and the black ribbed I got for free from a friend.
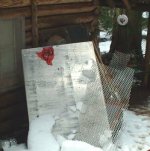
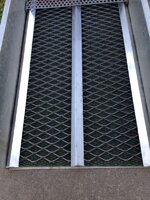
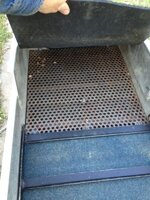
The next thing that I did was to strip the sluice box down to bare metal and cut the aluminum and expanded metal to fit. I used my table saw for the aluminum so that I could get it down to a perfect fit with smooth sides. Then I had to figure a way to mount the punch plate so that it would have no openings, which would allow over sized material into the lower box. So I went down to the local Hardware Store and picked up a couple sticks of ¾×¾ 90° angle aluminum and cut them to fit in the front of the box and act like a slide for the punch plate. It worked great and gives the punch plate a real tight fit along with holding it at just the right height perfectly even with the metal lip on the sluice box opening. The punch plate fits between the two pieces of ¾² aluminum angle that you see fitted together under the opening for the flare in the picture below. These are large pictures from here on so click and save if needed.
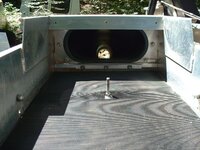
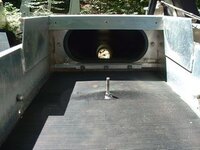
Next for the height on the lower box I just set in more of the angle aluminum to test it out. This gave me an opening of 9/16” in height which I figured would be the minimum three times the size of the material that I wanted for the 3/16 punch plate 3/16×3= 9/16. Also by doing it this way and if I needed more height I could have just riveted them to the aluminum plate and ended up with a ¾” opening but the 9/16 works great so it's been like that for years now.
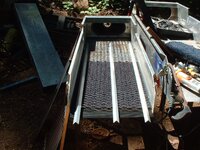
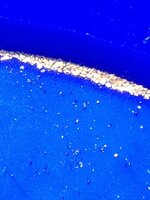
I cut a slide down the center of the aluminum so that I can adjust the amount of water flow into the lower box and so far I have ran it with about 3” of aluminum sticking out the back. Most of the gold that I got stayed in the miners moss directly under the punch plate and next I will start evaluating where the gold is all ending up in both the upper and lower box. 3” works great and having the 6" cut allows me to push it in flush with the tail end for easy storage.
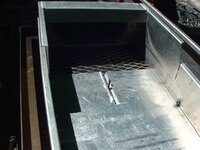
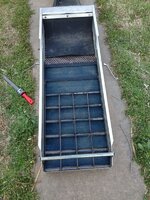
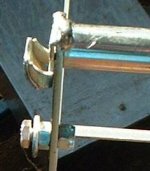
The next thing that I had to do was to mount the riffles back into the box and make them easily removable. I measured the height and started drilling the holes 2” above the bottom of the sluice so that I would get a tight fit. I mounted a small ¼” bolt on the lower end so that the stock hold downs could be used.
Part two
And I notched out the holes on the other side at an angle so that it would lock into place when the riffles are put in.
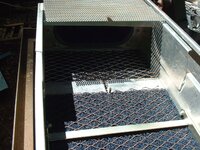
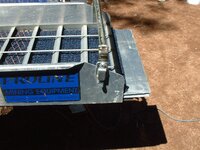
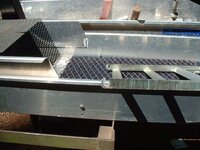
The next and final step was to mount the punch plate. Here’s the rest of the pics and you guys can build one of these great set ups for yourself from these instructions.
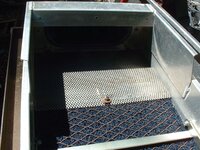
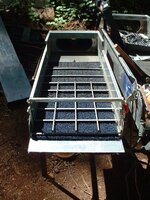
So this was how I built it for this box in 2005 and then I also have my complete series on how to build a dredge on YouTube that shows everything in action.
https://www.youtube.com/playlist?list=PL39A9E7B702FF1B8A
The first thing that I did was to gather up all the parts. I bought the punch plate off of a For Sale forum and I picked up the expanded metal and the piece of aluminum from a scrap yard down in Sacramento. All in all with buying off of the forum and buying used materials from the scrap yard, I have less than $150.00 invested in the metal and enough to do both of my dredges. The most expensive part was buying the new miners moss. I had tried contacting some of the vendors that were mentioned but I never got a call back from them. I ended up buying the miners moss from Pioneer Mining and the black ribbed I got for free from a friend.

The next thing that I did was to strip the sluice box down to bare metal and cut the aluminum and expanded metal to fit. I used my table saw for the aluminum so that I could get it down to a perfect fit with smooth sides. Then I had to figure a way to mount the punch plate so that it would have no openings, which would allow over sized material into the lower box. So I went down to the local Hardware Store and picked up a couple sticks of ¾×¾ 90° angle aluminum and cut them to fit in the front of the box and act like a slide for the punch plate. It worked great and gives the punch plate a real tight fit along with holding it at just the right height perfectly even with the metal lip on the sluice box opening. The punch plate fits between the two pieces of ¾² aluminum angle that you see fitted together under the opening for the flare in the picture below. These are large pictures from here on so click and save if needed.

Next for the height on the lower box I just set in more of the angle aluminum to test it out. This gave me an opening of 9/16” in height which I figured would be the minimum three times the size of the material that I wanted for the 3/16 punch plate 3/16×3= 9/16. Also by doing it this way and if I needed more height I could have just riveted them to the aluminum plate and ended up with a ¾” opening but the 9/16 works great so it's been like that for years now.

I cut a slide down the center of the aluminum so that I can adjust the amount of water flow into the lower box and so far I have ran it with about 3” of aluminum sticking out the back. Most of the gold that I got stayed in the miners moss directly under the punch plate and next I will start evaluating where the gold is all ending up in both the upper and lower box. 3” works great and having the 6" cut allows me to push it in flush with the tail end for easy storage.

The next thing that I had to do was to mount the riffles back into the box and make them easily removable. I measured the height and started drilling the holes 2” above the bottom of the sluice so that I would get a tight fit. I mounted a small ¼” bolt on the lower end so that the stock hold downs could be used.

Part two
And I notched out the holes on the other side at an angle so that it would lock into place when the riffles are put in.


The next and final step was to mount the punch plate. Here’s the rest of the pics and you guys can build one of these great set ups for yourself from these instructions.


So this was how I built it for this box in 2005 and then I also have my complete series on how to build a dredge on YouTube that shows everything in action.
https://www.youtube.com/playlist?list=PL39A9E7B702FF1B8A
Last edited:


 sorry-John


