Sackett
Sr. Member
- Feb 20, 2011
- 253
- 192
- Detector(s) used
- Garrett GTA 500 (need a new/better one)
- Primary Interest:
- All Treasure Hunting
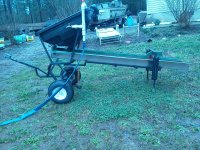
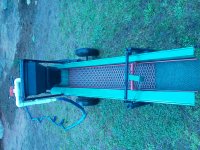
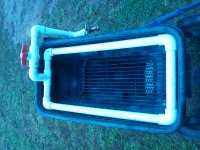
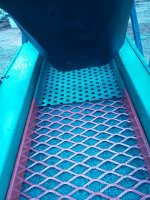
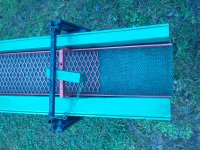
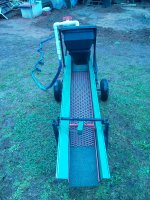
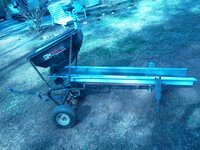
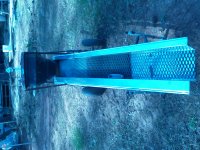
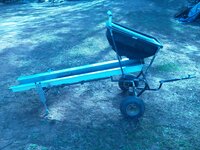
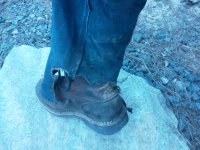
I decided the other day to build me a trommel, now I've never even seen a trommel but I want one. I started getting parts together and suddenly got sidetracked into building a highbanker. This DIY sure does save alot of money, and to me it gives more satisfaction in your gear. Here is what I've got so far. I started out with a pull behind lawnmower/4-wheeler ferterizer spreader (which was broke). I took the plastic hopper off, and the gears off the axle. I then used the frame for the upper end of my highbanker frame. To this frame I attached a 6 foot x 9 inch stainless steel tray for the sluice (I picked this up at the local scrap yard for $17.00, it was brand new). i then found a set of old metal shelves that I was not using, and cut off the frame for the hopper, which just happens to be the hopper from the old spreader. I then used the rest of the shelving for a frame under the sluice, which I welded to the spreader frame. I then welded leg holders to the end of the frame. i then bolted on the lower portion of a set of adjustable crutches for the lower leveling legs. I will layer the bottom of the sluice with v-ribbed rubber matting, $38.00, and then miners moss,(which I had). I am using raised expanded metal for the riffles, small ones at the top end and larger ones on the lower end. (I think, unless someone can tell me a good reason to reverse it and put larger expanded at top and smaller on bottom, like say the larger would break the material up into smaller peices and then hit the smaller expanded??) Anyway I'm using 4 feet of the larger and 2 feet of smaller...I already have the pump from a small dredge that I built...I plan to attach a 10 feet peice of gardenhose to the setup also. I had to cut the tongue of the trailer and reweld it at an angle so I can pull it behind my 4-wheeler without the end of the sluice dragging... all I lack now is attaching the riffles to a frame to secure it to the sluice and the plumbing, and then paint it all up...Below are some pictures so far, I'll post more as I finish it up...NOTE the picture of my pants...beware when welding as I caught my pants on fire and ALMOST did'nt get it out before burning myself really bad!!!!!
Wish me LUCK,
Shawn
I almost forgot to add that I have a 3 foot Angus McKirk sluice that will fit at the end of this ones 6 foot sluice, so I can run 9 feet of sluice..
Tell me what I need to add, change or whatever...Thanks~!
Wish me LUCK,
Shawn
I almost forgot to add that I have a 3 foot Angus McKirk sluice that will fit at the end of this ones 6 foot sluice, so I can run 9 feet of sluice..
Tell me what I need to add, change or whatever...Thanks~!


Upvote
0


 LOL!!!