Cleaning Large Objects With Electrolysis

Michigan Badger

Gold Member
Oct 12, 2005
6,797
149
Northern, Michigan
Detector(s) used
willow stick
Primary Interest:
Other
Greetings!

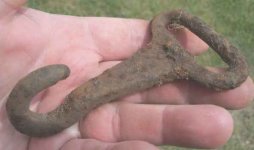
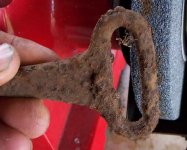
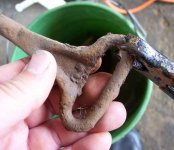
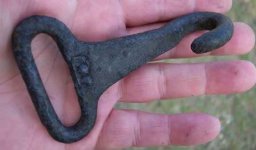
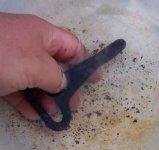
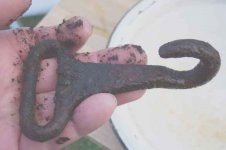
I've decided to bring this thread back for the benefit of those who want to clean larger objects with electrolysis.

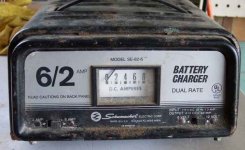
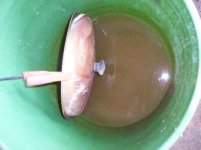
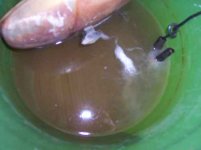
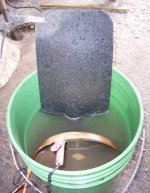
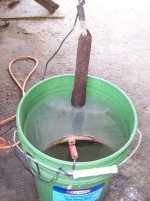
The basic electrolysis setup is super simple. Basically you're using a D.C. Car Battery Charger as the power source. You mix plenty of baking soda into a pail of water, connect the negative lead to the item to be cleaned and the positive lead to the anode (piece of stainless steel).

The 12 volts travels through the dirty item---through the baking soda bath--to the anode and thus cleans the item.

Wear rubber cloves as stainless steel breaks down in the bath and the bath can be a health hazard if in constant contact with the skin.

Happy zapping!

Badger
 

Attachments

  • treasurenet1.jpg
    treasurenet1.jpg
    11.2 KB · Views: 831
  • treasurenet2.jpg
    treasurenet2.jpg
    26.2 KB · Views: 831
  • treasurenet3.jpg
    treasurenet3.jpg
    23.4 KB · Views: 810
  • treasurenet4.jpg
    treasurenet4.jpg
    9.6 KB · Views: 816
  • treasurenet5.jpg
    treasurenet5.jpg
    19.8 KB · Views: 845
  • treasurenet6.jpg
    treasurenet6.jpg
    7.9 KB · Views: 836
More...
 

Attachments

  • treasurenet9.jpg
    treasurenet9.jpg
    11.2 KB · Views: 847
  • treasurenet8.jpg
    treasurenet8.jpg
    11.2 KB · Views: 827
  • treasurenet7.jpg
    treasurenet7.jpg
    10.3 KB · Views: 825
You can clean most any size object with this process.

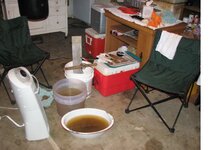
For very large objects just use a plastic garbage can or dig a trench and line it with plastic. Set the item to be zapped on blocks and lay your anode next to it also on blocks.
 

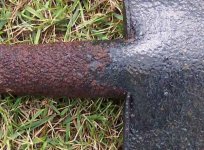
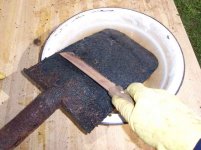
Cleaning a 19th century shovel dug at an old lumberjack camp...
 

Attachments

  • cleanshovel4.jpg
    cleanshovel4.jpg
    27.2 KB · Views: 809
  • cleanshovel3.jpg
    cleanshovel3.jpg
    43.1 KB · Views: 813
  • cleanshovel2.jpg
    cleanshovel2.jpg
    28.7 KB · Views: 818
  • cleanshovel1.jpg
    cleanshovel1.jpg
    29.2 KB · Views: 825
wire wheel/s, naval jelly ,wire brush/s and WD 40 was a bit labor intence but worth it
 

Attachments

  • P1010453.JPG
    P1010453.JPG
    24.7 KB · Views: 789
  • P1010453.JPG
    P1010453.JPG
    24.7 KB · Views: 759
Very timely there, Badger. I was about to post a new topic when I saw your repost. I've had great results on smaller items, the largest being an old door lockplate, using a 9V-500mA power source. I have some larger items, like some old andirons, that need cleaning. Here's my question. I have a battery charger that has a 2A charging rate, as well as a 4A and 6A setting. However, it is one of the microprocessor controlled automatic units that monitors battery condition and stops charging when battery is fully charged. Do you think this one would work or should I use a manual charger that doesn't have all the electronics?
 

Nail Digger said:
Very timely there, Badger. I was about to post a new topic when I saw your repost. I've had great results on smaller items, the largest being an old door lockplate, using a 9V-500mA power source. I have some larger items, like some old andirons, that need cleaning. Here's my question. I have a battery charger that has a 2A charging rate, as well as a 4A and 6A setting. However, it is one of the microprocessor controlled automatic units that monitors battery condition and stops charging when battery is fully charged. Do you think this one would work or should I use a manual charger that doesn't have all the electronics?

This is hard to say. I've never used a microprocessor controlled unit. I guess you could give it a try and find out. I'm sure your unit has a safty shutdown in the event of over-heating, etc. Even the old units have these.

If it fails just pick up a cheap auto battery charger and it will last forever. The one I use is over 30 years old and I've cleaned approx. 2000 ancient coins and relics with it.

Whatever you use, just make sure the negative connector goes to the item to be cleaned. The positive goes to the stainless steel anode.

Badger
 

Update: I recommend not coating iron relics with anything. Just clean off the rust with electrolysis and when dry brush the relic with a brass brush (sold at most hardware stores).

One exception might be iron knives and other thin metal iron relics. On them I'd use Renaissance Wax.

Thank you.

Badger
 

what about ski wax as a sealer?
 

Baron Von De Kalb said:
what about ski wax as a sealer?

Sealers are okay if you like that look. I just think old iron relics look much better more natural with maybe a thin rust. Sort of like the barrel on an old musket gun. To me, old ruff lumberjack stuff just looks strange all shiny new looking.

An old lumberjack double-bitted axe with a hint of old patina and remounted on a vintage style wood handle looks cool aganist a rustic wood background. I'm fixing two of these and plan to mount them crossed on the wall with smaller relics from the same site placed under them.

It's just a matter of personal taste.

Badger
 

Will.Dig.For.Food said:
Great looking shovel, Badger. That cleaned up nicely. Think it will work the same on aluminum or maybe close?

Laater...

Never tried aluminum. Almost all my relics are iron.

Try it out on a junk piece to test it.

Badger
 

Don't know how I missed this post Badger, ...One question, do you want to go with the LOW setting or the HIGH setting? Also, you said you don't coat them afterwords, intertesting...

neil
 

wolfpaw518 said:
Don't know how I missed this post Badger, ...One question, do you want to go with the LOW setting or the HIGH setting? Also, you said you don't coat them afterwords, intertesting...

neil

I use as high a setting as possible without having the charger fuse breaker shut the machine down.

I dry my relics in an oven and use a brass brush to clean away any unwanted residue. But in the long run I prefer the more natural look of wrought iron. It's just a matter of personal taste.
 

Thanks Badger, I'm going to try this out for my larger items.

PBK left me some great links on another thread..they were a little over my head, but the info I did understand gave me a good working knowledge of how this is all supposed works. That info leans toward "low and slow" and preservation, but I tend to feel as you and some of the others do that "hard and hot" would work just well on the larger [not as important] relics, I'm talking railroad spikes, a horseshoe, that kind of thing...I've never had a problem with coins or small items that would require electrolysis.


neil
 

Great post badger. I have lots of horse shoes to try. I like to paint them and hang them outside on the garage but the rust keeps coming through. I'll try your idea. Thanks for the great ideas.
 

Badger,
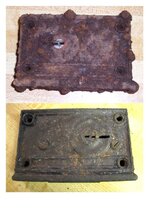
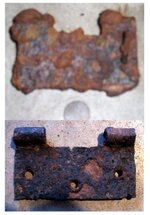
Thank you for posting this cleaning method along with pictures. Following your instructions I have set up my "cleaning station". After successfully test cleaning the hinge I thought I'd try the lock. I had already soaked, scraped and wire brushed the lock several times in the before picture. I'll have to say I'm impressed with the electrolysis results.
Thanks again!
 

Attachments

  • IMG_0050.JPG
    IMG_0050.JPG
    63.1 KB · Views: 370
  • door lock.jpg
    door lock.jpg
    74.5 KB · Views: 365
  • hinge.jpg
    hinge.jpg
    65.7 KB · Views: 348

Top Member Reactions

Users who are viewing this thread

Back
Top