Ceiling Designs for the Home

nova treasure

Bronze Member
Joined
Mar 2, 2008
Messages
1,726
Reaction score
454
Golden Thread
0
Location
Kentucky
Detector(s) used
Whites
Primary Interest:
Relic Hunting
We were sharing thoughts on Montana Jim's Voyage of removing popcorn (acoustical) Spray from his Ceiling. It is interesting How many different designs there is on Ceilings all over the World. I have been in the Drywall Business for over 25 Years and have worked in all Styles of Homes and Businesses and tryed Everything Possible with Drywall known to me in my Part of the Country. I thought I would Share a few designs that I have in my Home and hope others might Share some.
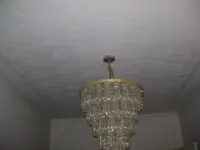
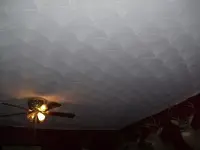
The first Pic is what we call Coin Swirl, the Second Pic is what We call a Sea Shell design.

Nova Treasure
 

Attachments

  • design ceiling 001.webp
    design ceiling 001.webp
    14.5 KB · Views: 5,423
  • design ceiling 001.webp
    design ceiling 001.webp
    14.5 KB · Views: 1,482
  • design ceiling 002.webp
    design ceiling 002.webp
    11 KB · Views: 14,892
texastee2007 said:
you've teased me enough...now teach me how to do it!!! I am sheetrocking a ceiling in our home...we've got one room taped already...what a difference from little 1 foot ceiling tiles from the 50's. Along with the new insulation what a difference the temp. is in that one hot room!!

Well it is a Job that takes practice. the first step of course is to get a slick enough finish that the tape lines,screws will not have any chance of showing through. I than brush the ceiling off to take out any edges or lap marks, than you want to paint the Ceiling white to make sure no trowel marks will bottom out and show the Drywall board, plus I measure ten inches off of each wall and make very lite pencil marks to run a 1 1/2" or 2" masking tape line to form a 10" border around the ceiling. I than will start at the top of the Ceiling which I determine from the width and away from entry door and roll my Drywall Compound at a medium to dense thickness from side to side inside the tapeline border. I than use a 10" or 8" plastic trowel that has a pretty good tooth line. I will than square up my top trowel swirls going across and proceed to run my first line. this is done by holding the left side corner of the trowel an pivoting it across the compound to add the swirl. once you have this top line in form, you will continue rolling the Compound for every new swirl line and start you new swirls from the center of the last line of Swirls. When you finally get your last line done within the tapeline. than you will carefully roll compound around the ouside of the tapeline and add your new design which I Texture with a brush or use a big Sponge. once you finish this out without getting into your swirls, you gently pull your masking tape from the Ceiling,leaving a border that you can paint to match the Wall color or own preference.
If the ceiling is done correctly at every angle you look at the ceiling the swirls will line up.

Nova Treasure
 

Wow! Those pics are fantastic! That is QUALITY work, my Friend!
Most times that quality of work is more expensive than just a "blow and go" that you see in tract homes. Most of the remodel jobs I had, I either did a very generic thick knap roll or would sub the ceiling out. Didn't have the expensive equipment.
Texturing is truly an artform! :thumbsup:
Scott
 

That is some impressive work !

Gotta wonder....... If a guy started with a nail in the center of the ceiling, and a string tied to a pencil to lay out concentric circle guidelines, could you get a sort of "chrysanthemum" effect ?

Now you've put some ideas in my head for the next ceiling I finish (if there is one that is)

Diggem'
 

I used to do ceilings like that years ago. we would often make our own tools to texture with. We used waterproof
drywall and first put a 1/8 th inch layer of plaster on the whole ceiling keeping it pretty smooth as we applied it'
After that dried for a day we put a layer of top coat on the whole ceiling and then right away before it had time to
dry, we'd texture it. When doing the shell pattern like your's we used a wood trowel about 4x8 inches with a foam pad
on the face. Another tool used would be a piece of plywood about 6x8 or 10x12 with a trowel shapped handle mounted
on. Then take a piece of insulation ( carefully cut to the same size as the plywood) about 2 inches thick. Then
stretch a piece of tough visqueen snugly on the insulation and staple it tight with the staples around the handle
so the bottom would feel similar to a cushion. The visqueen has to be stretched snug and neat at the corners.
While the mud was still wet the pattern was made by pressing the cushioned trowel against the fresh mud then as
you pull the texture pad away you give it a 1/4 or 1/2 twist. It makes a series of textured points in a swirl
pattern. It is a tricky movement to keep duplicating on a whole ceiling and takes practice but it is pretty
impressive when finished. We did a lot of that type back in the seventies when I lived up in northern
Michigan. They don't do any plastering like that around here because it takes too long to do the job. People
nowdays want everything done imediately if not sooner. Also it was a lot of work with lots of strong arm
pressure over your head to apply all that plaster.

From your pics it looks like you have done a real good job with your swirls.

Ray
 

Top Member Reactions

Users who are viewing this thread

Latest Discussions

Back
Top Bottom