Alternate method for hard to clean coins...somewhat long.

gary s fl

Sr. Member
Mar 21, 2005
264
53
Birmingham Alabama
Detector(s) used
Equinox 800, CTX 3030, Explorer II, Excalibur, Aquasound, TDI, GB 2, Quick-triggered CZ-21, AU-21, G2, Comprade 7" & 5.5"
Primary Interest:
Other
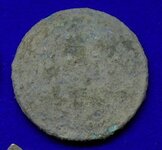
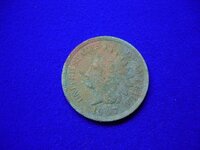
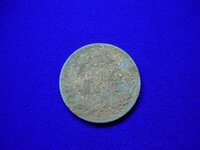
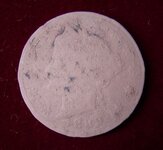
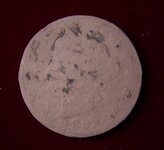
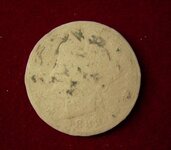
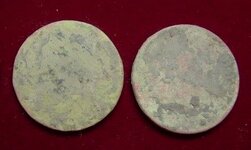
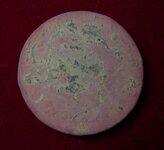
I dug an IH penny a few days ago that had a layer of harden dirt on both sides that wouldn't come off with either an ultrasonic cleaner or using heated peroxide for a few hours. I was barely able to make out the reverse but could see none of the obverse. I read many of the posts regarding how to safely clean coins (if that is possible for a non-professional). I grudgingly decided on the painfully slow distilled water soaking method described on another post, or the potato method which I had had prior success with on corroded ocean clad. My end goal was to be able to see the date just well enough to check for a possible key date. I didn’t want to use chemicals stronger than the potato starch if possible, but what I really wanted were quicker results. I’m not the sharpest tack in the box but I remembered one of my elementary school teachers describing how metal expands and contracts with heat and cold and thought…..hmm, would that loosen the dirt? I started a pot of water boiling, and placed a shallow layer of water in the ultrasonic cleaner with several ice cubes. For next 30-45 minutes I alternated the IH using a plastic spatula from the boiling pot to the ice filled, running, ultrasonic cleaner. There was little change with the first several transfers, but then the obverse slowly began to appear more with each transfer. When I was finally able to see the 1907 date I decided to continue with the process until I couldn’t see any further improvement. The method succeeded with completely cleaning the obverse without removing the mild green corrosion but the reverse still needed a significant amount of cleaning. I’m now trying the potato method for reverse only. The next time I use the hot/cold method I’ll try something else besides a spatula for the transfers. Any thoughts about what kind of damage could be done to a coin using this method or any improvements to this method would be appreciated.
 

Attachments

  • DSCN9071.JPG
    DSCN9071.JPG
    51.7 KB · Views: 753
  • DSCN9073.JPG
    DSCN9073.JPG
    90.2 KB · Views: 760
  • DSCN9074.JPG
    DSCN9074.JPG
    91.5 KB · Views: 750
Wish I could help out with the question on cleaning coins, Gary. I learned my lesson when I used silver polish on my IH's and "V" nickel :-[

HH....James
 

Now that looks like a fabulous, non-damaging process. Excellent work! This process is much better for the coins than either electrolysis or chemicals of some kind since it only involves water. I am anxious to see if others get similar results. Please post your before and after photos here!

Again, a great idea here.


-Buckleboy
 

ive held a coin above a torch at the rim with pliers (not directly in the flame)
then drop it in ice water repeat and rinse etc
 

Answering my own question as to negatives using the ultrasonic cleaning process, I would not use this process with any coin where any part of the coin would touch the bottom of the ultrasonic cleaner (unless placed in nylon stocking or similar covering, but this probably nullifies the cleaner) until I could ID the coin for valuation. The reason being is vibrating stainless steel bottom of the cleaner plus the dirt coming off the coin will cause micro polishing marks on any high surface. For most other coins I think it speeds the dirt removal, but just soaking the coin in distilled water then freezing it and after that placing it in hot distilled water without the ultrasonic cleaner and repeating the process several times will speed the removal of the dirt without damage to the point where ID can be made.

Below is a trial and error process I went though yesterday. It should help someone that is contemplating the cleaning of a coin.

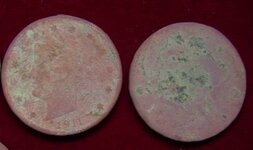
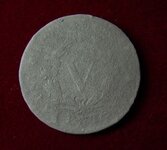
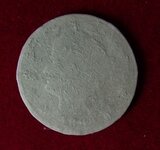
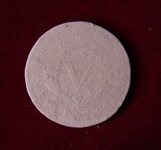
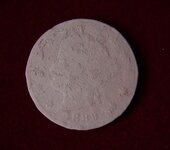
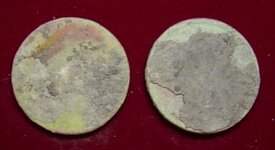
I found a couple of ‘V’ nickels a few days ago with some hard to remove dirt. One of the nickels was almost a slug and no date could be seen. I used the process above without the ultrasonic cleaner; repeating the process about ten times until the first, second and forth numbers on the date could be seen with some question as to the third number. The last two pictures shows the initial result.

After checking the coin book and seeing that it wouldn't be a key date, I tried some Nic-a-date (my first use of it) to reveal the third number. The Nic-a-date stained the area it was placed on and could not be removed with just water or soap and water. I next applied the Nic-a-date to the whole coin to even the color, but that didn’t work because the area of initial application still showed as a different shade. At that point I tried MS 70 coin cleaner (non-acidic mild cleaner) to even the shading and to remove the remaining spots of dirt. The MS 70 changed the color and did not remove the remaining dirt, and I could still see the initial use of the Nic-a-date.

At that point I felt I had nothing to lose, so I used Nic-a-lene coin cleaner which removed the remaining dirt spots and evened the color, but what it did best was reveal the whole date and some of the details that couldn’t be seen before on both sides of the coin. Though I wasn’t totally pleased with the color, I was less pleased with it after I used soap and water to remove the chemicals. The soap turned the color to an unpleasant grayish pink. I again used the Nic-a-lene, hoping that it would return the color to the pre-wash color but it didn’t, so I applied the MS 70 over the Nic-a-lene (probably not smart because of the fumes). It changed the color to a grayish nickel color but it made the date less visible. At that point I stopped and applied some Blue Ribbon coin conditioner. The pictures below show how the coin changed throughout the process. I hope this can help with your next coin cleaning adventure.
 

Attachments

  • DSCN9403.JPG
    DSCN9403.JPG
    46.4 KB · Views: 596
  • DSCN9400.JPG
    DSCN9400.JPG
    55.6 KB · Views: 608
  • DSCN9399.JPG
    DSCN9399.JPG
    49 KB · Views: 603
  • DSCN9398.JPG
    DSCN9398.JPG
    50.1 KB · Views: 601
  • DSCN9397.JPG
    DSCN9397.JPG
    50.1 KB · Views: 611
  • DSCN9396.JPG
    DSCN9396.JPG
    52.4 KB · Views: 614
  • DSCN9395.JPG
    DSCN9395.JPG
    48.4 KB · Views: 608
  • DSCN9394.JPG
    DSCN9394.JPG
    50.1 KB · Views: 612
  • DSCN9402.JPG
    DSCN9402.JPG
    48.5 KB · Views: 623
  • DSCN9401.JPG
    DSCN9401.JPG
    51.2 KB · Views: 623
  • DSCN9295.JPG
    DSCN9295.JPG
    55.9 KB · Views: 603

Top Member Reactions

Users who are viewing this thread

Back
Top