A bucket classifier

TerryC

Gold Member
Jun 26, 2008
7,797
11,180
Yarnell, AZ
Detector(s) used
Ace 250 (2), Ace 300, Gold Bug 2, Tesoro Cortes, Garrett Sea Hunter, Whites TDI SL SE, Fisher Impulse 8, Minelab Monster 1000, Minelab CTX3030, Falcon MD20, Garrett Pro-pointer, Calvin Bunker digger.
Primary Interest:
Metal Detecting
I recently viewed a video that showed a good way to classify loose dirt. The video showed two 5 gallon buckets, one inside the other. The inside bucket had numerous holes drilled in the bottom. The idea is to use a shovel to add dirt.. in the stream or dry... to the bucket and then aggitate till the small stuff is in the lower bucket. My brother TimC has a BETTER idea! Instead of drilling holes, he "sews" half-inch hardware cloth to the cut-out bottom. More dirt falls to the bottom bucket. More dirt, less time, more color! TTC
 

Upvote 0
terry, i seen a video about the 2 bucket method with one having drill holes. not real sure about that. can you post some pic. of the one with the cloth on the bottom? thanks much, take care and be carefull out there. ron
 

I've made my own classifier with the hardware cloth. Expanded steel is stronger and will last longer. I cut the bucket in half first. You don't want to classify too much material at a time. The gravel will trap finer stuff if there is too much in the classifier.
 

Hey Maui, Jack,
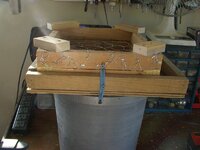
Thanks for the replies. Here is a pic of MY bucket. I screwed the hardware cloth in. I believe it is easier to install and replace than the "sewn-in" version. I also made the drilled hole bucket but if you do the math... that is, compute the remaining plastic area against the cloth area, you can see that the cloth will "pass" more dirt quicker. The expanded steel idea is interesting but I think a little overkill. BTW there are 13 screws in the bottom of mine. I am not superstitious (mmmm). The screws are 1/2 inch 1/4 20. And make sure you drill the 1/4 inch hole far enough from the wall to accept a washer for the bolt on top AND bottom. Thanks again. TTC
 

Attachments

  • IMG_0541.jpg
    IMG_0541.jpg
    83 KB · Views: 1,771
I made another 1/4" classifier with hardware cloth tonight, looks just like yours. I added crisscross flat steel bars under for a little strength. Headin out to the desert for the weekend to do some drywashing. I know it will work well. Looking forward to some new cons to play with :wink: My old homemade classifier wasn't built as nice as yours, thanks for the pic. My new one looks and feels sturdy and ready for action. :icon_thumright:
 

I did this awhile back too.

Here's some pictures of my homemade stuff, mostly because I am on the college budget and cant afford the expensive plastic stuff.

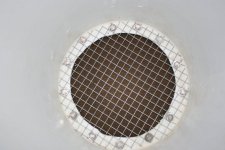
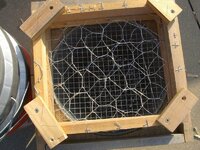
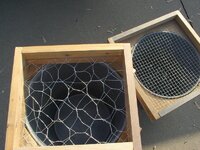
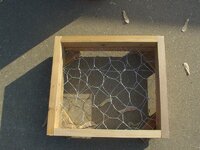
The top picture is 2 inch poultry wire, crisscrossed and then I used a couple pieces of wire to wrap the 2 sections of wire together. This stops those big rocks from ever getting in the bucket. Also I made its diameter fit the inside of my hardware cloth classifier so they can be stacked together. Or it will fit on a bucket by itself.


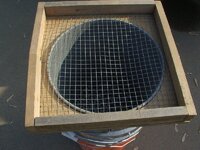
Second picture is half inch hardware cloth on top of the bucket. I fill the bucket with water and it classifies itself from the weight of the gravel. The top comes off in half a second to throw all the tailings off quick. I have to be careful though, last weekend I found some 1 inch + gemstones sitting here just glittering.

The third picture shows how I can stack the classifiers on top of each other and thus get the big stones then the medium sized ones classified.

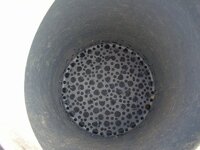
Fourth picture is my old bucket classifier I used to use. 1/2 inch holes and 1/4 inch holes, not drilled very well I might add. I still have it though I don't use it as much with the other two now though I do still carry it to the river every time just in case.

And the fifth picture is how I have them all tied together so they don't fall apart when carrying em to the river. The other side is held in place by a lip on the wood so they fit together. I always keep some spare rubber bands just in case, but so far that old blue ones done fine.

Last picture is both of them on different buckets.

Edit, I realize they don't look too pretty, but they work just fine regardless.
 

Attachments

  • 2 inch poultry wire.jpg
    2 inch poultry wire.jpg
    107.1 KB · Views: 1,122
  • half inch hardware cloth top.jpg
    half inch hardware cloth top.jpg
    101.8 KB · Views: 1,568
  • both classifiers stacked.jpg
    both classifiers stacked.jpg
    119.7 KB · Views: 1,287
  • bucket with holes.jpg
    bucket with holes.jpg
    67.8 KB · Views: 1,180
  • so they dont fall apart carrying them.jpg
    so they dont fall apart carrying them.jpg
    69.1 KB · Views: 1,078
  • both classifiers.jpg
    both classifiers.jpg
    113.5 KB · Views: 1,594
I know ya put em to work this weekend . I wish I could have gone. But family comes first. Hopefully we can get together this coming weekend. I might have the pump going for the highbanker by then. So we can really move some material. Dredganator is coming tho !!!! :headbang: :hello2: :icon_thumleft:
 

@ Buzz: The 2 inch poultry wire classifier was the trick today for that river gravel, made it so much easier. That same spot we were digging in last week had some fish move in and they didn't know what to make of me in there.
 

I cut my 5 gal buckets in half and cut screen big enough to cover the bottom of the buchet. Take a touch and heat up the bucket edge and get it hot and then press down on the screen it will melt into the plastic and you have a classifier. Use different sizes of screen opening to get down wo smaller dirt. Works great....Matt
 

Astrobouncer said:
I did this awhile back too.

Here's some pictures of my homemade stuff, mostly because I am on the college budget and cant afford the expensive plastic stuff.

The top picture is 2 inch poultry wire, crisscrossed and then I used a couple pieces of wire to wrap the 2 sections of wire together. This stops those big rocks from ever getting in the bucket. Also I made its diameter fit the inside of my hardware cloth classifier so they can be stacked together. Or it will fit on a bucket by itself.


Second picture is half inch hardware cloth on top of the bucket. I fill the bucket with water and it classifies itself from the weight of the gravel. The top comes off in half a second to throw all the tailings off quick. I have to be careful though, last weekend I found some 1 inch + gemstones sitting here just glittering.

The third picture shows how I can stack the classifiers on top of each other and thus get the big stones then the medium sized ones classified.

Fourth picture is my old bucket classifier I used to use. 1/2 inch holes and 1/4 inch holes, not drilled very well I might add. I still have it though I don't use it as much with the other two now though I do still carry it to the river every time just in case.

And the fifth picture is how I have them all tied together so they don't fall apart when carrying em to the river. The other side is held in place by a lip on the wood so they fit together. I always keep some spare rubber bands just in case, but so far that old blue ones done fine.

Last picture is both of them on different buckets.

Edit, I realize they don't look too pretty, but they work just fine regardless.

Astro,
Pretty? Who cares about pretty? If I had a choice between a "pretty" women or one that can handle a shovel, "pretty" don't cut it!. Well, in the desert anyway. ha ha. Good pics. TTC
 

TerryC said:
I recently viewed a video that showed a good way to classify loose dirt. The video showed two 5 gallon buckets, one inside the other. The inside bucket had numerous holes drilled in the bottom. The idea is to use a shovel to add dirt.. in the stream or dry... to the bucket and then aggitate till the small stuff is in the lower bucket. My brother TimC has a BETTER idea! Instead of drilling holes, he "sews" half-inch hardware cloth to the cut-out bottom. More dirt falls to the bottom bucket. More dirt, less time, more color! TTC

Hey TerryC,

Based on the video I got a different idea of how the bucket classifier is supposed to work. There's only one hole in the top bucket and the collection cup is sitting in that hole (with some water seeping through to the lower bucket). The dude stirs the mix and the violent circular motion of the water deposits all the heavy components inside the collection cup sitting at the center. He then lifts the collection cup out of the top bucket and lets the water and sand seep through the hole into the bottom bucket. He claims this method successfully extracts all the gold down to micron size.

Anyone got some pay dirt they don't mind trying this one out with? If this really works then this method would be just as legal as panning only a lot faster. Unless I'm mistaken two buckets are completely legal and you can prepare concentrate 10x faster than just using a pan. Heck u don't even need a pan. You can prepare the concentrates on site and bring them home.
 

Hi Charlie,
I've also seen that video. I have yet to try out his idea so I must reserve comment on it. Seems logical. The video I am referring to has a bucket with holes drilled in the bottom. Shake, shake; turn, twist, and the smaller contents falls to the lower bucket. The hardware cloth is only one version of a very good idea. My version (I am NOT the originator of the design) works extremely well on dry dirt and sand. Wet dirt and sand is also passed to the bottom bucket with more aggitation involved. When pulling larger stones from wet dirt and sand, be sure to "wipe" the clinging dirt into the bucket. Try it out! Thanks for your reply. TTC
 

Top Member Reactions

Users who are viewing this thread

Back
Top