Building an oversized classifer

DizzyDigger

Gold Member
Dec 9, 2012
6,475
13,187
Concrete, WA
Detector(s) used
Nokta FoRs Gold, a Gold Cube, 2 Keene Sluices and Lord only knows how many pans....not to mention a load of other gear my wife still doesn't know about!
Primary Interest:
Prospecting
After using a regular, bucket top sized classifier since I was
young, I broke down last year and built a manual trommel.
The trommel works great for dry material, but without a
spraybar, pump, etc. it's near worthless for classifying
the wet, rocky riverbank gravel.

The bucket top classifiers just wear my ass out, and the
constant up-down, lifting and shaking, etc. throws my
equilibrium way out of whack. They also don't classify
much material at one time.

So, what to do?

Chewed on it for a few days, and came up with an idea of
using a large tub to hold the classified material, and then
use a smaller tub as the classifier.

I wanted to make the classifying action (back, forth, etc) as
smooth as possible, so I added strips of cutting board material
(made of poly-something) to the bottom of the classifier
tub runners, and on the top of the rails mounted to the large
tub.

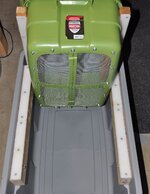
Might be easier to make sense out of in pictures:
DSC_0047-1.JPG

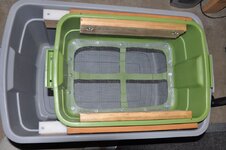
The large tub is a 38 gal. Roughneck, and the classifier tub
is a 10 ga. Roughneck. First was cutting the bottom of the
10 gal. tub and installing the 1/8" screen, and then adding
the rails to both tubs. Overall it took about 6 hrs. to complete,
and no doubt some of you could build it much quicker.

Couple more shots:
DSC_0043=1.JPG

DSC_0041-1.JPG

Tried it out yesterday afternoon by a local creek, and it worked
fantastic! The rails hold all the weight, and the classifier tub slides
back and forth on the hard plastic runners like it's on ice. Took me
only 15 min. to dig and classify about 30 gal. of -1/8" material ...8-)

(p.s. ran it all through the Cube and didn't get squat..:sadsmiley:)
 

Last edited:
Upvote 2
Nice work, those hard plastic runners are da bomb!
 

After using a regular, bucket top sized classifier since I was
young, I broke down last year and built a manual trommel.
The trommel works great for dry material, but without a
spraybar, pump, etc. it's near worthless for classifying
the wet, rocky riverbank gravel.

The bucket top classifiers just wear my ass out, and the
constant up-down, lifting and shaking, etc. throws my
equilibrium way out of whack. They also don't classify
much material at one time.

So, what to do?

Chewed on it for a few days, and came up with an idea of
using a large tub to hold the classified material, and a then
use a smaller tub as the classifier.

I wanted to make the classifying action (back, forth, etc) as
smooth as possible, so I added strips of cutting board material
(made of poly-something) to the bottom of the classifier
tub runners, and on the top of the rails mounted to the large
tub.

Might be easier to make sense out of in pictures:

View attachment 959382

The large tub is a 38 gal. Roughneck, and the classifier tub
is a 10 ga. Roughneck. First was cutting the bottom of the
10 gal. tub and installing the 1/8" screen, and then adding
the rails to both tubs. Overall it took about 6 hrs. to complete,
and no doubt some of you could build it much quicker.

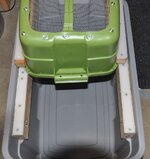
Couple more shots:
View attachment 959395

View attachment 959396

Tried it out yesterday afternoon by a local creek, and it worked
fantastic! The rails hold all the weight, and the classifier tub slides
back and forth on the hard plastic runners like it's on ice. Took me
only 15 min. to dig and classify about 30 gal. of -1/8" material ...8-)

(p.s. ran it all through the Cube and didn't get squat..:sadsmiley:)

very nice build I like it a lot dizzy.now maybe think of putting a handle on one end high enough to stand up and shake it as I agree it's a pain/w bucket classifiers.maybe an inverted u shape or wrap it underneath for more strength.or tell me to myob. lol
 

Just realized there's no side view of the large tub. What is not
shown, above, are the 1x4's on the outside of the large tub that
provide a good deal of added support for the 2x4 rails on the
inside.

Basic material list:

1 - 38 Gal. roughneck tub
1 - 10 Gal. roughneck tub
1 - 4' 2x2
1 - 4' 2x4
1 - 8' 1x4
1 - 20" x 20" piece of screen of whatever mesh size you choose
20 - #8 x 1/2" machine screws (with washers and nuts)
10 - 5/16 x 2-1/2" Carriage Bolts (with washers and nuts)

Chasin: I always appreciate suggestions, so no worries. BTW, welcome
to the forum!

Beauty of this is, before I start classifying I'll set it up on top
of 4, flipped over 3 Gal. buckets. This way the classifying is done
almost waist high, and the forward/back motion requires little
effort. Ya still gotta shake it up good, however, but it takes just
a few good shakes to classify 2-3 gal. of unclassified material.

The classifying tub can handle 2-3 gal. of material at a time, and the bottom
was cut leaving the crossing strips to support the screen and material.
 

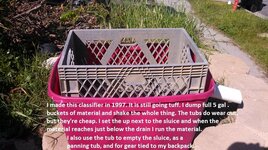
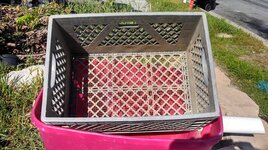
Did the same thing two years ago. I used a milk crate lined it with ¼" hardware cloth as my classifier.
See Pics HERE
Bob
 

I like em both! Great job guys and thanks for sharing!
Bob...I remember seeing that type of dredge on your link. I was just a kid in Warren ID...probably 45 years ago. It was abandoned and the buckets disappeared into the ground. It sure was BIG! I just was in awe of it and wondered what it looked like and how it sounded back in it's day. That is one of the best pictures I have seen of one.

Mike...what did you use to cut the plastic out of the bottom...jig saw? Any surprises/doh's during the field test?
 

Good job Mike! That super slick plastic is great for a lot of things! Makes great jigs for shop tools as well as facings for rip fences on a table saw.
 

Great idea and the only problem I can see is that it is made out of plastic tubs. I give it two seasons. It would be much better if you could make it out of galvanized stock tanks.
 

Mike...what did you use to cut the plastic out of the
bottom...jig saw? Any surprises/doh's during the field test?

Jeff, I just used a sharp knife to make the cuts. Thought about using
a jigsaw, but the knife made the job easy.

Was out today working one of the local creeks with the Cube, and
packed the classifier tub along. I only had to walk about 40 yds.
up the creek to reach the place where I was working, but any further
and hauling either the Cube or the classifier tub in would be quite
a challenge.

Material I was working today, unlike beach sand with some rocks in
it, this material is rocks with some dirt/gravel packed in around them.
Learned that it works best from the long side, and by grabbing the handles
on the classifier tub I could shake the bejesus out of the material.

Once classified, I just set one edge of the classifier tub on the edge
of the large tub and dumped it over the side (like a dump truck). Fed
it a 3 gal. bucket of unclassified material at a time. The only downside
is that you are going to get wet if'n you're not careful..lol

Nightstalkingfurball: Odds are I'll have to replace the 1/8" screen before
this season is over, but those roughneck tubs are tougheranell, and should
last me at least 2 seasons. No biggie, really, as we have a long, cold winter
between seasons and it won't cost squat to refurbish it in the off season.

Jimmy, I like the idea, but it would be difficult to get the rocks washed
well enough as they are sliding down the screen. I take the larger rocks
(baseball sized and bigger) and wash them in the tub independently of
classifying, just to be sure I don't leave any gold stuck to one.
 

Last edited:
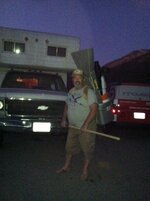
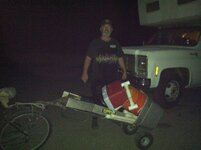
Very good. I love seeing how inventive miners are. I am always amazed. So I thought I should share as well.
Big Classifier 1.0.jpgBig Classifier 1.1.jpg
photo (2).JPG
Back From Heaton Flats 4.JPG
I have a select set of gear I like to have with me and this is the best way I found to get it to the river.
Sometimes hike and sometimes bike.
My biggest problem is just getting outta town.
I haven't been mining in 3 months, it really sucks.
 

Last edited:
Separating Stuff

Dizzy Digger, what a terrific idea! That plastic stuff is: Ultra High Molecular Weight Polyethylene and that means it is very special milk bottle plastic.

I've made some heavy duty screens using 1/4" mesh. The screen lasts for years IF center supports are added to keep the screen from sagging, any kind of support helps even some of the plastic bottom you cut out pop riveted to the screen and the green container would make it last longer. Of course the support material keeps some of the dirt from separating but hey no breakdowns to deal with.

Thank you for sharing your invention, it is a good use of time, energy mixed with a small amount of money and it will make your life immeasurably better!! Go get the gold DD.................63bkpkr
 

Last edited:
AKA...UHMW....love the stuff. I have a 3'x4' cutting board for wild game, used it on the bottom of my drift boat to slide over rocks like ice and have a layer in my highbanker hopper to help the rejects fly out after the screen. You can hit it with a hammer and you wont find a mark.....very cool stuff!
 

Dizz, as I mentioned, I love this idea and will be building it soon. It's been a few months since your original post and I was wondering how everything is holding up. Have you found any areas you might improve upon that you can share with me for my build? Thanks in advance.
 

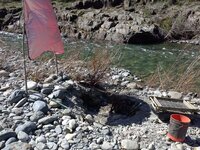
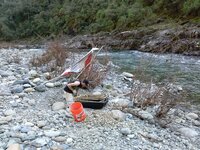
Wish I had a better pic....but I like how different materials can be used to accomplish the same idea....

Don't even use this much any more, but..... used a small wood frame w/ 1/4 inch mesh, supported by some small gauge rods going across.. (little support for the mesh). The wood frame is connect to a 3/4 in PVC frame, handle on one side, PVC pipe for hinge on the other....all sit's inside of a cement mixing tube....Just load up that screen, list 1/4 way up & shack, then fling the rocks out & re-load.

If classifying is your deal, this seemed to work pretty well.....


CAM00285.jpg


CAM00293.jpg
 

Top Member Reactions

Users who are viewing this thread

Back
Top